Salta al contenuto principale

Questa guida ha delle modifiche più recenti. Passa all'ultima versione non verificata.

LG VX5300 Keypad Replacement

Cosa ti serve

  1. LG VX5300 Keypad Replacement, Disassembling Back Cover: passo 1, immagine 1 di 3 LG VX5300 Keypad Replacement, Disassembling Back Cover: passo 1, immagine 2 di 3 LG VX5300 Keypad Replacement, Disassembling Back Cover: passo 1, immagine 3 di 3
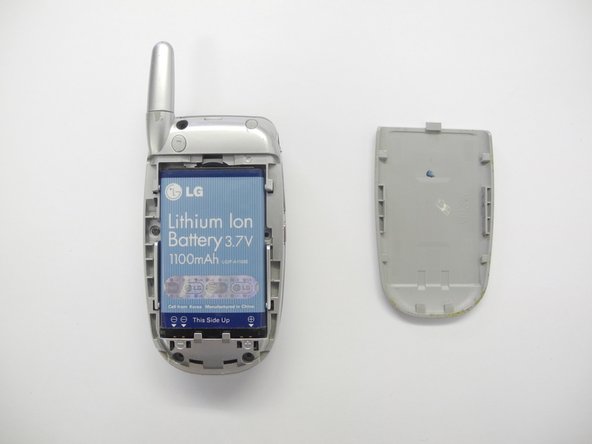
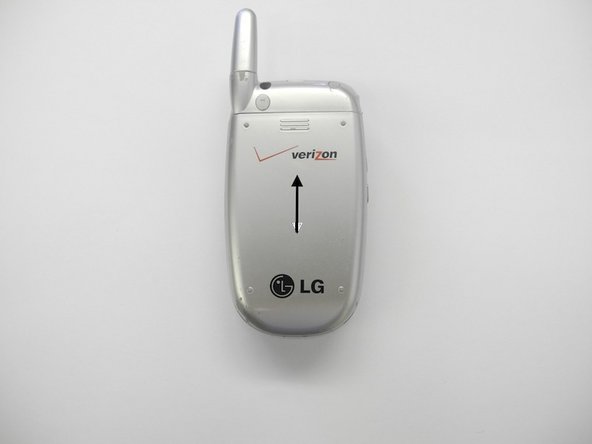
    • Carefully slide battery cover off in a downward direction.

    • Using the plastic opening tool, remove the battery. Light force may be necessary.

  2. LG VX5300 Keypad Replacement: passo 2, immagine 1 di 1
    • Using a Phillips #0 screwdriver, remove the five screws from the back cover and carefully set them aside.

  3. LG VX5300 Keypad Replacement: passo 3, immagine 1 di 1
    • Using the plastic opening tool, carefully lift the back cover off.

  4. LG VX5300 Keypad Replacement, Keypad: passo 4, immagine 1 di 2 LG VX5300 Keypad Replacement, Keypad: passo 4, immagine 2 di 2
    • Before touching anything inside the phone: it is crucial that you are very cautious when working around the wiring and sensor bars.

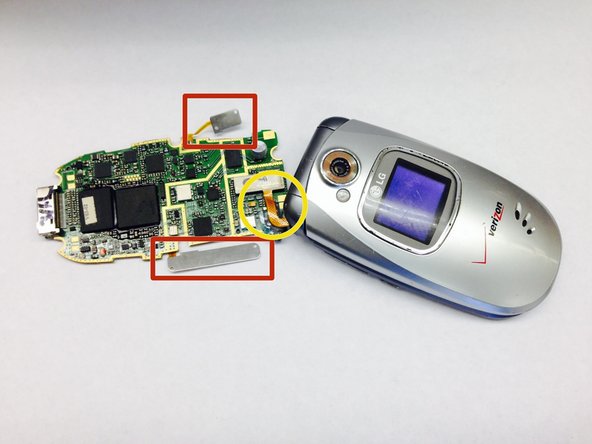
    • Look to the following photo for the location of the two sensor bars.

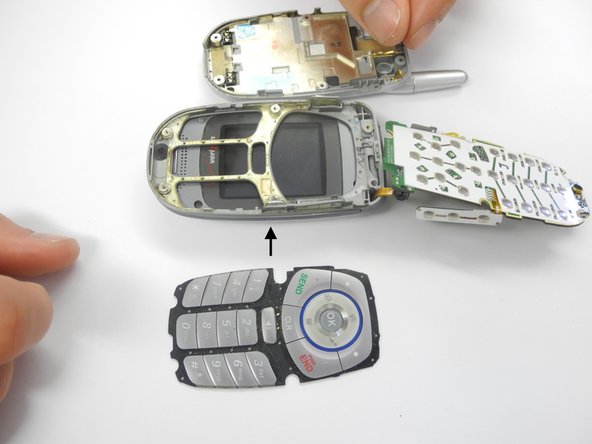
    • Without disconnecting the orange wire, carefully flip the computer chip over and lay flat on the table, exposing the keypad.

  5. LG VX5300 Keypad Replacement: passo 5, immagine 1 di 2 LG VX5300 Keypad Replacement: passo 5, immagine 2 di 2
    • Carefully remove the keypad and replace with the new keypad.

    • If sensor bars behind the volume and camera buttons fall out, gently put them back in place behind the buttons.

  6. LG VX5300 Keypad Replacement: passo 6, immagine 1 di 1
    • Carefully set the computer chip back in place.

  7. LG VX5300 Keypad Replacement: passo 7, immagine 1 di 2 LG VX5300 Keypad Replacement: passo 7, immagine 2 di 2
    • Place the back cover back on and secure it with the screws.

  8. LG VX5300 Keypad Replacement: passo 8, immagine 1 di 2 LG VX5300 Keypad Replacement: passo 8, immagine 2 di 2
    • Insert the battery.

    • Slide the back cover on the phone.

Linea Traguardo

Ashley

Membro da: 02/12/13

13 Reputazione

3 Guide realizzate

Team

Ohio State, Team 1-1, Buehl Spring 2013 Membro di Ohio State, Team 1-1, Buehl Spring 2013

OSU-BUEHL-S13S1G1

3 Membri

4 Guide realizzate

0 Commenti

Aggiungi Commento

Visualizza Statistiche:

Ultime 24 Ore: 0

Ultimi 7 Giorni: 0

Ultimi 30 Giorni: 1

Tutti i Tempi: 552