Salta al contenuto principale

LG Neon II Slider Mechanism Replacement

Cosa ti serve

  1. LG Neon II Slider Mechanism Replacement, Battery: passo 1, immagine 1 di 1
    • To gain access to the phone’s speaker, grip the phone firmly in an inverted position with the back of the unit facing up and the LG insignia positioned away from you.

    • Using both hands as support, use your thumbs to gently guide the rear housing away and in the direction of the arrow.

  2. LG Neon II Slider Mechanism Replacement: passo 2, immagine 1 di 1
    • After removing the phone’s back-panel, securely cushion the front of the phone on a soft surface such as a cloth or your hand.

    • Gently insert a spudger under the lip of the battery, preferably the lip away from the camera eye.

    • Gently pry the battery out of its seated position.

  3. LG Neon II Slider Mechanism Replacement, Button Board: passo 3, immagine 1 di 1
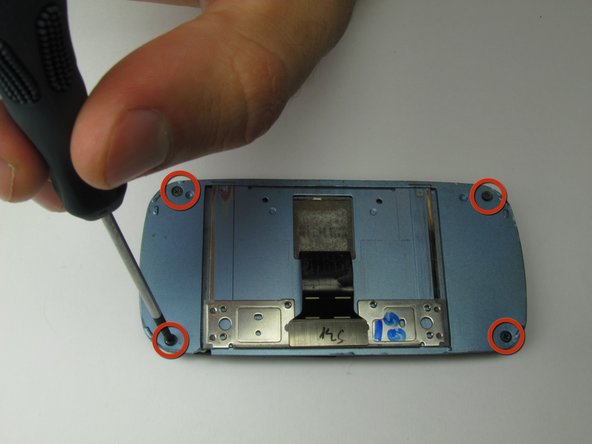
    • To separate the button board/circuit module from the phone main frame, firmly, but gently, unscrew (counter-clockwise) the seven outside 4 mm screws along the rear outside rim of the main body.

    • Hold the phone securely.

    • Be sure to use the appropriate Philips #0 screw driver for the job. Not using the appropriate tool could damage the mounting screws.

  4. LG Neon II Slider Mechanism Replacement: passo 4, immagine 1 di 1
    • Locate the lifted portion of plastic on the bottom end of the phone near the charger.

    • Slide the plastic opening tool underneath this lip, and gently pry the black plastic cover off.

    • Use the appropriate plastic pry tool to avoid circuit board damage.

    • There are three buttons around the outside of the phone that will fall out when you remove the plastic cover.

  5. LG Neon II Slider Mechanism Replacement: passo 5, immagine 1 di 1
    • Loosen the two captive screws on the metal plate near the center of the phone using the Phillips #0 Screwdriver.

    • The screws will remain captive in the metal plate—do not attempt to remove them after they're loosened.

  6. LG Neon II Slider Mechanism Replacement: passo 6, immagine 1 di 2 LG Neon II Slider Mechanism Replacement: passo 6, immagine 2 di 2
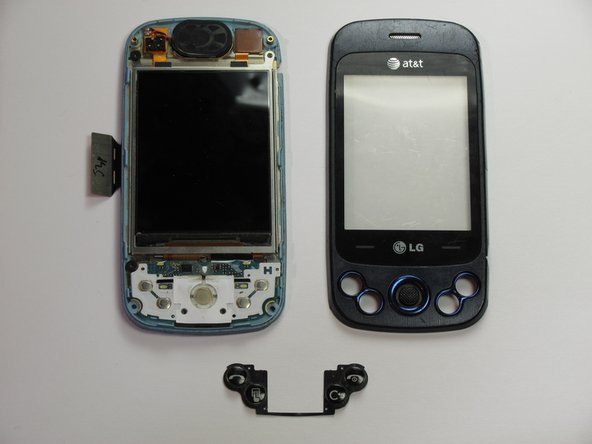
    • Using the plastic opening tool, gently pry the circuit board from the phone.

    • You may need to pry the circuit board in multiple locations to fully loosen it from the phone.

    • The underside of the circuit board is attached to the phone by some black tape. You will not be able to fully remove the circuit board, but you will be able to access the keyboard buttons located on the underside of the circuit board.

    • The partially separated circuit board may be attached to the main button area by factory adhesive/tape. If so, use a soft padded surface to rest the mother board on. Your work area will still be accessible without separating the two units.

  7. LG Neon II Slider Mechanism Replacement, Front Panel: passo 7, immagine 1 di 1
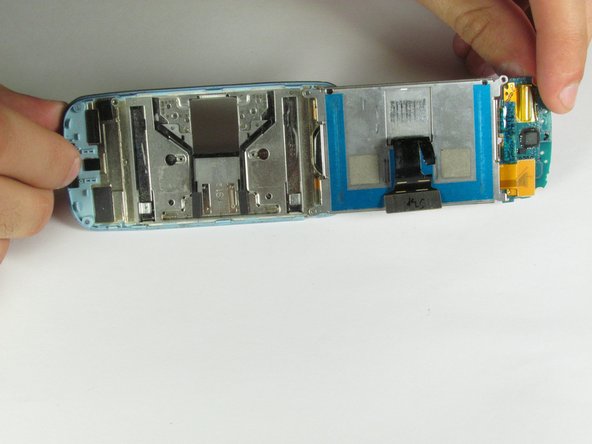
    • After prying the circuit board up, it will be attached by black tape. This tape connects the circuit board to a metal rectangle.

    • Use the spudger between this metal rectangle and the phone to disconnect the two halves of the phone.

    • Once this step is complete the phone should be split in two.

  8. LG Neon II Slider Mechanism Replacement: passo 8, immagine 1 di 1
    • Unscrew the four 1.75 mm screws located on both sides of the black tape using a Phillips #0 screwdriver.

    • There are two screws on each side.

    • The keyboard should now be fully detached from the phone.

  9. LG Neon II Slider Mechanism Replacement: passo 9, immagine 1 di 2 LG Neon II Slider Mechanism Replacement: passo 9, immagine 2 di 2
    • Using the pointed end of the spudger (or something sharp like a safety pin or push pin), remove the plastic screw covers along the corners of the phone.

    • Unscrew the four 3.5 mm screws that are underneath the covers.

  10. LG Neon II Slider Mechanism Replacement: passo 10, immagine 1 di 2 LG Neon II Slider Mechanism Replacement: passo 10, immagine 2 di 2
    • Flip the phone over. Using the plastic opening tool, remove the front casing from the phone.

    • You should now be able to see the interior components of the screen.

    • When you pop the front panel off, the Call buttons will fall out.

  11. LG Neon II Slider Mechanism Replacement, Slider Mechanism: passo 11, immagine 1 di 1
    • Remove the three 1.75 mm screws.

  12. LG Neon II Slider Mechanism Replacement: passo 12, immagine 1 di 2 LG Neon II Slider Mechanism Replacement: passo 12, immagine 2 di 2
    • Using the plastic opening tool, lift up the circuit board on the side opposite the speaker. This will reveal the sliding mechanism located under the screen.

    • The two halves of the phone will still be attached.

  13. LG Neon II Slider Mechanism Replacement: passo 13, immagine 1 di 1
    • Each of the two springs are connected to two little knotches. You may need to slide the slider to clearly see the image shown.

    • The two knotches are easily visible in the slot on the left within the red square.

    • Take your replacement spring and stretch it between these two knotches and the slider should work fine.

Conclusione

To reassemble your device, follow these instructions in reverse order.

Daniel Min

Membro da: 09/19/12

26 Reputazione

1 Guida realizzata

Team

Cal Poly, Team 1-6, Propen Fall 2012 Membro di Cal Poly, Team 1-6, Propen Fall 2012

CPSU-PROPEN-F12S1G6

3 Membri

14 Guide realizzate

0 Commenti

Aggiungi Commento

Visualizza Statistiche:

Ultime 24 Ore: 0

Ultimi 7 Giorni: 1

Ultimi 30 Giorni: 3

Tutti i Tempi: 629