Salta al contenuto principale

LG Muziq LX570 Display Panel Replacement

Cosa ti serve

  1. LG Muziq LX570 Display Panel Replacement, Front Case: passo 1, immagine 1 di 2 LG Muziq LX570 Display Panel Replacement, Front Case: passo 1, immagine 2 di 2
    • Use a spudger to remove the two screw covers below display.

    • Use a screw driver to remove the four Phillips #00 (3.3mm) screws at corners of the display.

  2. LG Muziq LX570 Display Panel Replacement: passo 2, immagine 1 di 3 LG Muziq LX570 Display Panel Replacement: passo 2, immagine 2 di 3 LG Muziq LX570 Display Panel Replacement: passo 2, immagine 3 di 3
    • Caution: Wires and ribbon connect the front case to the main body. Exhibit care when separating front case from the main body as to not break the connections.

    • Note: Side buttons may fall out when removing the front case. Do not misplace them.

    • Note: Each side button will only fit in the side that it came from.

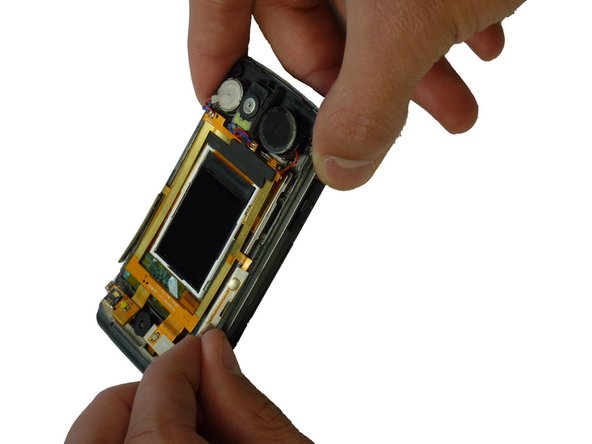
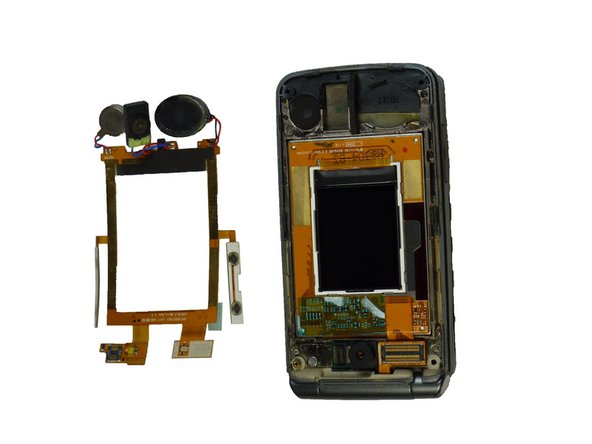
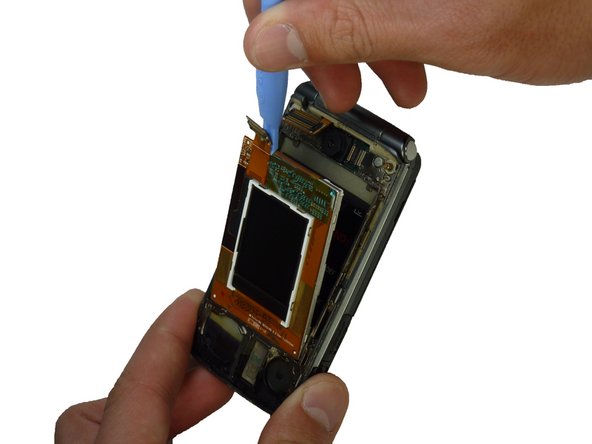
    • Insert a spudger between the black and grey casings and gently spread them apart.

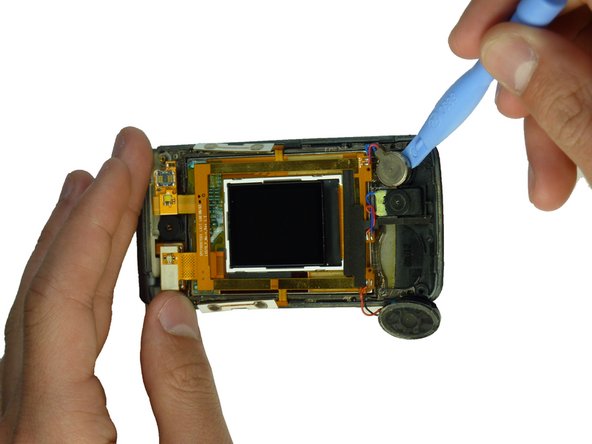
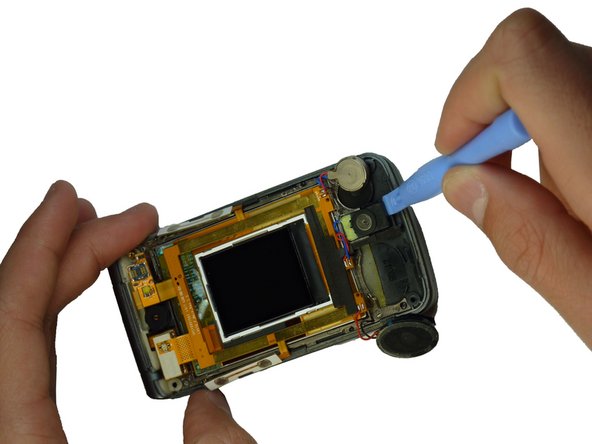
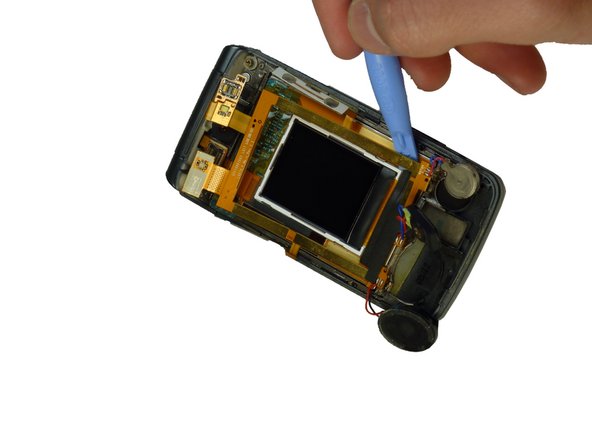
    • Work around the device gradually, opening the gap further.

  3. LG Muziq LX570 Display Panel Replacement: passo 3, immagine 1 di 3 LG Muziq LX570 Display Panel Replacement: passo 3, immagine 2 di 3 LG Muziq LX570 Display Panel Replacement: passo 3, immagine 3 di 3
    • Caution: The wires and ribbon connector can break easily. Exhibit care when removing them.

    • Use the spudger and lift upward to disconnect the ribbon from the main part of the phone.

    • Carefully remove any parts stuck to the front case such as speakers.

  4. LG Muziq LX570 Display Panel Replacement, Display Panel: passo 4, immagine 1 di 3 LG Muziq LX570 Display Panel Replacement, Display Panel: passo 4, immagine 2 di 3 LG Muziq LX570 Display Panel Replacement, Display Panel: passo 4, immagine 3 di 3
    • Use the spudger to unclip the two upper wiring connections.

  5. LG Muziq LX570 Display Panel Replacement: passo 5, immagine 1 di 2 LG Muziq LX570 Display Panel Replacement: passo 5, immagine 2 di 2
    • Caution: The side buttons are attached to the ribbon around the display screen. Do not separate the side buttons from the ribbon when removing.

    • Gently lift the side buttons from the phone casing.

  6. LG Muziq LX570 Display Panel Replacement: passo 6, immagine 1 di 3 LG Muziq LX570 Display Panel Replacement: passo 6, immagine 2 di 3 LG Muziq LX570 Display Panel Replacement: passo 6, immagine 3 di 3
    • Caution: The wiring on the ribbon connector is delicate. Do not excessively pull on the wires.

    • Use the spudger to remove the three components connected to the ribbon.

  7. LG Muziq LX570 Display Panel Replacement: passo 7, immagine 1 di 3 LG Muziq LX570 Display Panel Replacement: passo 7, immagine 2 di 3 LG Muziq LX570 Display Panel Replacement: passo 7, immagine 3 di 3
    • Caution: The ribbon contains important wiring and is glued to the phone. Be careful when removing the ribbon.

    • Use the spudger to gently remove the ribbon from the phone.

  8. LG Muziq LX570 Display Panel Replacement: passo 8, immagine 1 di 3 LG Muziq LX570 Display Panel Replacement: passo 8, immagine 2 di 3 LG Muziq LX570 Display Panel Replacement: passo 8, immagine 3 di 3
    • Use the spudger to lift the upper tab in the top left corner of the display.

    • Continue lifting until the display panels lift out of their setting and can be removed.

Conclusione

To reassemble your device, follow these instructions in reverse order.

Braden Burk

Membro da: 01/22/12

1 Reputazione

5 Guide realizzate

Team

Cal Poly, Team 3-29, Amido Winter 2012 Membro di Cal Poly, Team 3-29, Amido Winter 2012

CPSU-AMIDO-W12S3G29

4 Membri

14 Guide realizzate

0 Commenti

Aggiungi Commento

Visualizza Statistiche:

Ultime 24 Ore: 1

Ultimi 7 Giorni: 1

Ultimi 30 Giorni: 1

Tutti i Tempi: 1,034