Questa versione può contenere modifiche errate. Passa all'ultima istantanea verificata.
Cosa ti serve
-
Questo passaggio è privo di traduzione. Aiuta a tradurlo
-
First locate the button and the bottom of the cover where the arrow is. Press down on the button.
-
While pushing down on the button, slide the cover up towards the hinge until the cover comes off.
-
The battery will be visible after removing the back cover.
-
-
Questo passaggio è privo di traduzione. Aiuta a tradurlo
-
Simultaneously push the battery forward and pull up from the bottom.
-
-
Questo passaggio è privo di traduzione. Aiuta a tradurlo
-
Once the battery is loose it can be easily removed. The phone's ID tag will be visible once the battery is removed.
-
-
-
Questo passaggio è privo di traduzione. Aiuta a tradurlo
-
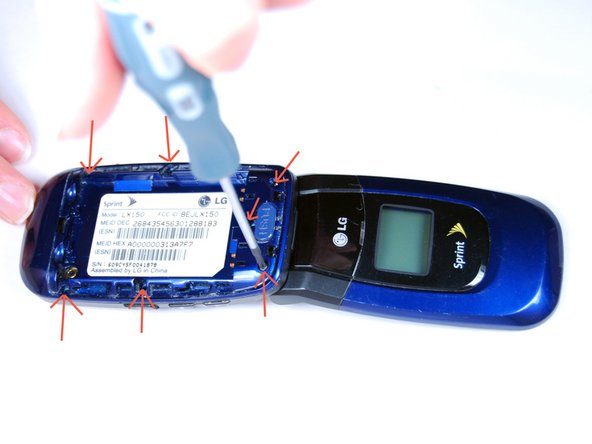
Remove the 7 phillips screws indicated by the red arrows using the phillips #0 screwdriver.
-
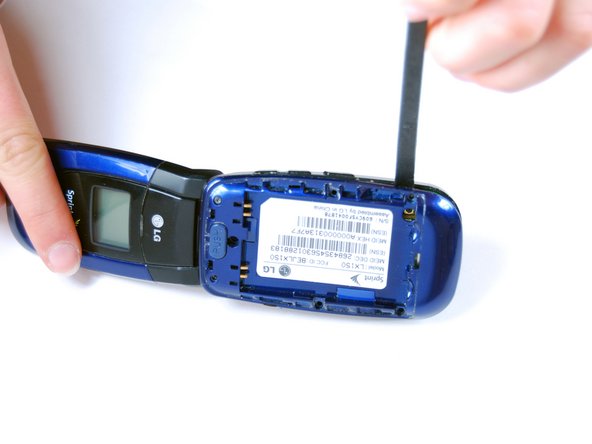
Insert the flat end of the spudger in-between the black and blue phone casing on the side of the phone and split the the blue and black apart. Work your way around the perimeter of the cover, loosening all corners.
-
-
Questo passaggio è privo di traduzione. Aiuta a tradurlo
-
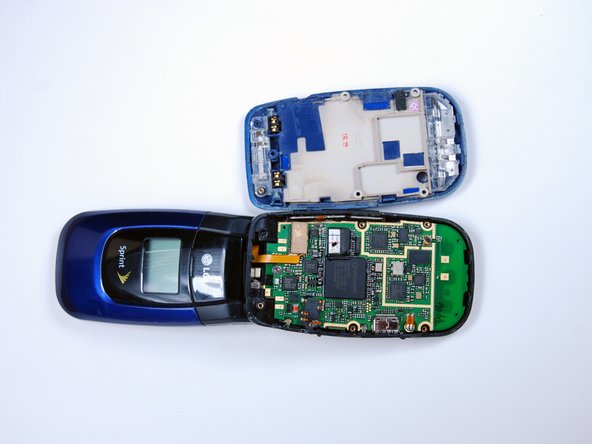
Remove the internal back cover after loosening all the corners.
-
The second picture below is what you will see after removing the internal back cover.
-
-
Questo passaggio è privo di traduzione. Aiuta a tradurlo
-
Lift the motherboard from the bottom to loosen it.
-
-
Questo passaggio è privo di traduzione. Aiuta a tradurlo
-
Remove the pin socket that connects the screen to the motherboard by pulling up away from the motherboard.
-
-
Questo passaggio è privo di traduzione. Aiuta a tradurlo
-
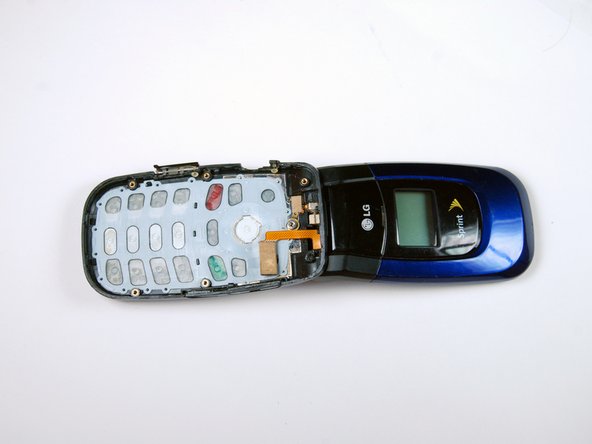
Remove the motherboard.
-
The keypad will now be visible, as shown in the second picture.
-
Annulla: non ho completato questa guida.
Un'altra persona ha completato questa guida.


