Introduzione
Having technical issues with your LG G3 Vigor that are linked to your devices motherboard? You are in luck, this is the LG G3 Vigor motherboard replacement guide.
Cosa ti serve
-
-
-
Remove the twelve Phillips #00 screws securing the midframe to the rest of the phone.
-
-
-
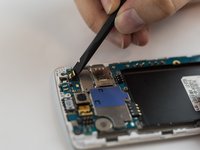
Use the spudger to gently unplug the ribbon cable connected to the motherboard. Then remove the rear facing camera.
-
-
-
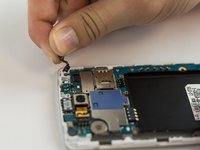
Use the spudger to gently unplug the ribbon cable connected to the motherboard.
-
Remove the front camera.
-
-
-
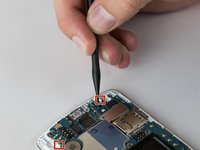
Use the flat edge of a spudger to disconnect the motherboard ribbon connector.
-


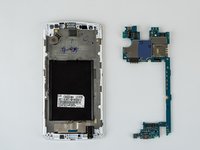
To reassemble your device, follow these instructions in reverse order.
Annulla: non ho completato questa guida.
Altre 8 persone hanno completato questa guida.
Team

USF Tampa, Team 12-5, Eyestone Spring 2016 Membro di USF Tampa, Team 12-5, Eyestone Spring 2016
USFT-EYESTONE-S16S12G5
4 Membri
5 Guide realizzate