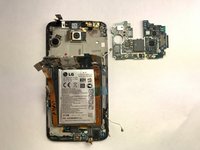
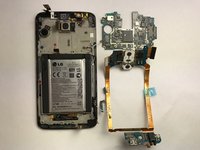
Salta al contenuto principale

LG G2 Sprint Charger Port Replacement

Cosa ti serve

  1. LG G2 Sprint Charger Port Replacement, Charger Port: passo 1, immagine 1 di 2 LG G2 Sprint Charger Port Replacement, Charger Port: passo 1, immagine 2 di 2
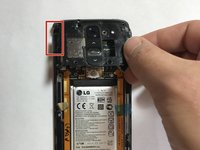
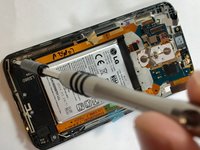
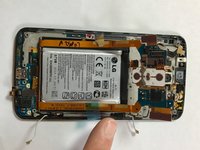
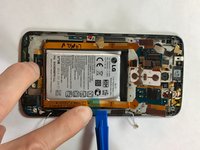
    • Use a plastic opening tool to pry open your phone case. Flip the phone over and start by sliding your tool between the two sides of your phone case. Work the tool towards the bottom of the phone case, gently prying the case open. There is a clip that will pop open after applying gentle but consistent pressure.

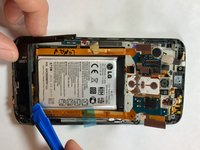
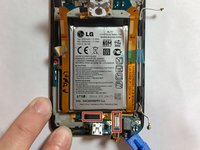
    • Make sure to release the clip on the top left corner of the phone case carefully. This is usually the most difficult clip to release.

  2. LG G2 Sprint Charger Port Replacement: passo 2, immagine 1 di 1
    • After removing the outer phone case, you will need two Phillips head bits. One J0 and one J000 size.

    • There are 11 silver screws for which you have to use J0 head bits, and 1 small black screw for which you have to use a J000 head bit.

  3. LG G2 Sprint Charger Port Replacement: passo 3, immagine 1 di 3 LG G2 Sprint Charger Port Replacement: passo 3, immagine 2 di 3 LG G2 Sprint Charger Port Replacement: passo 3, immagine 3 di 3
    • There is a clip on the upper left side of the upper panel. Use the plastic opening tool to pry the clip off of the phone.

    • The upper inside panel flips up easily off of the phone case once all the clips and screws are removed. If the panel does not pull off easily, check that you have removed all of the screws.

    • There are ribbons that need to be removed as well. Be sure to carefully pry them off of the board

  4. LG G2 Sprint Charger Port Replacement: passo 4, immagine 1 di 3 LG G2 Sprint Charger Port Replacement: passo 4, immagine 2 di 3 LG G2 Sprint Charger Port Replacement: passo 4, immagine 3 di 3
    • The bottom inside panel should pry back easily after you take out the screws. Again, if the panel does not pull off easily, you may have missed a screw.

  5. LG G2 Sprint Charger Port Replacement: passo 5, immagine 1 di 3 LG G2 Sprint Charger Port Replacement: passo 5, immagine 2 di 3 LG G2 Sprint Charger Port Replacement: passo 5, immagine 3 di 3
    • There are several clips and circuits that need to be released. They are circled in the images above. Be careful not to break any of the attached ribbon or wires. (circle ribbons etc.)

    • Be careful to use your tools to disconnect the cables at the connectors and not along the wire.

  6. LG G2 Sprint Charger Port Replacement: passo 6, immagine 1 di 3 LG G2 Sprint Charger Port Replacement: passo 6, immagine 2 di 3 LG G2 Sprint Charger Port Replacement: passo 6, immagine 3 di 3
    • There are several clips and circuits that need to be released. They are circled in the images above. Be careful not to break any of the attached ribbon or wires.

    • The orange materials is meant to bend along the dotted line labeled “bend.” Try to make the bend as close to this line as possible.

  7. LG G2 Sprint Charger Port Replacement: passo 7, immagine 1 di 3 LG G2 Sprint Charger Port Replacement: passo 7, immagine 2 di 3 LG G2 Sprint Charger Port Replacement: passo 7, immagine 3 di 3
    • After you have disconnected all of the ribbon and antennae connections, you can remove the board. Gently pry the board up from the bottom of the case and slide it back out.

    • Make sure to remove all ribbon connectors from the board prior to removing the board.

Conclusione

To reassemble your device, follow these instructions in reverse order.

Un'altra persona ha completato questa guida.

Team

USF Tampa, Team 5-2, Lacy Fall 2016 Membro di USF Tampa, Team 5-2, Lacy Fall 2016

USFT-LACY-F16S5G2

4 Membri

10 Guide realizzate

0 Commenti

Aggiungi Commento

Visualizza Statistiche:

Ultime 24 Ore: 0

Ultimi 7 Giorni: 0

Ultimi 30 Giorni: 3

Tutti i Tempi: 983