Introduzione
This is a fairly simple guide to remove the battery from your tablet.
Cosa ti serve
-
-
To remove the back panel of the device, start by attempting to fit the plastic opening tool in the crease between the screen and the back panel of the tablet.
-
Try opening picks if the case is not flexing enough, or if it is already cracked to prevent further damage.
-
You can use your hands to push against the corners of the device to attempt to make the gap larger for your plastic opening tool to fit in.
-
If you are replacing your screen because it is damaged, it may be useful to pick away at some of the glass to expose the clips in the edges of the plastic.
-
Insert the corners of your plastic opening tool into the slots that are on the very outside edge of your device to start disconnecting the panel.
-
-
-
-
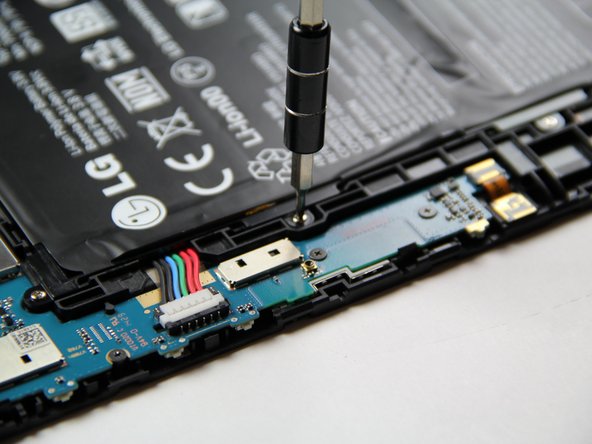
Remove the twelve 4 mm Phillips #000 screws surrounding the perimeter of the battery.
-


To reassemble your device, follow these instructions in reverse order.
To reassemble your device, follow these instructions in reverse order.
Annulla: non ho completato questa guida.
Altre 12 persone hanno completato questa guida.
Team

USF Tampa, Team 15-1, Blackwell Fall 2015 Membro di USF Tampa, Team 15-1, Blackwell Fall 2015
USFT-BLACKWELL-F15S15G1
4 Membri
12 Guide realizzate
6 Commenti
Thanks. It should be easier. What if my screen is cracked?
Hi! How do I know the battery is totally dead? Is it worth it to buy a new battery? where to order or buy?
Only had 4 screws for v930. But the rest appeared to accurate
OK.. myn question is how do i open the UK 750 without damaging the screen. It appears the the USB port for charging has the pins pushed back against the the motherboard. It appears these traces are NOT to securely attached to the board. Want to open it so I can add a wireless charging coil.
Any Ideas???