Salta al contenuto principale

Kyocera Hydro Vibe Lock Button Replacement

Cosa ti serve

  1. Kyocera Hydro Vibe Lock Button Replacement, Battery: passo 1, immagine 1 di 1
    • Make sure that the device is turned off before beginning.

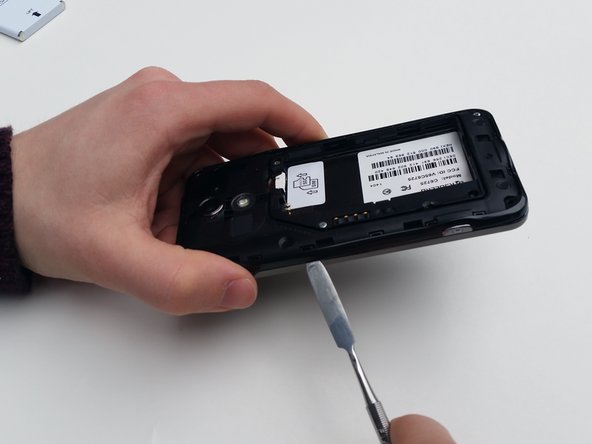
    • Look for a small indentation on the bottom of the phone.

    • Insert the plastic opening tool into the indentation and lift off the back casing.

  2. Kyocera Hydro Vibe Lock Button Replacement: passo 2, immagine 1 di 3 Kyocera Hydro Vibe Lock Button Replacement: passo 2, immagine 2 di 3 Kyocera Hydro Vibe Lock Button Replacement: passo 2, immagine 3 di 3
    • The large white component is the battery. Look for a small indentation under the arrow that says "LIFT."

    • Place the plastic opening tool in the indentation and lift the battery out of the socket.

  3. Kyocera Hydro Vibe Lock Button Replacement, Trim: passo 3, immagine 1 di 1
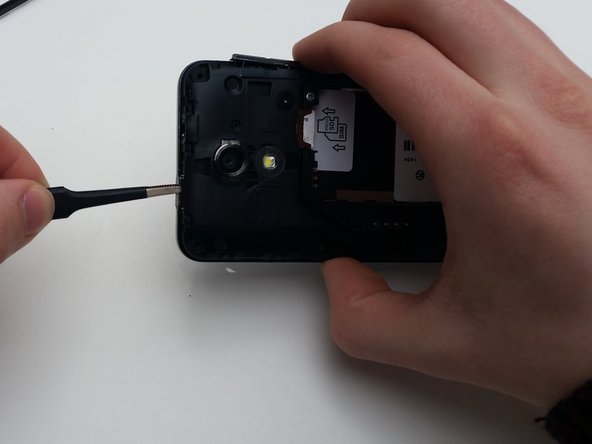
    • Locate the screws holding the trim which are the four side screws on each corner.

    • Remove each screw with a Phillips screw driver #J00. The screws are 5mm Phillips.

  4. Kyocera Hydro Vibe Lock Button Replacement: passo 4, immagine 1 di 2 Kyocera Hydro Vibe Lock Button Replacement: passo 4, immagine 2 di 2
    • Locate the clasps holding the trim in place.

    • You will need to insert the metal spudger through the bottom of the trim and slowly push upwards to release the clasps.

  5. Kyocera Hydro Vibe Lock Button Replacement: passo 5, immagine 1 di 1
    • The trim is flimsy.

    • This is what the trim will look like once removed.

  6. Kyocera Hydro Vibe Lock Button Replacement, Lock Button: passo 6, immagine 1 di 3 Kyocera Hydro Vibe Lock Button Replacement, Lock Button: passo 6, immagine 2 di 3 Kyocera Hydro Vibe Lock Button Replacement, Lock Button: passo 6, immagine 3 di 3
    Attrezzo utilizzato in questo passaggio:
    Tweezers
    $4.99
    Compra
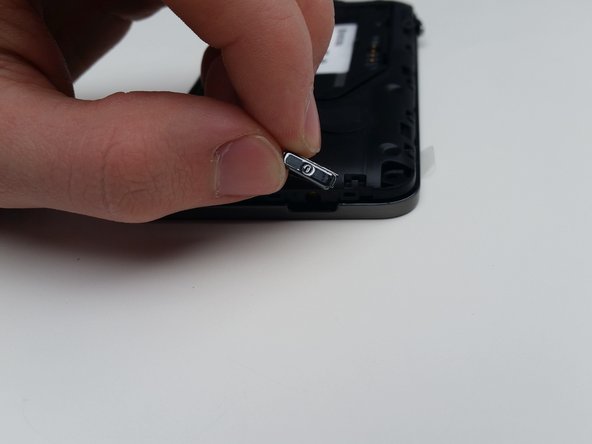
    • Once you have taken the trim apart, the lock button will be easily removable.

    • The lock button is located on the top of the phone.

    • Take the tweezers and remove the lock button.

Conclusione

To reassemble your device, follow these instructions in reverse order.

0 Commenti

Aggiungi Commento

Visualizza Statistiche:

Ultime 24 Ore: 0

Ultimi 7 Giorni: 2

Ultimi 30 Giorni: 7

Tutti i Tempi: 436