Salta al contenuto principale
Unisciti alla Community delle riparazioni - Crea un account

Kodak Easyshare Z981 Flash Button Replacement

Cosa ti serve

    1. Kodak Easyshare Z981 Flash Button Replacement, Flash Button: passo 1, immagine 1 di 2 Kodak Easyshare Z981 Flash Button Replacement, Flash Button: passo 1, immagine 2 di 2
      • Open the battery cover and remove the AA batteries from the camera if any are inserted.

      Chiedi a FixBot

      Aggiungi Commento

    2. Kodak Easyshare Z981 Flash Button Replacement: passo 2, immagine 1 di 3 Kodak Easyshare Z981 Flash Button Replacement: passo 2, immagine 2 di 3 Kodak Easyshare Z981 Flash Button Replacement: passo 2, immagine 3 di 3
      Strumento utilizzato in questo passaggio:
      Phillips #00 Screwdriver
      $5.49
      • Remove screws using a 00 Phillips-Head screwdriver:

      • Eight (8) 3mm screws on the lower portion of the camera

      • Four (4) on the bottom of the camera

      • Four (4) on the inside of the battery cover

      • Four (4) 6mm screws on the sides of the camera (two on each side)

      Chiedi a FixBot

      Aggiungi Commento

    3. Kodak Easyshare Z981 Flash Button Replacement: passo 3, immagine 1 di 1
      • Start from a corner and gently remove the bottom of the camera.

      • The cover will easily lift off, so not much pressure is required.

      Chiedi a FixBot

      Aggiungi Commento

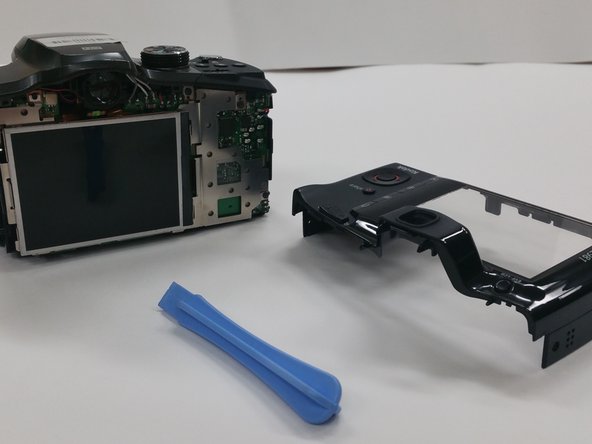
    4. Kodak Easyshare Z981 Flash Button Replacement: passo 4, immagine 1 di 2 Kodak Easyshare Z981 Flash Button Replacement: passo 4, immagine 2 di 2
      • Use a Plastic Opening Tool to remove the back of the camera

      Chiedi a FixBot

      Aggiungi Commento

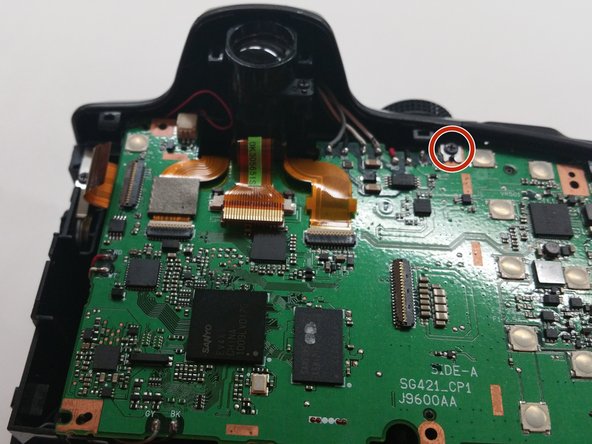
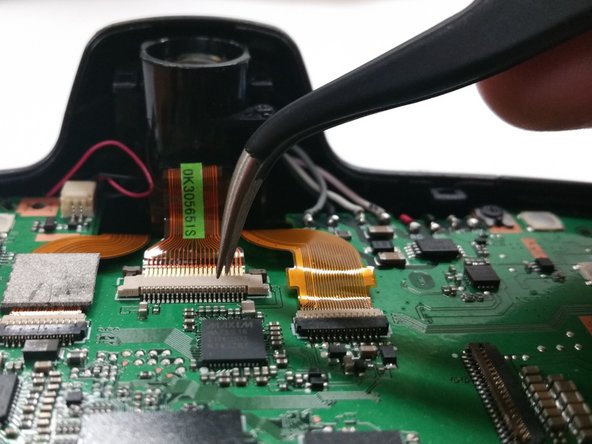
    5. Kodak Easyshare Z981 Flash Button Replacement: passo 5, immagine 1 di 3 Kodak Easyshare Z981 Flash Button Replacement: passo 5, immagine 2 di 3 Kodak Easyshare Z981 Flash Button Replacement: passo 5, immagine 3 di 3
      Strumento utilizzato in questo passaggio:
      Tweezers
      $4.99
      • Remove the four (4) 3mm screws attaching the LCD screen to the circuit board.

      • Use Tweezers to carefully detach the ribbon cable

      • Use extreme caution on this step, as the ribbon cable is very fragile and can rip very easily.

      Chiedi a FixBot

      Aggiungi Commento

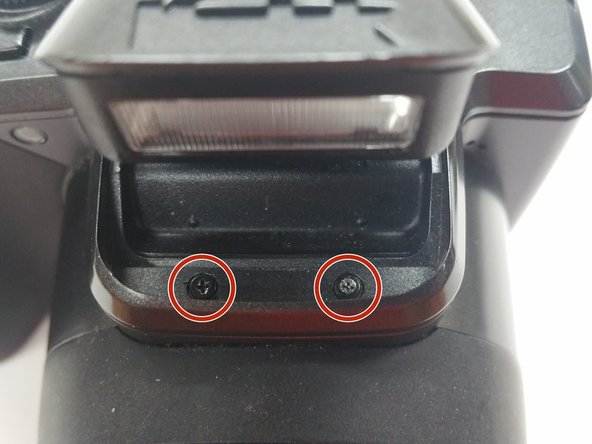
    6. Kodak Easyshare Z981 Flash Button Replacement: passo 6, immagine 1 di 3 Kodak Easyshare Z981 Flash Button Replacement: passo 6, immagine 2 di 3 Kodak Easyshare Z981 Flash Button Replacement: passo 6, immagine 3 di 3
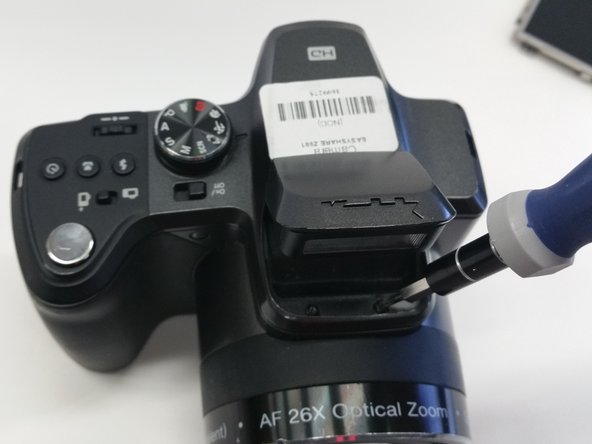
      • Open the flash compartment and remove two (2) 3mm screws.

      Chiedi a FixBot

      Aggiungi Commento

    7. Kodak Easyshare Z981 Flash Button Replacement: passo 7, immagine 1 di 2 Kodak Easyshare Z981 Flash Button Replacement: passo 7, immagine 2 di 2
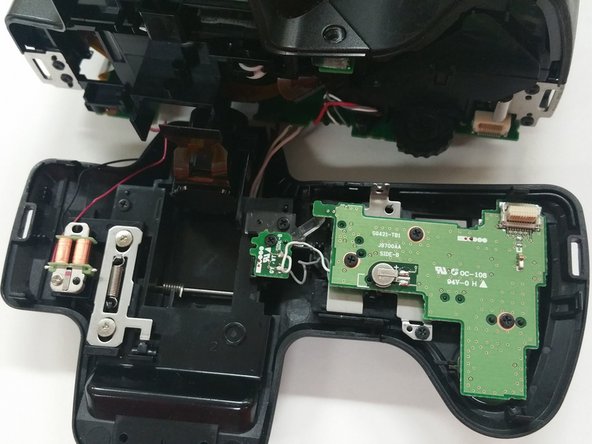
      • Use a Plastic Opening Tool to carefully remove the top of the camera.

      • Use caution when removing the top of the camera

      Chiedi a FixBot

      Aggiungi Commento

    8. Kodak Easyshare Z981 Flash Button Replacement: passo 8, immagine 1 di 3 Kodak Easyshare Z981 Flash Button Replacement: passo 8, immagine 2 di 3 Kodak Easyshare Z981 Flash Button Replacement: passo 8, immagine 3 di 3
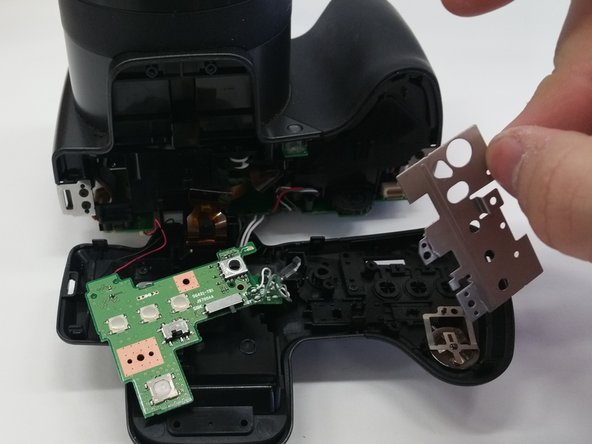
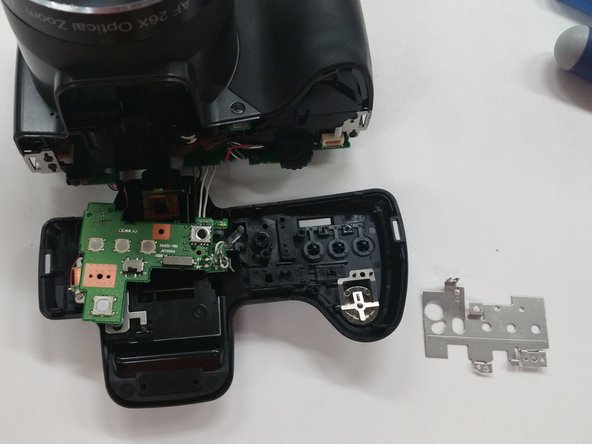
      • Remove four (4) 3mm screws from the circuit board underneath the button set.

      • Gently move the circuit board aside.

      • Gently move aside the metal sheet.

      Chiedi a FixBot

      Aggiungi Commento

    9. Kodak Easyshare Z981 Flash Button Replacement: passo 9, immagine 1 di 2 Kodak Easyshare Z981 Flash Button Replacement: passo 9, immagine 2 di 2
      Strumento utilizzato in questo passaggio:
      Tweezers
      $4.99
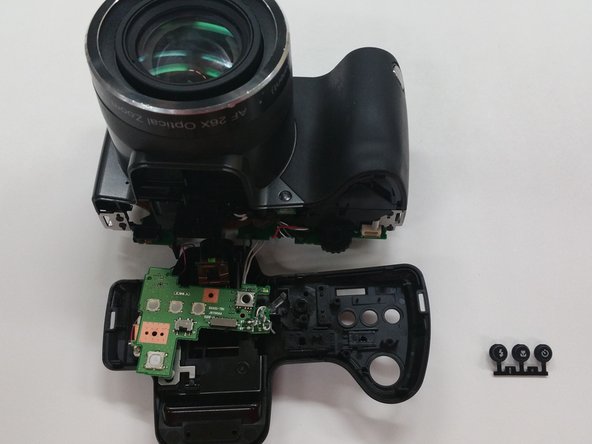
      • Use Tweezers to carefully remove the flash button.

      • The button should simply pop out when light pressure is applied.

      Chiedi a FixBot

      Aggiungi Commento

Conclusione

To reassemble your device, follow these instructions in reverse order.

Annulla: non ho completato questa guida.

0Commenti sulla guida

Aggiungi Commento

Visualizza statistiche:

Ultime 24 ore: 3

Ultimi 7 giorni: 9

Ultimi 30 giorni: 24

Tutti i Tempi: 1,085