Questa versione può contenere modifiche errate. Passa all'ultima istantanea verificata.
Cosa ti serve
-
Questo passaggio è privo di traduzione. Aiuta a tradurlo
-
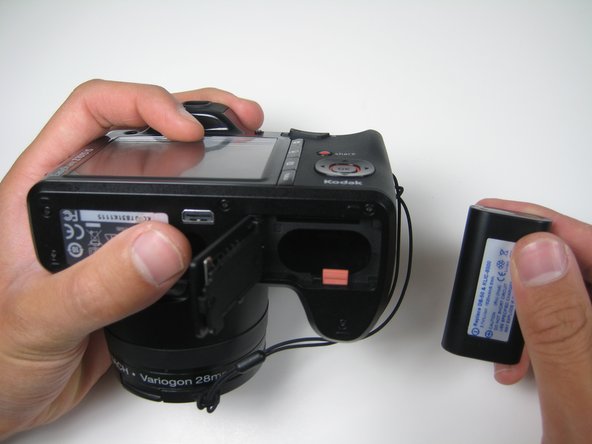
Begin by sliding the switch towards the open symbol. Release your finger from the switch and the battery case will pop open.
-
-
Questo passaggio è privo di traduzione. Aiuta a tradurlo
-
Next, press down on the red lever which holds the battery in place.
-
-
Questo passaggio è privo di traduzione. Aiuta a tradurlo
-
Once the battery has popped out of the compartment, simply pull it out of the camera.
-
-
-
Questo passaggio è privo di traduzione. Aiuta a tradurlo
-
Begin by removing the first screw located on the back of the camera.
-
-
Questo passaggio è privo di traduzione. Aiuta a tradurlo
-
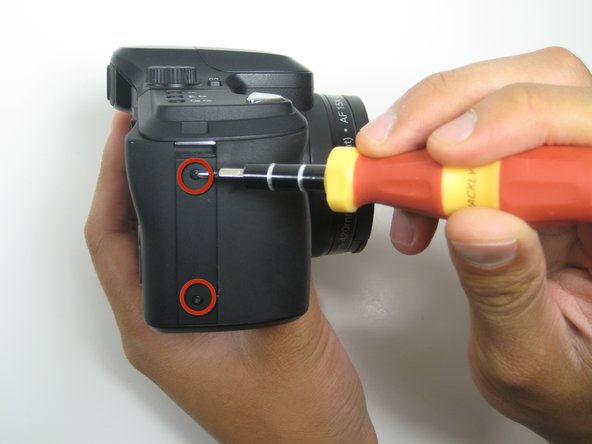
Next, remove the two screws located on the right side of the camera.
-
-
Questo passaggio è privo di traduzione. Aiuta a tradurlo
-
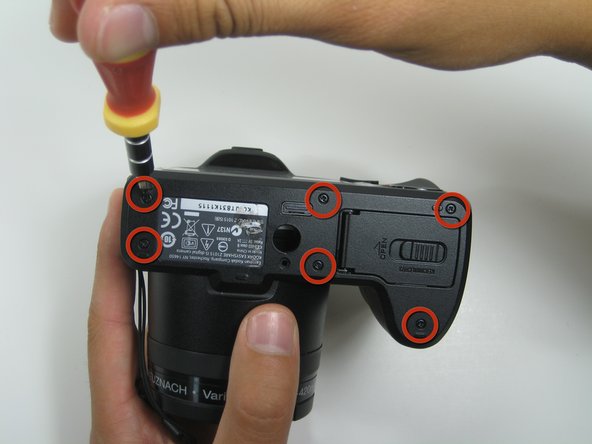
After removing the screws located on the right side, remove the six screws located on the bottom of the camera.
-
-
Questo passaggio è privo di traduzione. Aiuta a tradurlo
-
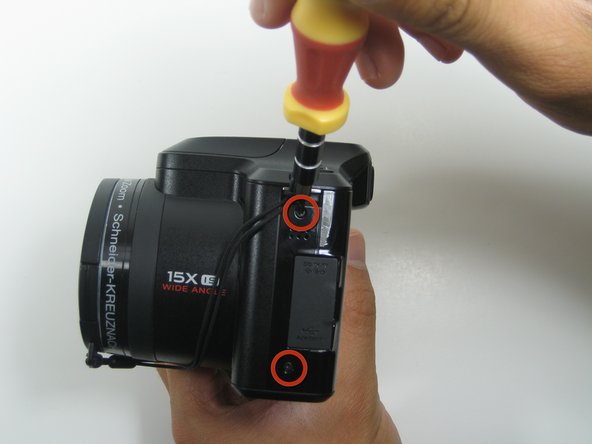
Lastly, remove the two screws located on the left side of the camera.
-
-
Questo passaggio è privo di traduzione. Aiuta a tradurlo
-
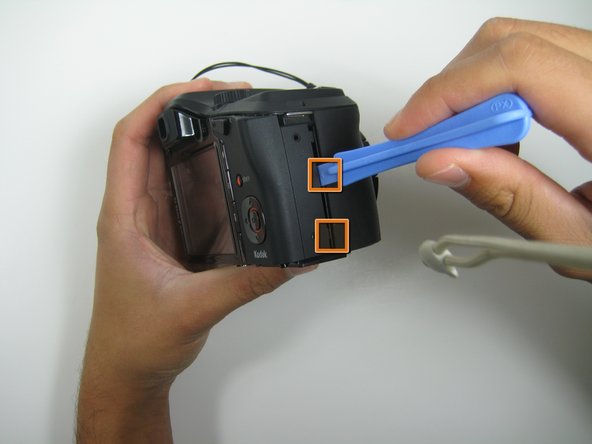
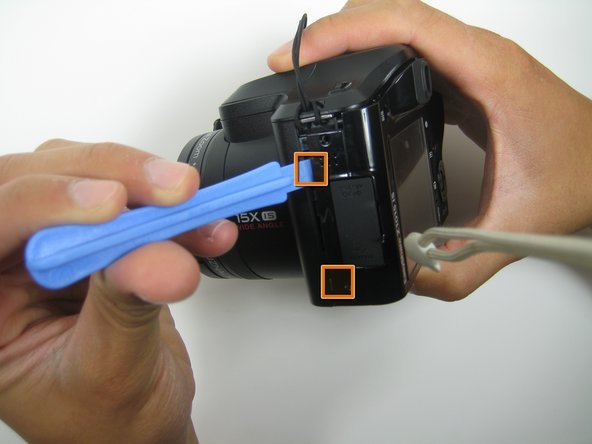
Once all eleven screws have been removed, use Plastic Opening Tools to take off the back cover.
-
Insert the plastic opening tool and apply leverage on each side of the camera. The recommended spots to apply leverage are shown in these pictures.
-
-
Questo passaggio è privo di traduzione. Aiuta a tradurlo
-
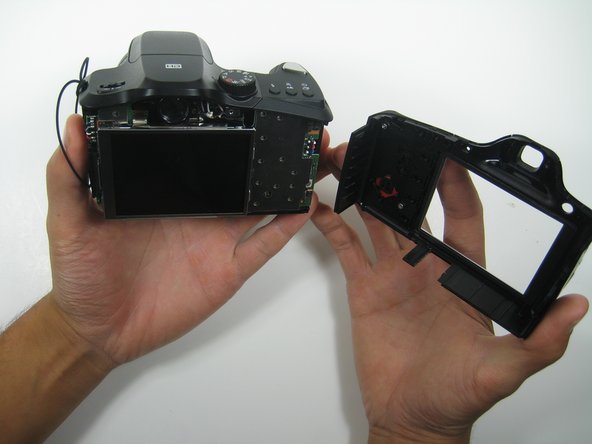
Apply pressure on the left and right side of the camera and pull the back cover away from the device.
-
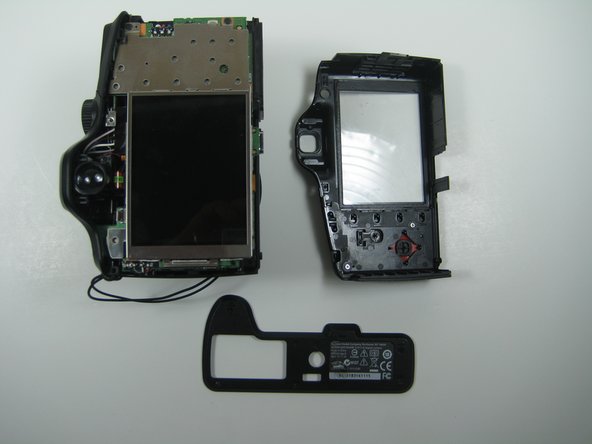
Once the back cover has been successfully removed, you should have a total of eleven screws as well as the bottom cover separated from the camera.
-
Annulla: non ho completato questa guida.
Altre 2 persone hanno completato questa guida.


