Salta al contenuto principale

Kodak EasyShare M532 Screen Replacement

Cosa ti serve

  1. Kodak EasyShare M532 Screen  Replacement, Screen: passo 1, immagine 1 di 2 Kodak EasyShare M532 Screen  Replacement, Screen: passo 1, immagine 2 di 2
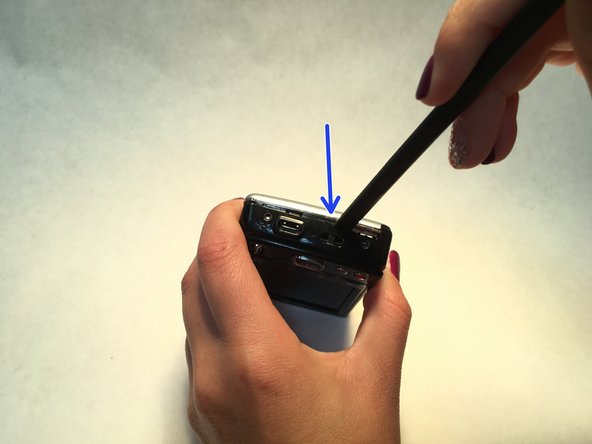
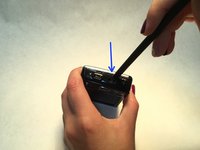
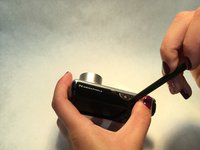
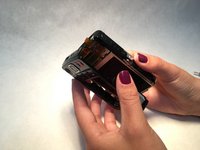
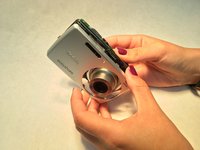
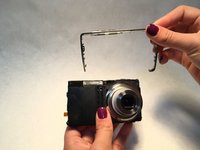
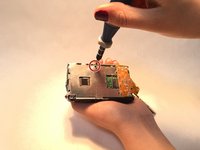
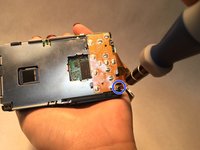
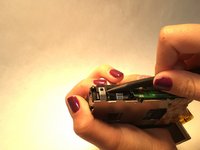
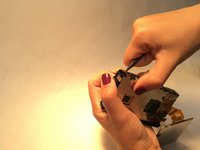
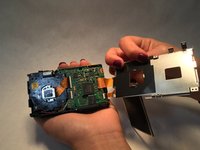
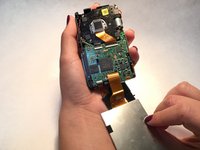
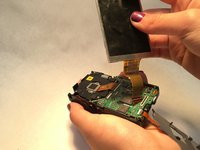
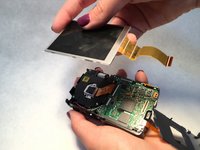
    • Open the battery compartment on the bottom of the camera and remove the battery.

  2. Kodak EasyShare M532 Screen  Replacement: passo 2, immagine 1 di 3 Kodak EasyShare M532 Screen  Replacement: passo 2, immagine 2 di 3 Kodak EasyShare M532 Screen  Replacement: passo 2, immagine 3 di 3
    • Remove two Phillips screws from each side of the camera (four screws total).

    • Remove one additional Phillips screw from the bottom of the camera.

  3. Kodak EasyShare M532 Screen  Replacement: passo 3, immagine 1 di 3 Kodak EasyShare M532 Screen  Replacement: passo 3, immagine 2 di 3 Kodak EasyShare M532 Screen  Replacement: passo 3, immagine 3 di 3
    • Inserting the prying tool as shown, gently separate the front and back pieces of the camera exterior.

  4. Kodak EasyShare M532 Screen  Replacement: passo 4, immagine 1 di 3 Kodak EasyShare M532 Screen  Replacement: passo 4, immagine 2 di 3 Kodak EasyShare M532 Screen  Replacement: passo 4, immagine 3 di 3
    • Carefully remove the front and back exterior pieces from the camera body.

  5. Kodak EasyShare M532 Screen  Replacement: passo 5, immagine 1 di 3 Kodak EasyShare M532 Screen  Replacement: passo 5, immagine 2 di 3 Kodak EasyShare M532 Screen  Replacement: passo 5, immagine 3 di 3
    • Gently remove the frame with the top buttons.

    • You should now have the screen and inside parts exposed as shown.

  6. Kodak EasyShare M532 Screen  Replacement: passo 6, immagine 1 di 2 Kodak EasyShare M532 Screen  Replacement: passo 6, immagine 2 di 2
    • Lift the screen off the body. Note that it is still connected on one side by the orange tape.

    • Flip it over gently and let it rest off to the side where the tape is.

    • It is okay if the orange tape clips out of its spot.

  7. Kodak EasyShare M532 Screen  Replacement: passo 7, immagine 1 di 2 Kodak EasyShare M532 Screen  Replacement: passo 7, immagine 2 di 2
    • Remove the two Phillips screws. There is one at the top center and one in the bottom left corner.

  8. Kodak EasyShare M532 Screen  Replacement: passo 8, immagine 1 di 3 Kodak EasyShare M532 Screen  Replacement: passo 8, immagine 2 di 3 Kodak EasyShare M532 Screen  Replacement: passo 8, immagine 3 di 3
    • Remove the top Phillips screw from the right side.

    • Move the silver tape aside to access and remove the Phillips screw in the bottom corner.

  9. Kodak EasyShare M532 Screen  Replacement: passo 9, immagine 1 di 3 Kodak EasyShare M532 Screen  Replacement: passo 9, immagine 2 di 3 Kodak EasyShare M532 Screen  Replacement: passo 9, immagine 3 di 3
    • Gently pry up the clip on the top corner to release the metal casing and lift the casing out of the way.

    • The casing is also connected via an orange tape on the right side that you may leave in place.

    • Be sure to wear safety glasses while prying the clip.

  10. Kodak EasyShare M532 Screen  Replacement: passo 10, immagine 1 di 3 Kodak EasyShare M532 Screen  Replacement: passo 10, immagine 2 di 3 Kodak EasyShare M532 Screen  Replacement: passo 10, immagine 3 di 3
    • Find the silver clip where the orange tape from the screen attaches to the circuit board.

    • Lift up the silver clip. The orange tape will slide out, completely disconnecting the screen from the camera.

Conclusione

To reassemble your device, follow these instructions in reverse order.

0 Commenti

Aggiungi Commento

Visualizza Statistiche:

Ultime 24 Ore: 0

Ultimi 7 Giorni: 1

Ultimi 30 Giorni: 8

Tutti i Tempi: 764