Salta al contenuto principale

Questa guida ha delle modifiche più recenti. Passa all'ultima versione non verificata.

Kodak EasyShare LS743 Removing LCD Replacement

Cosa ti serve

  1. Kodak EasyShare LS743 Removing LCD Replacement, Battery: passo 1, immagine 1 di 1
    • Using your fingernail, open the battery cover.

  2. Kodak EasyShare LS743 Removing LCD Replacement: passo 2, immagine 1 di 1
    • Slide the orange latch sideways to eject the battery.

    • Remove the battery from the battery slot.

  3. Kodak EasyShare LS743 Removing LCD Replacement, Kodak EasyShare LS743 Camera Case Disassembly: passo 3, immagine 1 di 3 Kodak EasyShare LS743 Removing LCD Replacement, Kodak EasyShare LS743 Camera Case Disassembly: passo 3, immagine 2 di 3 Kodak EasyShare LS743 Removing LCD Replacement, Kodak EasyShare LS743 Camera Case Disassembly: passo 3, immagine 3 di 3
    • Using a Phillips #00 screwdriver, remove two 5.39 mm screws next to the battery slot.

    • Remove the metal piece holding down the lanyard, then remove the lanyard.

  4. Kodak EasyShare LS743 Removing LCD Replacement: passo 4, immagine 1 di 3 Kodak EasyShare LS743 Removing LCD Replacement: passo 4, immagine 2 di 3 Kodak EasyShare LS743 Removing LCD Replacement: passo 4, immagine 3 di 3
    • Using a Phillips #00 screwdriver, remove seven screws located on the outside case of the camera.

    • One 6.25 mm screw is located on the top right corner, right to the "OK" button.

    • Four 4.45 mm screws are on the bottom of the camera.

    • Two 2.95 mm screws are on the left side of the camera, above the USB port.

  5. Kodak EasyShare LS743 Removing LCD Replacement: passo 5, immagine 1 di 2 Kodak EasyShare LS743 Removing LCD Replacement: passo 5, immagine 2 di 2
    • Carefully remove the rear camera casing.

    • Carefully remove the front camera casing.

  6. Kodak EasyShare LS743 Removing LCD Replacement, Removing LCD: passo 6, immagine 1 di 3 Kodak EasyShare LS743 Removing LCD Replacement, Removing LCD: passo 6, immagine 2 di 3 Kodak EasyShare LS743 Removing LCD Replacement, Removing LCD: passo 6, immagine 3 di 3
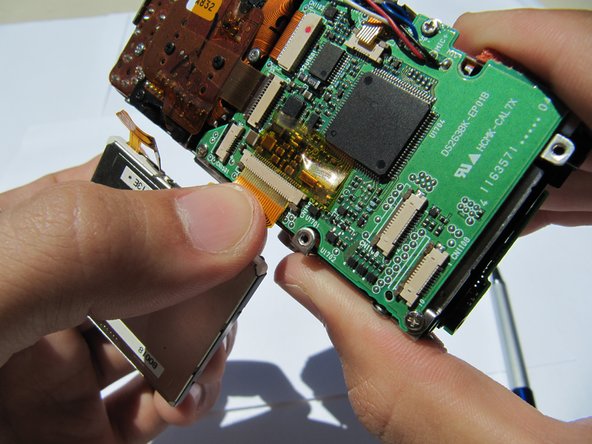
    • Flip up the LCD screen to reveal the two orange ribbon cables.

    • Disconnect the two ribbons cables from their sockets on the motherboard.

Conclusione

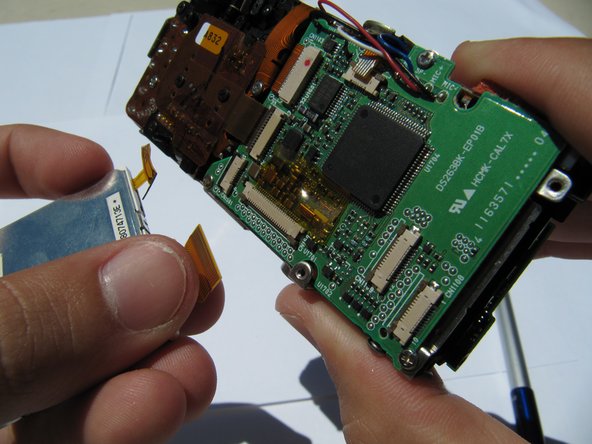
To reassemble your device, follow these instructions in reverse order.

Un'altra persona ha completato questa guida.

Team

Cal Poly, Team 2-8, Johann Summer 2010 Membro di Cal Poly, Team 2-8, Johann Summer 2010

CPSU-JOHANN-R10S2G8

5 Membri

16 Guide realizzate

0 Commenti

Aggiungi Commento

Visualizza Statistiche:

Ultime 24 Ore: 0

Ultimi 7 Giorni: 0

Ultimi 30 Giorni: 0

Tutti i Tempi: 1,230