Salta al contenuto principale

KitchenAid KHM512ER Power Cord Replacement

Cosa ti serve

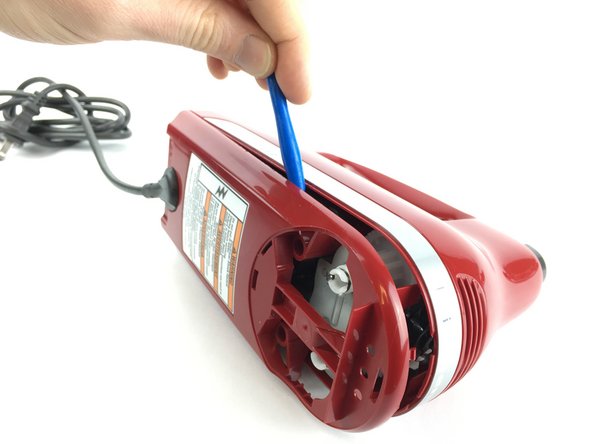
  1. KitchenAid KHM512ER Power Cord Replacement, Power Cord: passo 1, immagine 1 di 2 KitchenAid KHM512ER Power Cord Replacement, Power Cord: passo 1, immagine 2 di 2
    • Insert the back of a plastic opening tool into one of the beater holes

    • Apply force to pull the circular plastic part off.

    • If necessary, use the other side of the plastic opening tool to pry the circular plastic part off.

  2. KitchenAid KHM512ER Power Cord Replacement: passo 2, immagine 1 di 3 KitchenAid KHM512ER Power Cord Replacement: passo 2, immagine 2 di 3 KitchenAid KHM512ER Power Cord Replacement: passo 2, immagine 3 di 3
    • Use a plastic opening tool to remove the speed knob.

    • Pop up the panel with a plastic opening tool.

    • Use a plastic opening tool to pry the white plastic switch assembly out.

  3. KitchenAid KHM512ER Power Cord Replacement: passo 3, immagine 1 di 2 KitchenAid KHM512ER Power Cord Replacement: passo 3, immagine 2 di 2
    • Use a Phillips 2 screwdriver to remove the two 20.0mm screws that hold the bottom plastic piece.

    • Your screwdriver may not be long or narrow enough to reach the screws in these holes. If that's the case, use another screwdriver.

    • Remove the bottom plastic piece using a plastic opening tool.

  4. KitchenAid KHM512ER Power Cord Replacement: passo 4, immagine 1 di 3 KitchenAid KHM512ER Power Cord Replacement: passo 4, immagine 2 di 3 KitchenAid KHM512ER Power Cord Replacement: passo 4, immagine 3 di 3
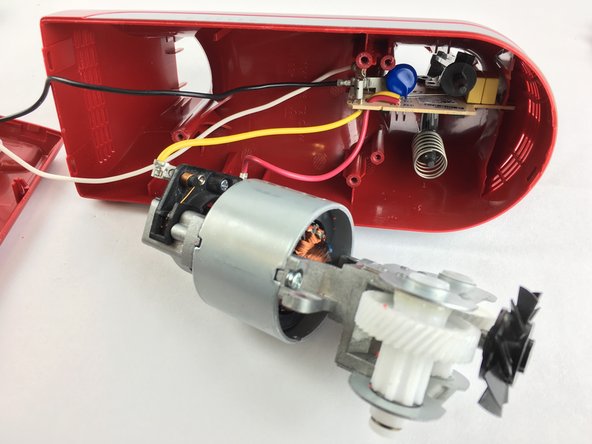
    • Using a Phillips 2 screwdriver, remove the three 20.0mm screws holding the motor assembly in place.

    • Use your hands to remove the motor assembly and circuit board.

  5. KitchenAid KHM512ER Power Cord Replacement: passo 5, immagine 1 di 3 KitchenAid KHM512ER Power Cord Replacement: passo 5, immagine 2 di 3 KitchenAid KHM512ER Power Cord Replacement: passo 5, immagine 3 di 3
    • Firmly grip the circuit board, and using pliers, remove the black and white power cord connectors from the circuit board.

    • Some force may be required. Be careful not to cut yourself on any electrical components.

  6. KitchenAid KHM512ER Power Cord Replacement: passo 6, immagine 1 di 3 KitchenAid KHM512ER Power Cord Replacement: passo 6, immagine 2 di 3 KitchenAid KHM512ER Power Cord Replacement: passo 6, immagine 3 di 3
    • Using a plastic opening tool, remove the white plastic clip on the inside of the bottom plastic piece.

    • Once it's loose, remove it with your fingers.

    • Pull the power cord through the hole.

Conclusione

To reassemble your device, follow these instructions in reverse order.

Un'altra persona ha completato questa guida.

Team

USF Tampa, Team 2-3, Sullivan Spring 2016 Membro di USF Tampa, Team 2-3, Sullivan Spring 2016

USFT-SULLIVAN-S16S2G3

3 Membri

4 Guide realizzate

0 Commenti

Aggiungi Commento

Visualizza Statistiche:

Ultime 24 Ore: 1

Ultimi 7 Giorni: 10

Ultimi 30 Giorni: 43

Tutti i Tempi: 3,540