Salta al contenuto principale

Kingston HyperX Cloud II Speaker Wire Repair

Cosa ti serve

  1. Kingston HyperX Cloud II Speaker Wire Repair, Kingston HyperX Cloud II Speaker Wire Repair: passo 1, immagine 1 di 1
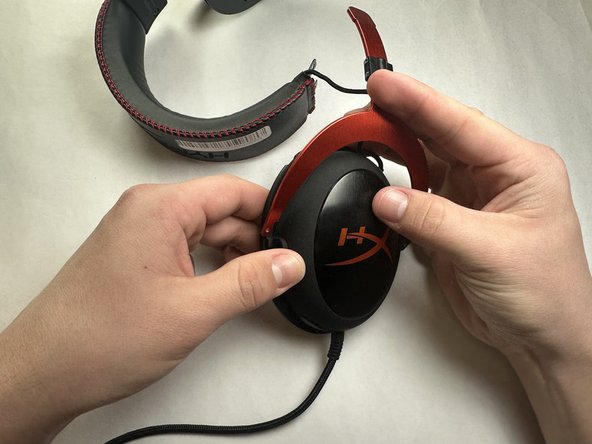
    • Pulling along the edges, take off the ear padding.

  2. Kingston HyperX Cloud II Speaker Wire Repair: passo 2, immagine 1 di 2 Kingston HyperX Cloud II Speaker Wire Repair: passo 2, immagine 2 di 2
    • Use a Phillips #0 screwdriver to remove the two 11 mm screws from the bracket support.

  3. Kingston HyperX Cloud II Speaker Wire Repair: passo 3, immagine 1 di 3 Kingston HyperX Cloud II Speaker Wire Repair: passo 3, immagine 2 di 3 Kingston HyperX Cloud II Speaker Wire Repair: passo 3, immagine 3 di 3
    • Remove the inside bracket support, and then remove the outside bracket support.

    • Expand and remove the microphone speaker from the frame.

  4. Kingston HyperX Cloud II Speaker Wire Repair: passo 4, immagine 1 di 3 Kingston HyperX Cloud II Speaker Wire Repair: passo 4, immagine 2 di 3 Kingston HyperX Cloud II Speaker Wire Repair: passo 4, immagine 3 di 3
    • Use a Phillips #1 screwdriver to remove the two 7.90 mm screws from the red support attached to the microphone speaker.

  5. Kingston HyperX Cloud II Speaker Wire Repair: passo 5, immagine 1 di 3 Kingston HyperX Cloud II Speaker Wire Repair: passo 5, immagine 2 di 3 Kingston HyperX Cloud II Speaker Wire Repair: passo 5, immagine 3 di 3
    • Separate the red frame support from the microphone speaker by putting it to the side.

  6. Kingston HyperX Cloud II Speaker Wire Repair: passo 6, immagine 1 di 2 Kingston HyperX Cloud II Speaker Wire Repair: passo 6, immagine 2 di 2
    • Remove the four 11 mm screws on the speaker frame with a Phillips #2 screwdriver.

  7. Kingston HyperX Cloud II Speaker Wire Repair: passo 7, immagine 1 di 3 Kingston HyperX Cloud II Speaker Wire Repair: passo 7, immagine 2 di 3 Kingston HyperX Cloud II Speaker Wire Repair: passo 7, immagine 3 di 3
    • Remove the headphone speaker frame.

    • Solder the detached blue wire onto the driver.

    • Be cautious not to solder the wrong wire.

  8. Kingston HyperX Cloud II Speaker Wire Repair: passo 8, immagine 1 di 1
    • Solder the green wire onto the driver.

    • Be cautious not to solder the wrong wire.

Conclusione

To reassemble your device, follow these instructions in reverse order.

Team

IUPUI, Team 1-4, Harley Spring 2023 Membro di IUPUI, Team 1-4, Harley Spring 2023

IUPUI-HARLEY-S23S1G4

3 Membri

3 Guide realizzate

0 Commenti

Aggiungi Commento

Visualizza Statistiche:

Ultime 24 Ore: 15

Ultimi 7 Giorni: 34

Ultimi 30 Giorni: 102

Tutti i Tempi: 1,618