Questa versione può contenere modifiche errate. Passa all'ultima istantanea verificata.
Cosa ti serve
-
Questo passaggio è privo di traduzione. Aiuta a tradurlo
-
Place the device face down on a clean cloth or another smooth surface.
-
Insert the plastic opening tool between the device’s front and back panels. You might need to wiggle the tool up and down to wedge it in the gap.
-
Maneuver the tool around the device until the back unclips from the front panel.
-
-
Questo passaggio è privo di traduzione. Aiuta a tradurlo
-
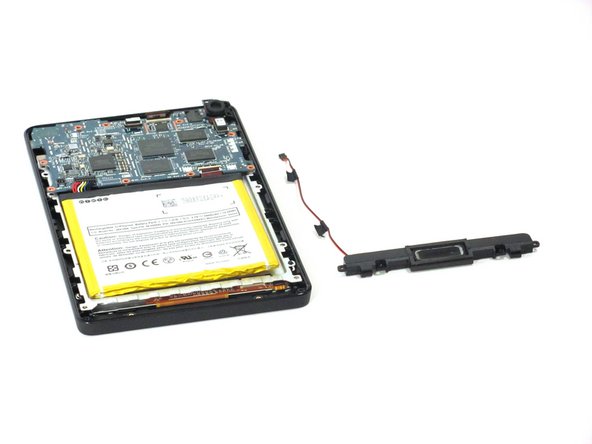
Carefully separate the back panel from the rest of the device internals.
-
-
-
Questo passaggio è privo di traduzione. Aiuta a tradurlo
-
Unscrew the two 3.5mm T5 Torx screws at the base of the speaker.
-
-
Questo passaggio è privo di traduzione. Aiuta a tradurlo
-
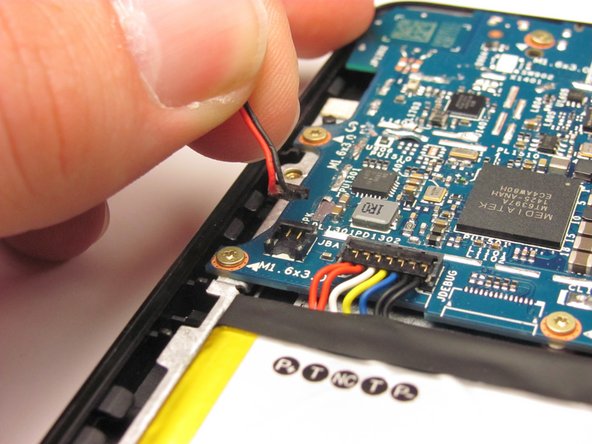
Unclip the speaker wire that runs up the side of the battery and clips into the motherboard next to the battery connector. Gently pull it straight up.
-


Annulla: non ho completato questa guida.
Altre 2 persone hanno completato questa guida.
Team

Cal Poly, Team 70-4, Forte Winter 2015 Membro di Cal Poly, Team 70-4, Forte Winter 2015
CPSU-FORTE-W15S70G4
4 Membri
12 Guide realizzate