Questa versione può contenere modifiche errate. Passa all'ultima istantanea verificata.
Cosa ti serve
-
-
Inserisci uno strumento di apertura in plastica sull'angolo inferiore destro del Kindle Fire.
-
Fai leva per dividere le due metà e fai scorrere lo strumento lungo tutto il perimetro del dispositivo, allentando le clip che tengono giunte le due parti.
-
È di aiuto rimuovere prima la parte inferiore del Kindle Fire (e fuori di lato) dalla parte superiore. Se si applica troppa forza durante la separazione delle due metà senza tirare, le alette interne potrebbero rompersi.
-
-
-
Inserisci la punta dello strumento di apertura in plastica tra la cella destra della batteria ed il frame del Kindle Fire.
-
Fai leva per alzare la batteria e fai scorrere lo strumento di plastica lungo tutto il bordo per rimuovere la colla dal supporto.
-
-
Questo passaggio è privo di traduzione. Aiuta a tradurlo
-
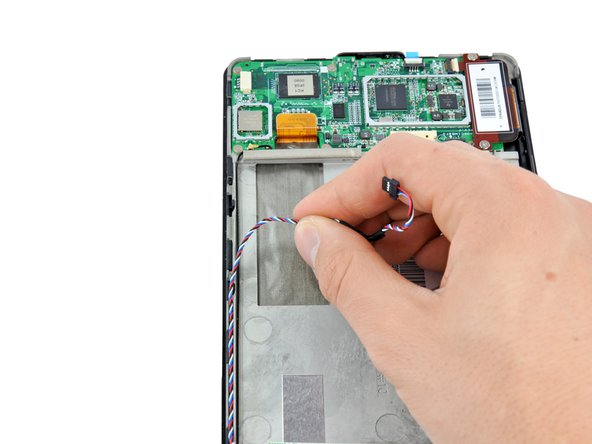
Peel the tape on the upper-left IC that is securing the speaker cable.
-
Use the flat end of a spudger to push the speaker connector out of its socket.
-
Deroute the speaker cable.
-
-
Questo passaggio è privo di traduzione. Aiuta a tradurlo
-
Remove the two 3.3 mm Phillips #00 screws securing the speakers to the Kindle Fire.
-
Lift the speakers out of the Kindle Fire.
-
-
-
Questo passaggio è privo di traduzione. Aiuta a tradurlo
-
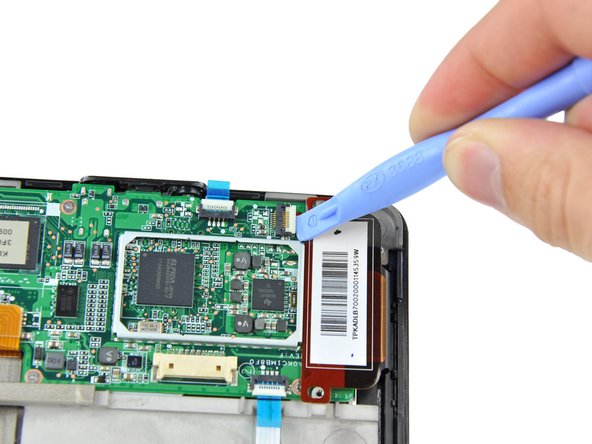
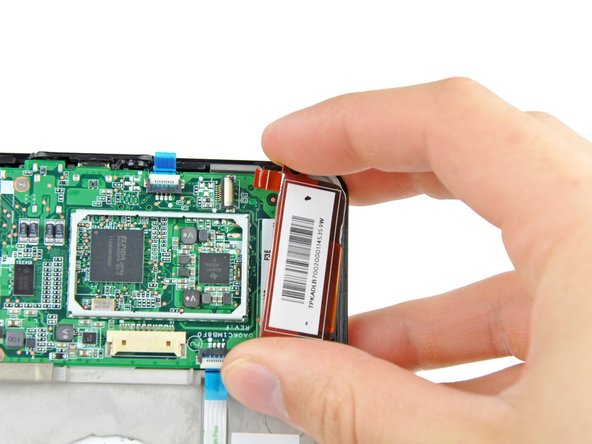
Remove the two 2.3 mm Phillips #00 screws from the touchscreen controller.
-
Use a plastic opening tool to release the touchscreen controller connector.
-
Gently remove the touchscreen controller by lifting it up and to the right.
-
-
Questo passaggio è privo di traduzione. Aiuta a tradurlo
-
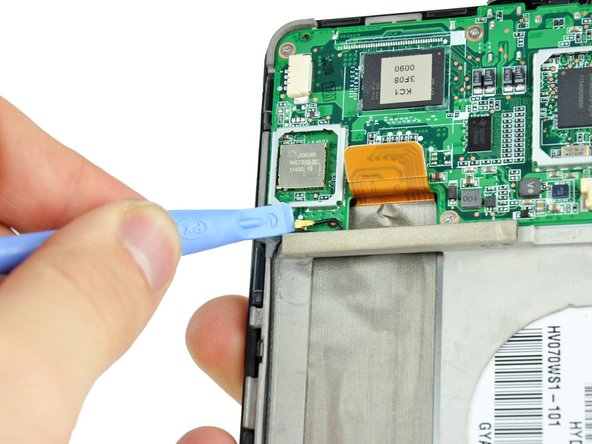
Use a plastic opening tool to flip open the power button ZIF connector.
-
Flip open the ambient light sensor ZIF socket with a plastic opening tool.
-
Use a pair of tweezers to pull the blue tab on the ambient light sensor cable to remove it from its socket.
-
-
Questo passaggio è privo di traduzione. Aiuta a tradurlo
-
Use a plastic opening tool to lift up and disconnect the display data cable.
-
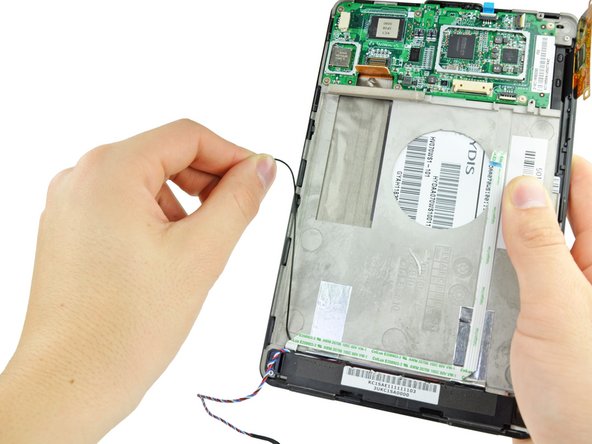
Lift up on the antenna connector with a plastic opening tool to disconnect it.
-
De-route the antenna cable.
-
-
Questo passaggio è privo di traduzione. Aiuta a tradurlo
-
Remove the six 2.6 mm Phillips #00 screws securing the motherboard to the frame.
-
-
Questo passaggio è privo di traduzione. Aiuta a tradurlo
-
Use a plastic opening tool to gently lever up the bottom side of the motherboard to free from the adhesive on its underside.
-
Lever the top side of the motherboard up with a plastic opening tool until it comes free.
-
Lift the motherboard out of the Kindle Fire, making sure that the power button cable from step 8 comes free from its connector.
-
-
Questo passaggio è privo di traduzione. Aiuta a tradurlo
-
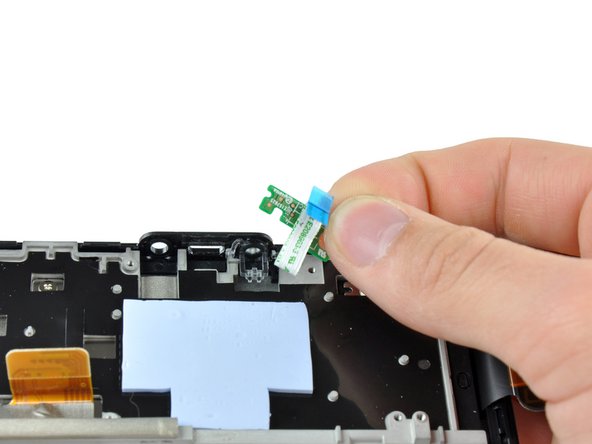
Remove the 2.5 mm Phillips #00 scew securing the power button board to the Kindle Fire.
-
Lift the power button board out of the Kindle Fire.
-
-
Questo passaggio è privo di traduzione. Aiuta a tradurlo
-
Use the flat end of a spudger to peel the ambient light sensor cable off of the frame.
-
-
Questo passaggio è privo di traduzione. Aiuta a tradurlo
-
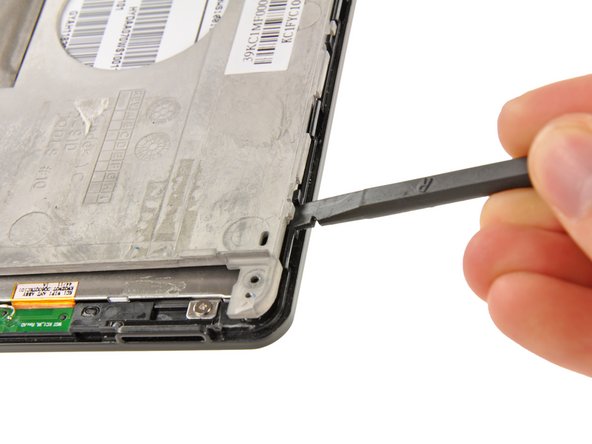
Use the flat end of a spudger to peel up the silver tape securing the antenna cable.
-
-
Questo passaggio è privo di traduzione. Aiuta a tradurlo
-
Remove the five 3.6 mm Phillips #00 screws securing the frame and ambient light sensor.
-
-
Questo passaggio è privo di traduzione. Aiuta a tradurlo
-
Slide the ambient light sensor out from under the frame and remove it from the Kindle Fire.
-
-
Questo passaggio è privo di traduzione. Aiuta a tradurlo
-
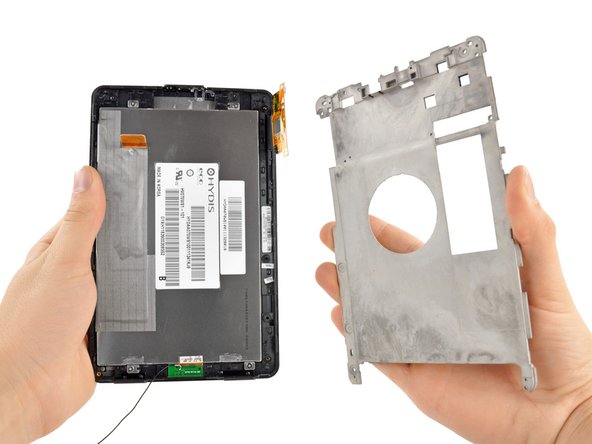
Use the flat end of a spudger to lever the frame away from the display assembly until you can grab it with your hand.
-
Remove the frame from the display assembly.
-
-
Questo passaggio è privo di traduzione. Aiuta a tradurlo
-
Remove the four 2.4 mm Phillips #00 screws attaching the LCD to the front glass panel.
-
Rotate the top of the LCD 90 degrees away from the front glass panel as shown in the second picture.
-
Separate the LCD and front glass panel.
-


Annulla: non ho completato questa guida.
Altre 85 persone hanno completato questa guida.

25 Commenti
How does that tell you how to fix the screen you are just putting the screen on so it sill cracked so how are you going to fix it now?
This took me about an hour from start to finish - taking my time to mark all the screws etc. but it may take longer if you don't have the correct tools. I agree that there should be a photo of separating the front glass digitizer from the front bezel as the true last step - it can be tricky, and the replacements I have seen don't include the front bezel. I used a razor/hobby knife to slowly peel and separate the digitizer working slowly and carefully from the inside bottom (around and behind the power button cutout) - some goo-gone or lighter fluid will be necessary to clean any old adhesive residue from the bezel as well. The front bezel has a rubberized gasket that should not be remover, so take care to see that you are not peeling that off. My last suggestion is to wear latex or nitrile gloves to prevent getting smudges on the LCD or digitizer during replacement; put them on for step 18, and until you have the frame back in place - care to keep dust out from in between during reassembly is a must!
How do I know which part I need?? Do I need the lcd screen and/or the digitizer?? What's the difference?? My kindle was dropped unfortunately and I am trying to find the part to replace it with. PLEASE HELP!! People are trying to charge me 100$ to replace the screen alone, excluding labor.