Salta al contenuto principale

Jumper EZbook S5 Touchpad Replacement

Cosa ti serve

  1. Jumper EZbook S5 Touchpad Replacement, Touchpad: passo 1, immagine 1 di 2 Jumper EZbook S5 Touchpad Replacement, Touchpad: passo 1, immagine 2 di 2
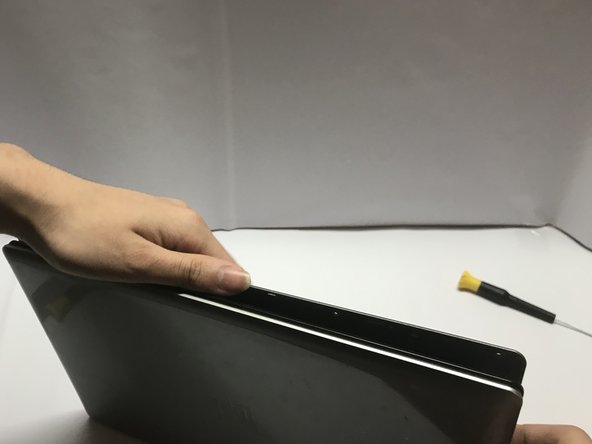
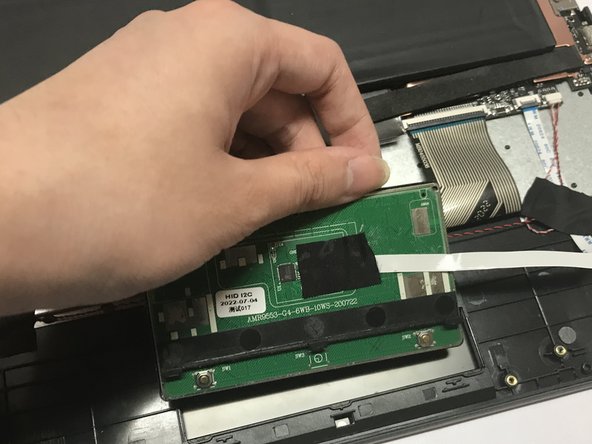
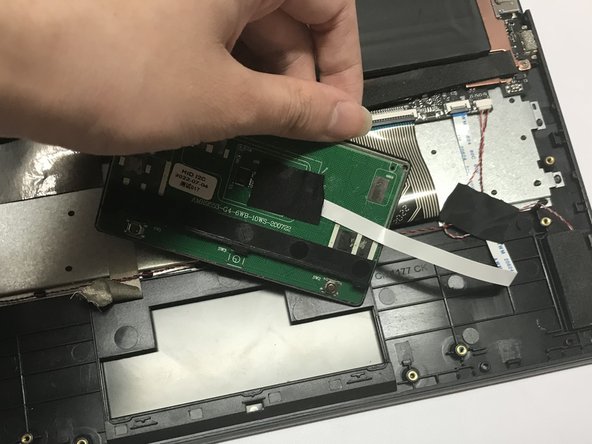
    • Place the laptop so the bottom is facing upwards.

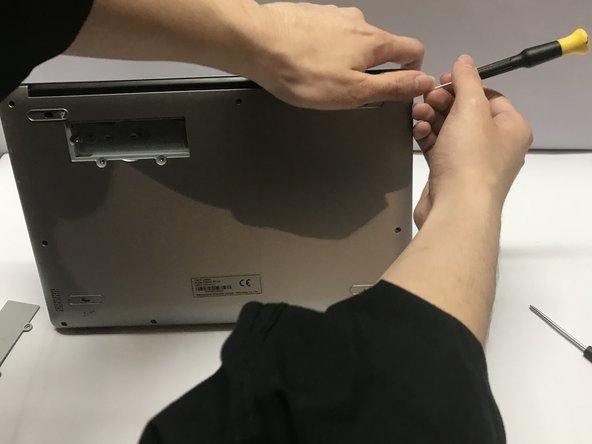
    • Remove the two 8 mm screws on the back of the laptop using a T3 Torx screwdriver.

    • Remove the three 5 mm screws on the back of the laptop using a T3 Torx screwdriver.

    • Remove the six 4 mm screws on the back of the laptop using a T3 Torx screwdriver.

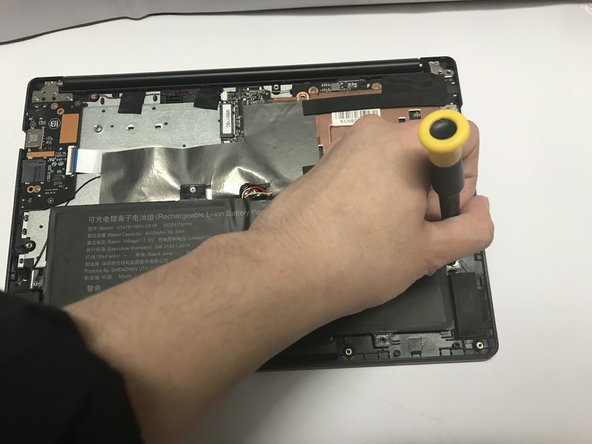
    • Remove the single 3 mm base screw inside the battery case using a T3 Torx screwdriver.

  2. Jumper EZbook S5 Touchpad Replacement: passo 2, immagine 1 di 3 Jumper EZbook S5 Touchpad Replacement: passo 2, immagine 2 di 3 Jumper EZbook S5 Touchpad Replacement: passo 2, immagine 3 di 3
    • Detach the battery case using the flat end of a spudger.

  3. Jumper EZbook S5 Touchpad Replacement: passo 3, immagine 1 di 3 Jumper EZbook S5 Touchpad Replacement: passo 3, immagine 2 di 3 Jumper EZbook S5 Touchpad Replacement: passo 3, immagine 3 di 3
    • Pry apart the bottom cover of the laptop using the flat end of a spudger.

  4. Jumper EZbook S5 Touchpad Replacement: passo 4, immagine 1 di 3 Jumper EZbook S5 Touchpad Replacement: passo 4, immagine 2 di 3 Jumper EZbook S5 Touchpad Replacement: passo 4, immagine 3 di 3
    • Remove the four 4 mm screws from the battery using a T3 Torx screwdriver.

  5. Jumper EZbook S5 Touchpad Replacement: passo 5, immagine 1 di 3 Jumper EZbook S5 Touchpad Replacement: passo 5, immagine 2 di 3 Jumper EZbook S5 Touchpad Replacement: passo 5, immagine 3 di 3
    • Flip the battery to the opposite side of the touchpad.

  6. Jumper EZbook S5 Touchpad Replacement: passo 6, immagine 1 di 3 Jumper EZbook S5 Touchpad Replacement: passo 6, immagine 2 di 3 Jumper EZbook S5 Touchpad Replacement: passo 6, immagine 3 di 3
    • Detach the tape on the left side of the touchpad shown in the first two images.

    • Use a heat gun or a hair dryer to melt the glue quickly.

  7. Jumper EZbook S5 Touchpad Replacement: passo 7, immagine 1 di 3 Jumper EZbook S5 Touchpad Replacement: passo 7, immagine 2 di 3 Jumper EZbook S5 Touchpad Replacement: passo 7, immagine 3 di 3
    • Detach the tape on the right side of the touchpad shown in all three images.

    • Use a hair dryer or a heat gun to soften the glue.

  8. Jumper EZbook S5 Touchpad Replacement: passo 8, immagine 1 di 3 Jumper EZbook S5 Touchpad Replacement: passo 8, immagine 2 di 3 Jumper EZbook S5 Touchpad Replacement: passo 8, immagine 3 di 3
    • Use a spudger to detach the touchpad from the top case.

    • The touchpad is attached to the top case with glue. Use a hair dryer or a heat gun to soften the glue.

    • Be patient. Step 8 can take up to 8 hours if you work by yourself.

    • Don't aim the heat gun or the hair dryer anywhere other than the top case.

  9. Jumper EZbook S5 Touchpad Replacement: passo 9, immagine 1 di 3 Jumper EZbook S5 Touchpad Replacement: passo 9, immagine 2 di 3 Jumper EZbook S5 Touchpad Replacement: passo 9, immagine 3 di 3
    • Lift the touchpad out of the case.

Conclusione

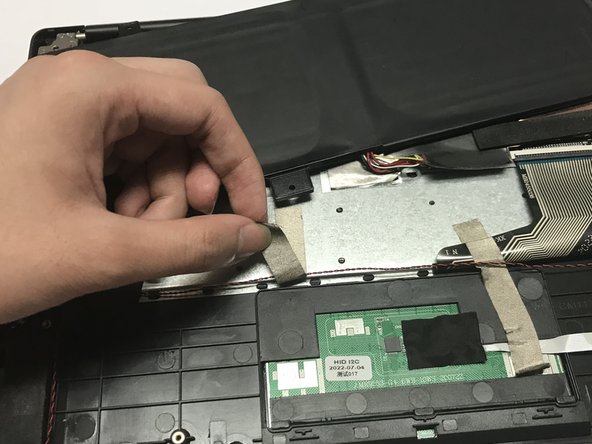
To reassemble your device, follow these instructions in reverse order.

Altre 2 persone hanno completato questa guida.

Zed Chen

Membro da: 10/25/22

223 Reputazione

1 Guida realizzata

Team

0 Commenti

Aggiungi Commento

Visualizza Statistiche:

Ultime 24 Ore: 2

Ultimi 7 Giorni: 9

Ultimi 30 Giorni: 40

Tutti i Tempi: 1,256