Questa versione può contenere modifiche errate. Passa all'ultima istantanea verificata.
Cosa ti serve
-
Questo passaggio è privo di traduzione. Aiuta a tradurlo
-
Using the standard metal spudger, begin by prying at the bottom of the plain rubber end cap (the end without the USB or auxiliary input).
-
-
Questo passaggio è privo di traduzione. Aiuta a tradurlo
-
Continue prying around the end panel, prying at different points until the entire panel is out of its seating.
-
Carefully remove the end panel.
-
-
Questo passaggio è privo di traduzione. Aiuta a tradurlo
-
Slide out the rubber foot located on the bottom of the case.
-
-
Questo passaggio è privo di traduzione. Aiuta a tradurlo
-
Using a T6 bit, remove the flat topped 5mm screw located on the bottom of the casing, underneath the rubber foot.
-
-
-
Questo passaggio è privo di traduzione. Aiuta a tradurlo
-
Push against the side without end cap to slide the internal components out of the case.
-
While holding the metal outset casing with one hand, press on the black inner plastic casing with your thumb.
-
-
Questo passaggio è privo di traduzione. Aiuta a tradurlo
-
Using the standard metal spudger, carefully pry up the top 2 plastic tabs which hold the exterior button and port cover onto the interior plastic frame.
-
-
Questo passaggio è privo di traduzione. Aiuta a tradurlo
-
Using the standard metal spudger, pry up the bottom 2 tabs attaching the other side of the button panel.
-
-
Questo passaggio è privo di traduzione. Aiuta a tradurlo
-
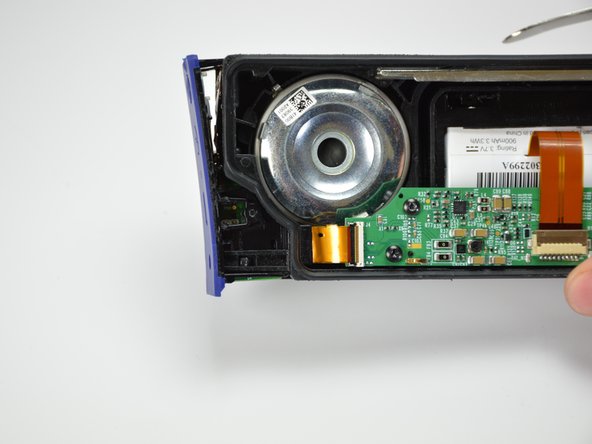
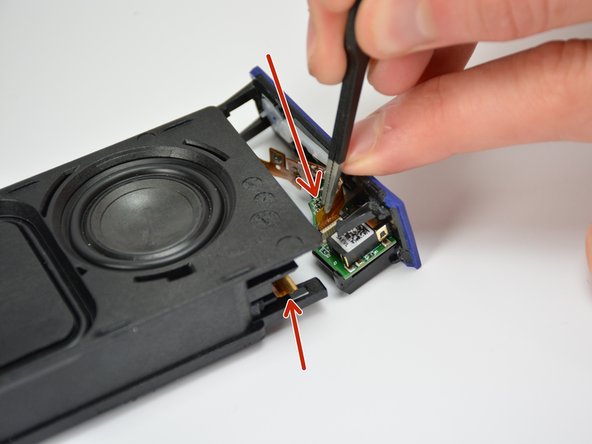
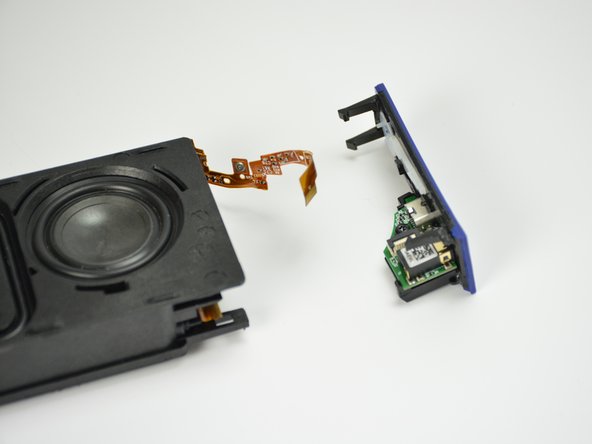
Carefully lift out the end panel.
-
Unplug both the connection ribbon and the ZIF or "zero insertion force" ribbon using tweezers or your hands.
-
-
Questo passaggio è privo di traduzione. Aiuta a tradurlo
-
Using the spudger, push the button in and create a small gap between the outside structure and the button.
-
-
Questo passaggio è privo di traduzione. Aiuta a tradurlo
-
Using a computer duster, blow any contaminants out from the button junction.
-
Using a q-tip and cleaner, wipe off any stickiness from the buttons, ensuring to prevent excessive moisture.
-


