Salta al contenuto principale

JVC GR-D93U Lens Replacement

Cosa ti serve

  1. JVC GR-D93U Lens Replacement, Eye Piece: passo 1, immagine 1 di 2 JVC GR-D93U Lens Replacement, Eye Piece: passo 1, immagine 2 di 2
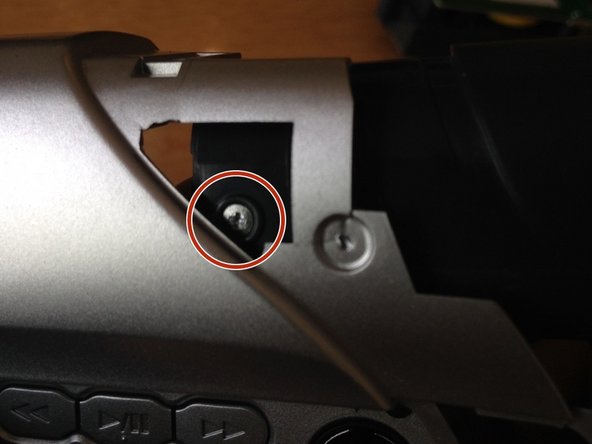
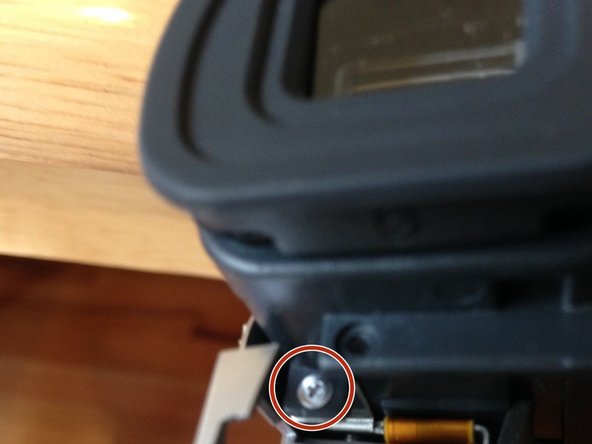
    • Unscrew two 3mm Phillips #0 screw from the bottom of the camera to remove blue plastic casing.

  2. JVC GR-D93U Lens Replacement: passo 2, immagine 1 di 2 JVC GR-D93U Lens Replacement: passo 2, immagine 2 di 2
    • Unscrew two 3mm Phillips #0 screws. Then remove 6 3mm Philips #0 screws from the bottom of the camera.

  3. JVC GR-D93U Lens Replacement: passo 3, immagine 1 di 1
    • Unscrew 3mm Phillips #0 screws from the batter port under the eye piece.

  4. JVC GR-D93U Lens Replacement: passo 4, immagine 1 di 2 JVC GR-D93U Lens Replacement: passo 4, immagine 2 di 2
    • Now the camera can be split into two pieces. Be careful when removing the two sides and remove the cables connecting the two halves. There are also cables that need to be disconnected from the battery pack section.

  5. JVC GR-D93U Lens Replacement: passo 5, immagine 1 di 3 JVC GR-D93U Lens Replacement: passo 5, immagine 2 di 3 JVC GR-D93U Lens Replacement: passo 5, immagine 3 di 3
    • Unscrew two 3mm Phillips #0 screws from around the eye piece. Then flip the camera over and unscrew 3mm Phillips #0 screw. Then unscrew 3mm Phillips #0 screw from under the eye piece.

  6. JVC GR-D93U Lens Replacement: passo 6, immagine 1 di 2 JVC GR-D93U Lens Replacement: passo 6, immagine 2 di 2
    • Unscrew 3mm Phillips #0 screw and disconnect cable. This will disconnect the eye piece from the camera.

  7. JVC GR-D93U Lens Replacement, Lens: passo 7, immagine 1 di 1
    • Remove the two 3mm screws using the PH0 screwdriver.

  8. JVC GR-D93U Lens Replacement: passo 8, immagine 1 di 1
    • Remove the blue dust cover using the metal spudger. Unscrew the 3mm screw using the PH0 screwdriver.

  9. JVC GR-D93U Lens Replacement: passo 9, immagine 1 di 1
    • Remove the two 5mm screws using the PH0 screw driver. Use the metal spudger to remove plastic casing.

  10. JVC GR-D93U Lens Replacement: passo 10, immagine 1 di 1
    • Remove the 3mm screw using the metal spudger.

  11. JVC GR-D93U Lens Replacement: passo 11, immagine 1 di 1
    • Remove the two logic strips by lifting the plastic clips using the metal spudger.

  12. JVC GR-D93U Lens Replacement: passo 12, immagine 1 di 1
    • Disconnect the power from the lens.

Conclusione

To reassemble your device, follow these instructions in reverse order.

Un'altra persona ha completato questa guida.

James

Membro da: 03/16/15

146 Reputazione

1 Guida realizzata

Team

Un commento

Do you fix these yourself? This is too much for me but I love my camera and even though I can watch videos and pictures o the screen I cannot see through the view finder to take pictures. No matter what I do it stays dark. Can you fix it? My email address is sl.green2014@gmail.com. Thank you.

Lee Green - Replica

Aggiungi Commento

Visualizza Statistiche:

Ultime 24 Ore: 1

Ultimi 7 Giorni: 2

Ultimi 30 Giorni: 7

Tutti i Tempi: 499