Salta al contenuto principale

JBL Pulse Outer Casing Replacement

Cosa ti serve

  1. JBL Pulse Outer Casing Replacement, Button Board: passo 1, immagine 1 di 1
    • Use a plastic opening tool to pry around the edges of the circular rubber panel.

  2. JBL Pulse Outer Casing Replacement: passo 2, immagine 1 di 1
    • Once the edges are loose, pull off the rubber button panel completely.

    • New adhesive will have to be applied when reassembling.

  3. JBL Pulse Outer Casing Replacement: passo 3, immagine 1 di 1
    • Use your plastic opening tool to pry the button board loose by lifting the edges.

  4. JBL Pulse Outer Casing Replacement: passo 4, immagine 1 di 1
    • Lift the button board, exposing the attached cable.

    • New adhesive will have to be applied when reassembling.

  5. JBL Pulse Outer Casing Replacement: passo 5, immagine 1 di 1
    • Pull black piece on top of socket away from board to loosen, then detach the cable.

  6. JBL Pulse Outer Casing Replacement, Outer Casing: passo 6, immagine 1 di 3 JBL Pulse Outer Casing Replacement, Outer Casing: passo 6, immagine 2 di 3 JBL Pulse Outer Casing Replacement, Outer Casing: passo 6, immagine 3 di 3
    • Take out the four 9mm black PH0 screws from the top and bottom of the device.

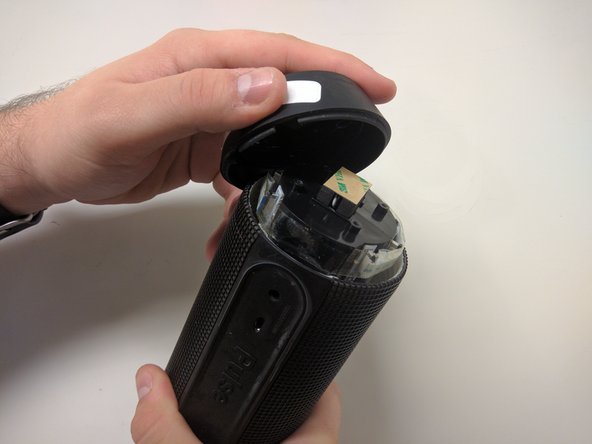
    • Pull off cap by hand.

    • The outer casing can now be removed.

Conclusione

To reassemble your device, follow these instructions in reverse order.

Altre 2 persone hanno completato questa guida.

Team

USF Tampa, Team 18-6, Blackwell Fall 2016 Membro di USF Tampa, Team 18-6, Blackwell Fall 2016

USFT-BLACKWELL-F16S18G6

3 Membri

8 Guide realizzate

0 Commenti

Aggiungi Commento

Visualizza Statistiche:

Ultime 24 Ore: 1

Ultimi 7 Giorni: 2

Ultimi 30 Giorni: 12

Tutti i Tempi: 2,553