Questa versione può contenere modifiche errate. Passa all'ultima istantanea verificata.
Cosa ti serve
-
Questo passaggio è privo di traduzione. Aiuta a tradurlo
-
Turn the device upside down so that the three rubber pads are facing up.
-
-
Questo passaggio è privo di traduzione. Aiuta a tradurlo
-
Use a heat gun (set to low) to apply heat to one of the rubber pads until you can easily remove the pad. This step takes around 5-7 minutes.
-
-
Questo passaggio è privo di traduzione. Aiuta a tradurlo
-
Remove the heated rubber pad with a plastic opening tool.
-
Repeat steps 2 and 3 for the two remaining rubber pads.
-
-
-
Questo passaggio è privo di traduzione. Aiuta a tradurlo
-
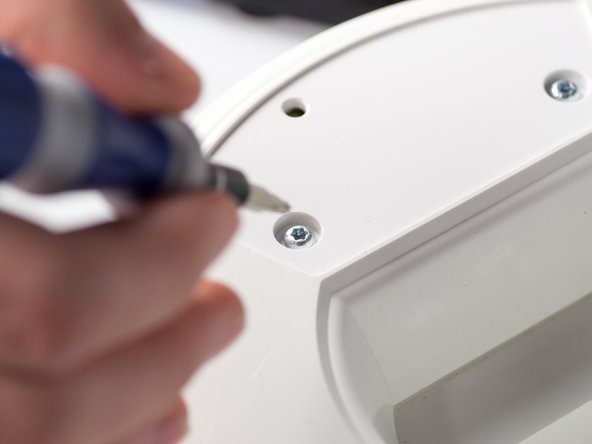
Remove the six 1cm T-10 torx screws on the bottom of the device (found under the rubber pads) using a T-10 Torx screwdriver.
-
-
Questo passaggio è privo di traduzione. Aiuta a tradurlo
-
Disconnect the ribbon cable connector from the top half of the device by pulling outward and parallel to the connecting pins.
-
-
Questo passaggio è privo di traduzione. Aiuta a tradurlo
-
Locate and disconnect the two molex connectors found on either side of the ribbon cable connector on the bottom half of the device.
-
-
Questo passaggio è privo di traduzione. Aiuta a tradurlo
-
Separate speakers from their slots using a metal spudger.
-
-
Questo passaggio è privo di traduzione. Aiuta a tradurlo
-
Cut the black wire (leading to the speaker you are replacing) with a pair of wire cutters.
-
Cut the red wire (leading to the speaker you are replacing) with a pair of wire cutters.
-
Annulla: non ho completato questa guida.
Altre 5 persone hanno completato questa guida.
8 Commenti
Where can I buy the replacement speaker?
I join Gןilberto question,can someone attach a link to replacement speakers or tell what is the p/n of the speakers ?
Thanks !
little bit late i just order it after 2 years searching
Do these work as original driver are 8 ohm?


