Questa versione può contenere modifiche errate. Passa all'ultima istantanea verificata.
Cosa ti serve
-
Questo passaggio è privo di traduzione. Aiuta a tradurlo
-
Turn the device upside down so that the three rubber pads are facing up.
-
-
Questo passaggio è privo di traduzione. Aiuta a tradurlo
-
Use a heat gun (set to low) to apply heat to one of the rubber pads until you can easily remove the pad. This step takes around 5-7 minutes.
-
-
Questo passaggio è privo di traduzione. Aiuta a tradurlo
-
Remove the heated rubber pad with a plastic opening tool.
-
Repeat steps 2 and 3 for the two remaining rubber pads.
-
-
Questo passaggio è privo di traduzione. Aiuta a tradurlo
-
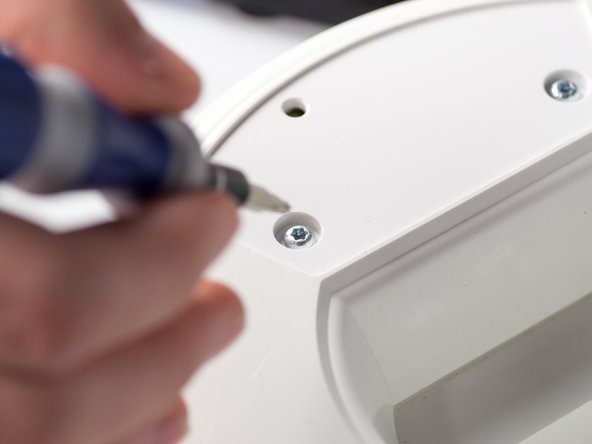
Remove the six 1cm T-10 torx screws on the bottom of the device (found under the rubber pads) using a T-10 Torx screwdriver.
-
-
-
Questo passaggio è privo di traduzione. Aiuta a tradurlo
-
Disconnect the ribbon cable connector from the top half of the device by pulling outward and parallel to the connecting pins.
-
-
Questo passaggio è privo di traduzione. Aiuta a tradurlo
-
Locate and disconnect the two molex connectors found on either side of the ribbon cable connector on the bottom half of the device.
-
-
Questo passaggio è privo di traduzione. Aiuta a tradurlo
-
Apply heat with a heatgun on a low setting to the area around the 30-pin connector until you can easily pry it out by the seam surrounding it (about 10 minutes).
-
-
Questo passaggio è privo di traduzione. Aiuta a tradurlo
-
Use a metal spudger to pry out the plastic surrounding the 30-pin connector.
-
-
Questo passaggio è privo di traduzione. Aiuta a tradurlo
-
Use a pair of tweezers to wiggle out the 30-pin connector.
-


Annulla: non ho completato questa guida.
Un'altra persona ha completato questa guida.
Team

Cal Poly, Team 9-28, Maness Winter 2014 Membro di Cal Poly, Team 9-28, Maness Winter 2014
CPSU-MANESS-W14S9G28
4 Membri
7 Guide realizzate
2 Commenti
and how you get a new one of the 30 pin connector?