Introduzione
Gli altoparlanti sono posizionati dietro la scheda madre. Segui questa guida per sostituire uno o entrambi gli altoparlanti rotti.
Cosa ti serve
-
-
Assicurati che il dispositivo sia spento prima di cominciare lo smontaggio.
-
Rimuovi la guarnizione dallo speaker usando uno spudger in metallo o un "Jimmy".
-
-
-
Usa uno spudger per rimuovere con attenzione il nastro isolante liquido che tiene la batteria ferma nel suo alloggiamento.
This is NOT liquid Electrical tape! I recommend using 3M adhesive silicone. If you are doing this repair then you can find the 3m adhesive silicone at automotive stores. Liquid tape hardens and 3M adhesive remains mailable vs the rock hardening effect of liquid tape.
-
-
-
Rimuovi le quattro viti da 16 mm dal case in plastica bianca con il cacciavite PH2.
The two screws on the right side (side with the USB port) are too long to extract with the iFixit screwdriver in the basic kit. I needed to use a regular thin PH2 screwdriver to get them out.
I had this problem also, whenever putting the screws back in there were still air pockets in the side with smaller screws
-
-
-
-
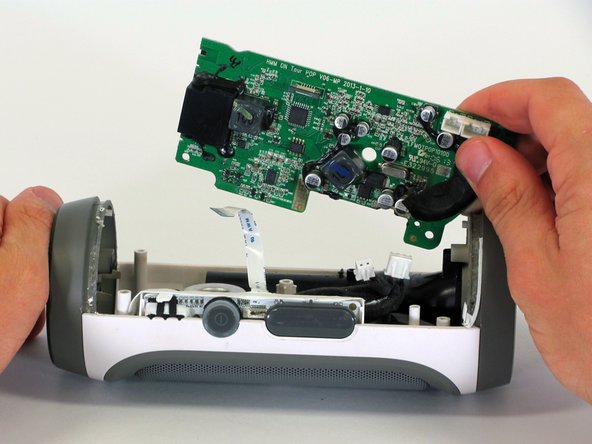
Quando il case posteriore si apre, disconnetti i tre cavi bianchi dalla scheda madre.
-
Rimuovi il case superiore.
Hi , Thanks a lot in my speacker i had broken plastic part which affect clear sound with your guide i open mine seasily and take it out now i have beand new sound which i had before. thanks again.
-
-
-
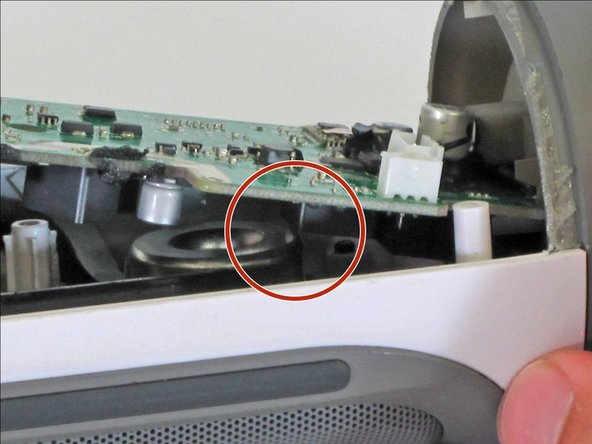
Rimuovi la vite Phillips da 9 mm nell'angolo della scheda madre.
There are 2 screws to remove, the other is under the barcode sticker
-
-
-
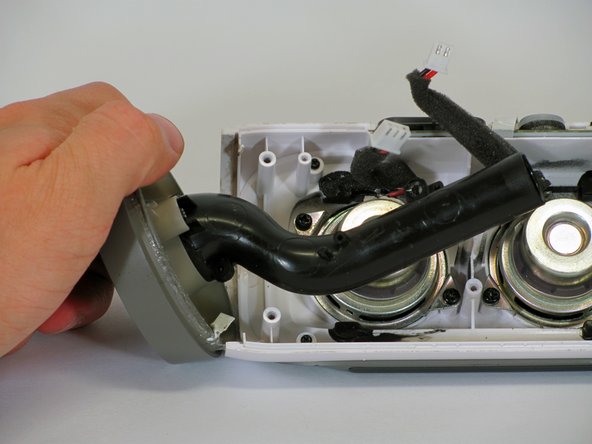
Utilizzando il cacciavite PH1, rimuovi la vite Phillips da 9 mm che collega il tubo nero all'interno del dispositivo.
-
-
-
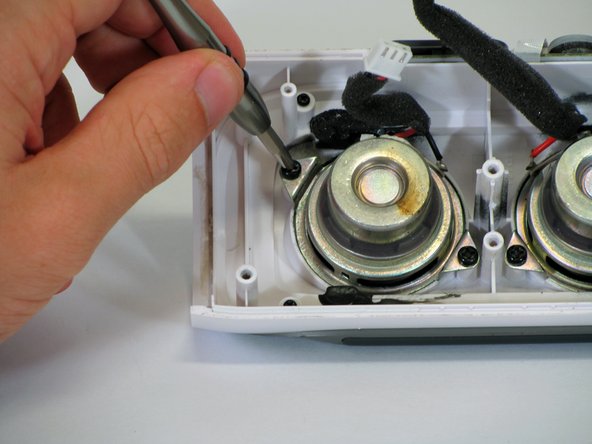
Ogni altoparlante è fissato in posizione con due viti Phillips da 9 mm. Rimuovi le viti utilizzando la punta del cacciavite PH1.
-
Se stai sostituendo l'altoparlante sinistro, rimuovi le viti e l'altoparlante alla tua destra.
-
Se stai sostituendo l'altoparlante destro, rimuovi le viti e l'altoparlante alla tua sinistra.
Where do I find a replacement speaker?
Same here. I am Looking for replacement speakers for the JBL charge 1
Dilly -
-


Per rimontare il dispositivo, segui queste istruzioni all'inverso.
Per rimontare il dispositivo, segui queste istruzioni all'inverso.
Annulla: non ho completato questa guida.
Altre 14 persone hanno completato questa guida.
Un ringraziamento speciale a questi traduttori:
100%


Questi traduttori ci stanno aiutando ad aggiustare il mondo! Vuoi partecipare?
Inizia a tradurre ›
Team

Cal Poly, Team 12-4, Lancaster Spring 2015 Membro di Cal Poly, Team 12-4, Lancaster Spring 2015
CPSU-LANCASTER-S15S12G4
2 Membri
18 Guide realizzate
11 Commenti
Donde encuentro las bocinas no sirven la que tiene
Donde puedo conseguir las bocinas?
Where can I get gthe replacement speaker?
where can i get replaicment speaker?
did you ever find the replacement speakers?
you ever find the replacement speakers?
Hi All, I suggest looking to eBay for broken JBL Charge's to source parts from.
Can the JBL charge power a single or bigger speaker and what is the ohm of the stock speaker