Introduzione
If your pictures are turning out too dark because your flash is not working, you will need to replace the photo flash capacitor. For this guide, some soldering is required. You will need a soldering workstation and Phillips screwdrivers #00 and #000. While following this guide, you must ensure that you ground yourself with the wrist strap so that the motherboard is protected from static discharges. Take note that there is a risk of shocking yourself while performing this replacement.
Cosa ti serve
-
-
The battery compartment can be found on the backside of the camera. Pinpoint this compartment and focus on the right edge of the compartment gate to find the opening latch.
-
-
-
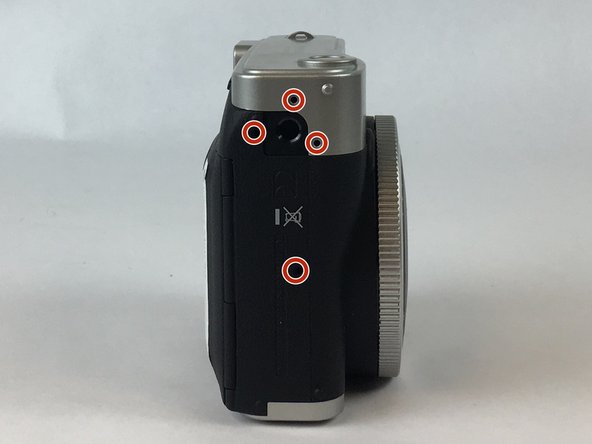
Face the front side of the camera towards you. To locate the left side turn the left side of the camera towards you.
-
Take out the four screws, sized 4.75 mm, with the Phillips #000 screwdriver.
-
-
-
-
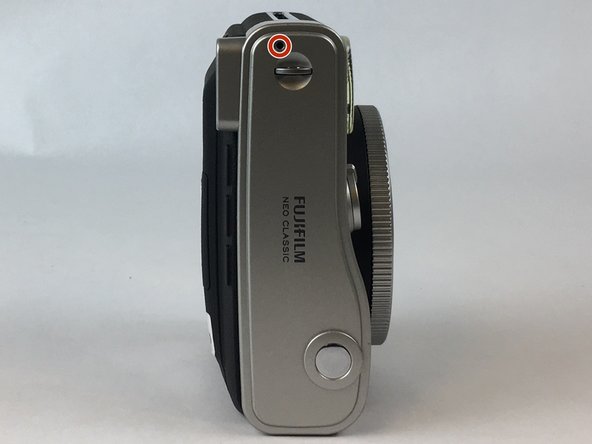
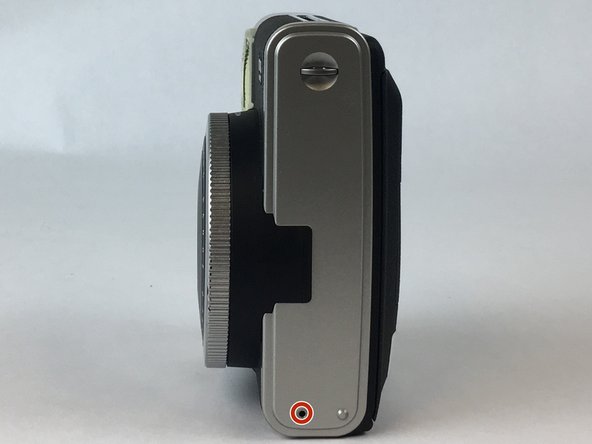
Remove the anchors that hold the strap to the body of the camera. There is one on top, and one on the bottom.
-
Use the black spudger to pry off the silver casing on the top and the bottom of the camera.
-
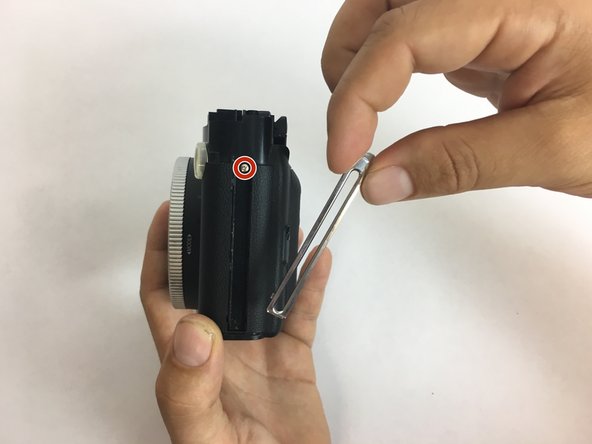
Remove the metal piece from which the film is ejected located on the right side of the camera. There is a 4.75 mm screw under the metal piece. Use a Phillips #000 screw driver to remove it.
-
-
-
Open up the camera by releasing the latches on the top of the camera. Pry open the top half of the camera to reveal the capacitor. Locate the capacitor on the top left of the camera.
-
Use the black spudger to pry out the capacitor.
-
Desolder the brown and white wires, taking note of which goes where.
-
Solder the brown and white wires onto the new capacitor.
-


To reassemble your device, follow these instructions in reverse order.
To reassemble your device, follow these instructions in reverse order.
Annulla: non ho completato questa guida.
Altre 2 persone hanno completato questa guida.
Team

USF Tampa, Team S2-G1, Nance Spring 2017 Membro di USF Tampa, Team S2-G1, Nance Spring 2017
USFT-NANCE-S17S2G1
4 Membri
12 Guide realizzate