Introduzione
Aggiorna il tuo hard disk per aver maggior spazio di archiviazione!
Questa guida ti illustra anche i passi per aggiornare l’hard disk del tuo iMac con un SSD. Descrive come installare il sensore di temperatura dell’SSD per far funzionare le ventole dell’iMac alla velocita’ corretta.
Prima di iniziare qualsiasi lavoro sul tuo iMac: stacca la spina del computer e tieni premuto per dieci secondi il pulsante di accensione per scaricare i condensatori dell’alimentatore.
Stai molto attento a non toccare i fili dei condensatori o ogni altra parte saldata esposta nella parte posteriore dell’alimentatore.
Cosa ti serve
-
-
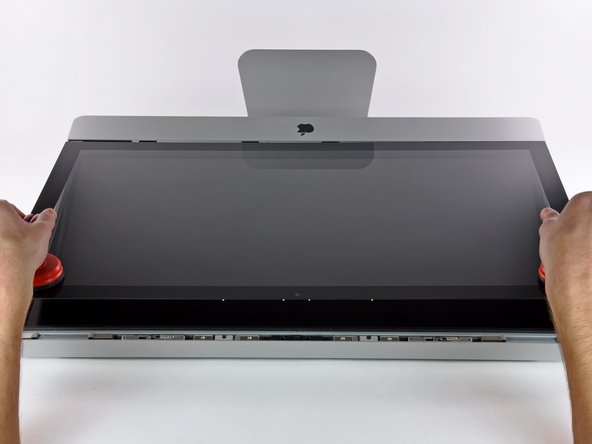
Fai aderire una ventosa accanto a ciascuno dei due angoli superiori del pannello di vetro.
-
Tenendo delicatamente la ventosa contro il vetro, solleva la maniglia orientabile finché non è parallela all'altra maniglia (come indicato nella terza immagine).
-
-
-
Solleva delicatamente il pannello di vetro in perpendicolare rispetto alla superficie dello schermo LCD affinché sia possibile sgombrare i piedini di montaggio in acciaio inseriti lungo il lato sottostante al bordo superiore del pannello di vetro.
-
Estrai il panello di vetro dal bordo inferiore dell'iMac e riponilo da parte con attenzione.
-
-
-
-
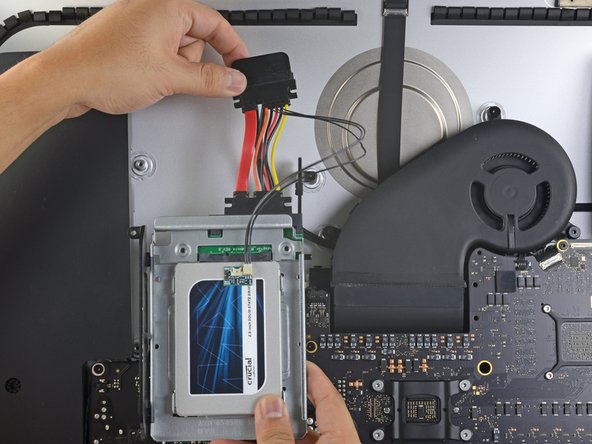
Scollega il sensore termico, il cavo di alimentazione SATA e il cavo dati SATA sfilando i connettori dalle prese sull'hard drive.
-
-
-
Allinea il connettore dell'SSD con i rispettivi zoccoli dell'involucro metallico.
-
Premi il disco contro gli zoccoli dell'alloggiamento finché l'SSD non si blocca in posizione corretta.
-
-
-
Stacca la protezione bianca dal retro della piccola scheda del sensore di temperatura per esporre l'adesivo presente su questo componente.
-
Fai aderire la scheda del sensore di temperatura su una superficie metallica esposta dell'SSD, vicino al connettore SATA.
-
Ripiega i cavi del sensore di temperatura che ingombrano in modo che non siano di intralcio in fase di montaggio dell'alloggiamento.
-
-
-
Trova il connettore sulla scheda madre etichettato HD TMP o HDD TEMP.
-
Se il precedente cavo della temperatura è ancora connesso alla scheda, scollegalo e rimuovilo. Non ti servirà più.
-
Connetti il doppio cavo rosso-nero del sensore di temperatura alla presa sulla scheda madre etichettata HD TMP o HDD TEMP.
-
Ripiega la parte di cavo in eccesso in modo che non interferisca con altri componenti.
-
Per riassemblare il tuo dispositivo, segui queste istruzioni in ordine inverso.
Per riassemblare il tuo dispositivo, segui queste istruzioni in ordine inverso.
Annulla: non ho completato questa guida.
Altre 580 persone hanno completato questa guida.
Un ringraziamento speciale a questi traduttori:
100%
Questi traduttori ci stanno aiutando ad aggiustare il mondo! Vuoi partecipare?
Inizia a tradurre ›
87 Commenti
While putting the system back together, I recommend untaping and removing the vertical sync cable from the back of the led screen. Plug it back into the LED Driver board and then into the back of the screen. Reapply the tape and continue reassembling as normal. It is far easier to plug it back into the screen than into the driver board through such a small gap.
Wow! That's a great tip... I looked at doing this and thought it would be a hassle but if you said it is easier than doing it taped than it must be easier. I'm going to do this time. Thaanx
My hd failed and i used this guide to replace it with the same model. The problem i'm stuck with now is installing os x again. The installation starts and goes on for a while, while the hard drive makes a weird clicking noise. Then randomly the installation fails and asks to try again. I've done this ten times now.
I'm not here to rant though, i've some useful tips as well.
Instead of buying suction cups, i used a vacuum cleaner inserted into the back of a plastic container to create more pressure per inch. Also used duct tape on edges of the container to create more friction and not damage the glass. Although later i noticed you could wedge the sharp edge of a knife between the glass and the case and widen the gap with a fingernail, then pull the glass out completely.
A note when you're buying screw drivers... The ones with the interchangeable bits won't reach the screws on the lcd, so be prepared to fiddle with strips of paper and screws falling into the sides!
Were you able to finally install the osx ?
Kul -
I'm supposing my SSD will go before my HDD, but either way this doesn't look like the inside of my 27" iMac. Help?


