Salta al contenuto principale

Insignia NS-CSPBTHOL-R Power Button Replacement

Cosa ti serve

  1. Insignia NS-CSPBTHOL-R Power Button Replacement, Battery: passo 1, immagine 1 di 1
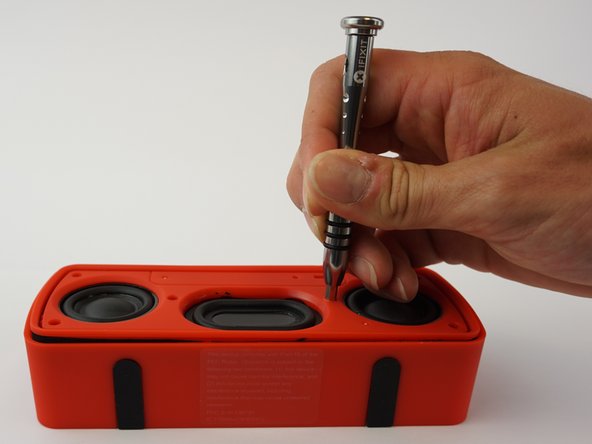
    • Push the Spudger into the crevice between the grated panel of the speaker and the base of the speaker.

    • Angle the spudger to create a separation between the grate and the base.

  2. Insignia NS-CSPBTHOL-R Power Button Replacement: passo 2, immagine 1 di 1
    • Slide the spudger along the separation between the grate and the base of the speaker to loosen the grate. Do this to the entire perimeter of the speaker.

  3. Insignia NS-CSPBTHOL-R Power Button Replacement: passo 3, immagine 1 di 2 Insignia NS-CSPBTHOL-R Power Button Replacement: passo 3, immagine 2 di 2
    • Pull the grated panel off.

  4. Insignia NS-CSPBTHOL-R Power Button Replacement: passo 4, immagine 1 di 2 Insignia NS-CSPBTHOL-R Power Button Replacement: passo 4, immagine 2 di 2
    • Remove the six 3mm screws using the J00 JIS screw bit. This will require a long, narrow screwdriver.

  5. Insignia NS-CSPBTHOL-R Power Button Replacement: passo 5, immagine 1 di 2 Insignia NS-CSPBTHOL-R Power Button Replacement: passo 5, immagine 2 di 2
    • Push the spudger into the crevice between the base and the face of the speaker and create a separation.

    • Slide the spudger along the entire perimeter and gently pull off the face of the speaker.

    • The two parts are connected by wires, do not rip them apart.

  6. Insignia NS-CSPBTHOL-R Power Button Replacement: passo 6, immagine 1 di 1
    • Use the spudger to release the battery by sliding it underneath the battery to create a separation.

    • Remove the battery.

  7. Insignia NS-CSPBTHOL-R Power Button Replacement: passo 7, immagine 1 di 2 Insignia NS-CSPBTHOL-R Power Button Replacement: passo 7, immagine 2 di 2
    • Pull the motherboard from the base of the speaker.

    • Using tweezers, squeeze and pull on the white plastic clip that connects the battery wires to the motherboard.

    • Unclip the battery from the motherboard.

  8. Insignia NS-CSPBTHOL-R Power Button Replacement, Power Button: passo 8, immagine 1 di 3 Insignia NS-CSPBTHOL-R Power Button Replacement, Power Button: passo 8, immagine 2 di 3 Insignia NS-CSPBTHOL-R Power Button Replacement, Power Button: passo 8, immagine 3 di 3
    • Using tweezers, detach the power button from the mother board.

Conclusione

To reassemble your device, follow these instructions in reverse order.

Un'altra persona ha completato questa guida.

Team

USF Tampa, Team 12-6, Eyestone Spring 2017 Membro di USF Tampa, Team 12-6, Eyestone Spring 2017

USFT-EYESTONE-S17S12G6

3 Membri

4 Guide realizzate

0 Commenti

Aggiungi Commento

Visualizza Statistiche:

Ultime 24 Ore: 0

Ultimi 7 Giorni: 1

Ultimi 30 Giorni: 3

Tutti i Tempi: 586