Salta al contenuto principale

Insignia Ice Maker NS-IMP26SS7 Fan Replacement

Cosa ti serve

  1. Insignia Ice Maker NS-IMP26SS7 Fan Replacement, Fan: passo 1, immagine 1 di 2 Insignia Ice Maker NS-IMP26SS7 Fan Replacement, Fan: passo 1, immagine 2 di 2
    • Undo the 6 Screws found on the bottom edge holding the rear casing on.

  2. Insignia Ice Maker NS-IMP26SS7 Fan Replacement: passo 2, immagine 1 di 1
    • Pull the casing off.

  3. Insignia Ice Maker NS-IMP26SS7 Fan Replacement: passo 3, immagine 1 di 2 Insignia Ice Maker NS-IMP26SS7 Fan Replacement: passo 3, immagine 2 di 2
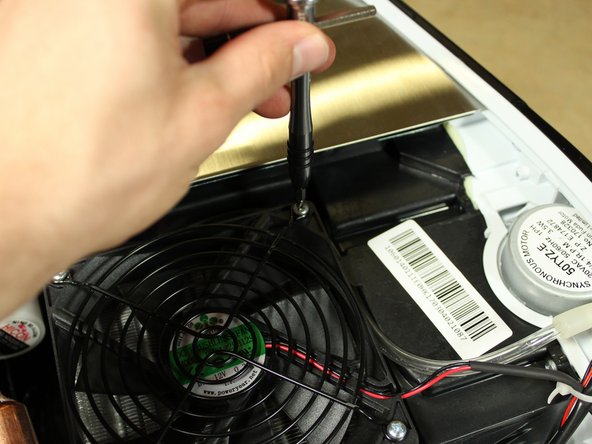
    • Locate the fan on the side of the Ice maker and undo the 4 screws holding it in place.

  4. Insignia Ice Maker NS-IMP26SS7 Fan Replacement: passo 4, immagine 1 di 2 Insignia Ice Maker NS-IMP26SS7 Fan Replacement: passo 4, immagine 2 di 2
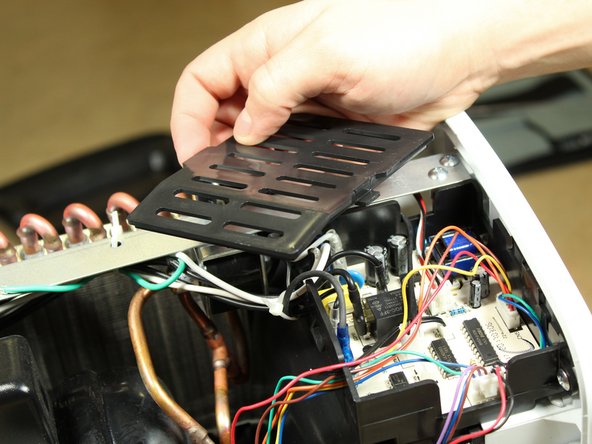
    • Remove the cover from the circuit board by pressing against the lever to the side. A pry tool may be needed.

  5. Insignia Ice Maker NS-IMP26SS7 Fan Replacement: passo 5, immagine 1 di 3 Insignia Ice Maker NS-IMP26SS7 Fan Replacement: passo 5, immagine 2 di 3 Insignia Ice Maker NS-IMP26SS7 Fan Replacement: passo 5, immagine 3 di 3
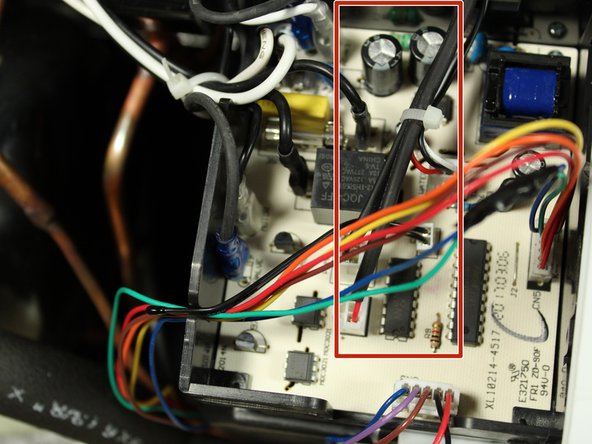
    • Follow the fan's power cable and unplug.

    • You may have to cut a zip tie holding the cable in place.

Conclusione

To reassemble your device, follow these instructions in reverse order.

Un'altra persona ha completato questa guida.

Evan Taylor

Membro da: 01/18/18

616 Reputazione

5 Guide realizzate

Team

Cal Poly, Team S21-G3, Banghart Winter 2018 Membro di Cal Poly, Team S21-G3, Banghart Winter 2018

CPSU-BANGHART-W18S21G3

2 Membri

5 Guide realizzate

0 Commenti

Aggiungi Commento

Visualizza Statistiche:

Ultime 24 Ore: 0

Ultimi 7 Giorni: 8

Ultimi 30 Giorni: 26

Tutti i Tempi: 1,600