Salta al contenuto principale

Infant Optics DXR-8 Monitor Replacement

Guida Archiviata
Questa guida รจ mantenuta solo per scopi storici. Usa la versione aggiornata della guida per eseguire la riparazione.

Cosa ti serve

  1. Infant Optics DXR-8 Monitor Replacement, Monitor: passo 1, immagine 1 di 1
    • Start by gently inserting the plastic opening tool between the led and casing.

  2. Infant Optics DXR-8 Monitor Replacement: passo 2, immagine 1 di 1
    • Slowly pry the cover away from the bottom using the plastic opening tool.

  3. Infant Optics DXR-8 Monitor Replacement: passo 3, immagine 1 di 1
    • Glide the tool around the entire cover to reveal the screws, which are 5.0 mm.

  4. Infant Optics DXR-8 Monitor Replacement: passo 4, immagine 1 di 1
    • Remove the cover and set it aside.

  5. Infant Optics DXR-8 Monitor Replacement: passo 5, immagine 1 di 2 Infant Optics DXR-8 Monitor Replacement: passo 5, immagine 2 di 2
    • Remove the four corner screws, 5.0 mm, using a J1 bit.

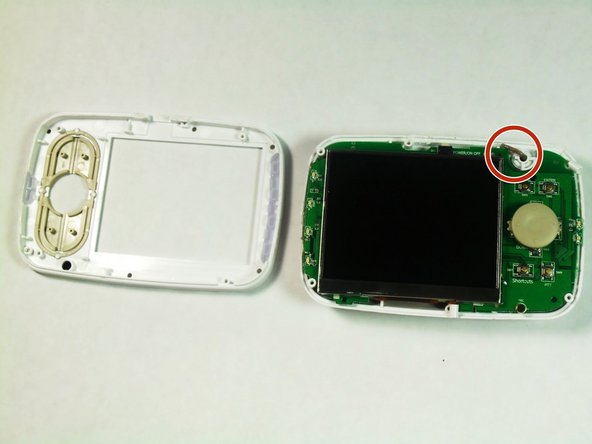
    • Lift the top away from the bottom using the metal spudger. Be careful not to rip the antenna wire.

Conclusione

To reassemble your device, follow these instructions in reverse order.

Altre 6 persone hanno completato questa guida.

Team

USF Tampa, Team 6-4, Remmell Fall 2015 Membro di USF Tampa, Team 6-4, Remmell Fall 2015

USFT-REMMELL-F15S6G4

4 Membri

3 Guide realizzate

2 Commenti

What is the part number for the LCD?

jstarion - Replica

From the pictures LQ035NC111 seem to be the part number.

Michael C -

Aggiungi Commento

Visualizza Statistiche:

Ultime 24 Ore: 0

Ultimi 7 Giorni: 1

Ultimi 30 Giorni: 2

Tutti i Tempi: 5,830