Salta al contenuto principale

IBM ThinkPad T43 Screen Replacement

Cosa ti serve

  1. IBM ThinkPad T43 Screen Replacement, Screen: passo 1, immagine 1 di 3 IBM ThinkPad T43 Screen Replacement, Screen: passo 1, immagine 2 di 3 IBM ThinkPad T43 Screen Replacement, Screen: passo 1, immagine 3 di 3
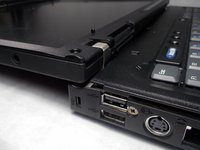
    • Locate the screws holding the screen cover in place.

    • There are 3 screws on the left side, 4 on the right, and 4 across the bottom of the screen.

  2. IBM ThinkPad T43 Screen Replacement: passo 2, immagine 1 di 3 IBM ThinkPad T43 Screen Replacement: passo 2, immagine 2 di 3 IBM ThinkPad T43 Screen Replacement: passo 2, immagine 3 di 3
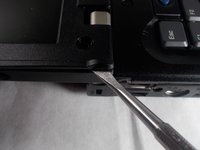
    • Remove the covers by inserting plastic spudger in between the edge of the cover and laptop.

    • Remove screws by using the Phillips head #0

    • The covers are set in with an adhesive so they may pop off when removing them.

  3. IBM ThinkPad T43 Screen Replacement: passo 3, immagine 1 di 3 IBM ThinkPad T43 Screen Replacement: passo 3, immagine 2 di 3 IBM ThinkPad T43 Screen Replacement: passo 3, immagine 3 di 3
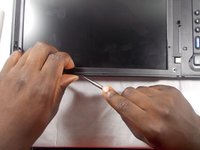
    • Insert the flat metal spudger into the edge of the screen cover and slowly pry open.

    • Slide the spudger along the edges and pry open to release the cover from the clips

    • While slide the spudger up the side of the cover, pinch the cover to help unhook the clips

    • Across the bottom of the screen there is an adhesive, so you will need to carefully pry of that part of the cover

  4. IBM ThinkPad T43 Screen Replacement: passo 4, immagine 1 di 1
    • Remove the two screws located near the bottom middle of the screen

  5. IBM ThinkPad T43 Screen Replacement: passo 5, immagine 1 di 3 IBM ThinkPad T43 Screen Replacement: passo 5, immagine 2 di 3 IBM ThinkPad T43 Screen Replacement: passo 5, immagine 3 di 3
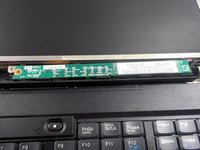
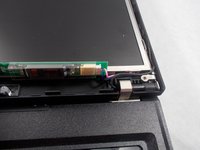
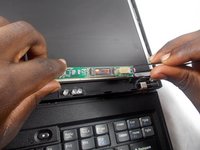
    • Flip over the green rectangular shaped board

    • Disconnect the screen from the rectangular board using your fingers or tweezers

  6. IBM ThinkPad T43 Screen Replacement: passo 6, immagine 1 di 1
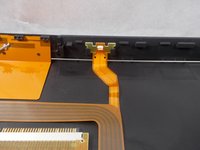
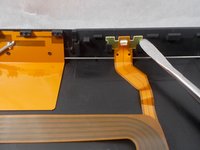
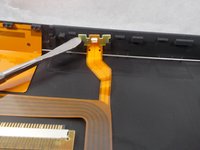
    • Using "Flat metal spudger" lift up the screen from the bottom slowly until you see the ribbon cable

    • Detach the ribbon cable before lifting completely the screen

    • Now you be able to remove the screen

    • Because of how the ribbon cable is connected, it may detach when you lift the screen up

  7. IBM ThinkPad T43 Screen Replacement: passo 7, immagine 1 di 3 IBM ThinkPad T43 Screen Replacement: passo 7, immagine 2 di 3 IBM ThinkPad T43 Screen Replacement: passo 7, immagine 3 di 3
    • To replace the screen follow the next set of steps

    • Using your fingers or tweezers, pull out the light by placing them on the sides and lifting up

    • Insert the wide plug on the ribbon cable into the new screen and place back into the laptop.

    • Now if you follow these steps in reverse order, you will be able to finish replacing the screen

Conclusione

To reassemble your device, follow these instructions in reverse order.

aLiX pIeRRe

Membro da: 03/19/18

855 Reputazione

5 Guide realizzate

Team

0 Commenti

Aggiungi Commento

Visualizza Statistiche:

Ultime 24 Ore: 1

Ultimi 7 Giorni: 4

Ultimi 30 Giorni: 17

Tutti i Tempi: 1,269