Salta al contenuto principale

Huawei u7519 Screen Replacement

Cosa ti serve

  1. Huawei u7519 Screen Replacement, Back Cover: passo 1, immagine 1 di 2 Huawei u7519 Screen Replacement, Back Cover: passo 1, immagine 2 di 2
    • Take off the back covering of the phone along with the battery and SIM card.

    • The SIM card is located above the battery.

  2. Huawei u7519 Screen Replacement: passo 2, immagine 1 di 2 Huawei u7519 Screen Replacement: passo 2, immagine 2 di 2
    • Using the Phillips #00 Screwdriver, take out the four small screws located at the four corners of the phone.

    • Save the screws. They will be needed for reassembly.

  3. Huawei u7519 Screen Replacement: passo 3, immagine 1 di 1
    • Using the same screwdriver, take out the two bigger screws located on each side of the battery compartment.

    • NOTE: Save the screws. They will be needed for reassembly.

  4. Huawei u7519 Screen Replacement: passo 4, immagine 1 di 1
    • Once all the screws are removed, use the iPod opening tool to pry off the back covering of the phone along the edge of the back cover and you will have access to the motherboard.

    • Note: The power and volume buttons will fall out of the phone. Set aside for reassembly.

  5. Huawei u7519 Screen Replacement: passo 5, immagine 1 di 1
    • Carefully pull the backing of the phone from the motherboard with your hands.

  6. Huawei u7519 Screen Replacement, Screen: passo 6, immagine 1 di 2 Huawei u7519 Screen Replacement, Screen: passo 6, immagine 2 di 2
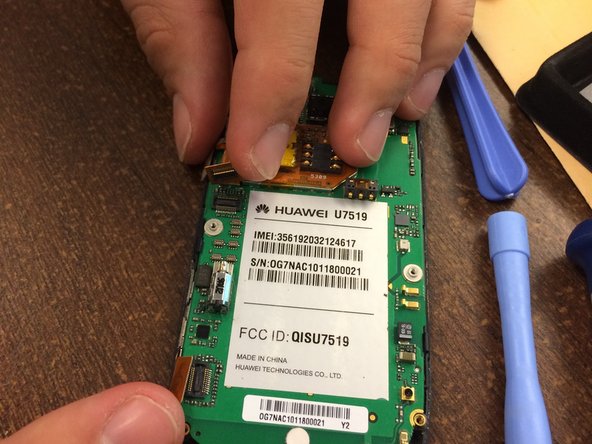
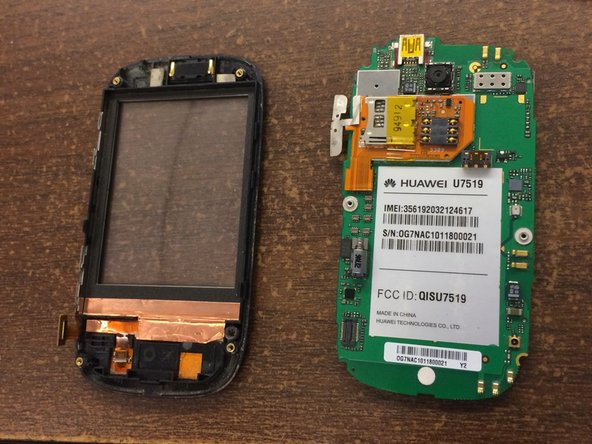
    • To remove front case from the motherboard, first pull back the silver tab (highlighted in blue) and the orange tab (highlighted in red).

  7. Huawei u7519 Screen Replacement: passo 7, immagine 1 di 2 Huawei u7519 Screen Replacement: passo 7, immagine 2 di 2
    • Once the silver and orange tabs are pulled back, carefully pull the motherboard apart from the front case.

  8. Huawei u7519 Screen Replacement: passo 8, immagine 1 di 1
    • Now that the motherboard is separate from the front case, you can discard the original motherboard.

    • The LCD screen can not be removed from the motherboard. Therefore, a new motherboard must be purchased in order to replace this screen.

  9. Huawei u7519 Screen Replacement: passo 9, immagine 1 di 1
    • For reassembly:

    • Place the new motherboard on the front case.

    • Snap the tabs back into place.

    • Replace back casing and snap in place.

    • Screw in screws.

    • Note: you can also follow these steps in reverse, which is the same process as outline above.

    • Note: replacing the power and volume buttons may be tricky. For ease, use tweezers.

    • You have now successfully replaced the screen for the phone.

Conclusione

To reassemble your device, follow these instructions in reverse order.

Altre 5 persone hanno completato questa guida.

Alicia

Membro da: 02/13/14

34 Reputazione

1 Guida realizzata

Team

Ohio State, Team 1-1, Meza Spring 2014 Membro di Ohio State, Team 1-1, Meza Spring 2014

OSU-MEZA-S14S1G1

4 Membri

6 Guide realizzate

0 Commenti

Aggiungi Commento

Visualizza Statistiche:

Ultime 24 Ore: 0

Ultimi 7 Giorni: 0

Ultimi 30 Giorni: 1

Tutti i Tempi: 714