Salta al contenuto principale

Huawei Union Screen Replacement

Cosa ti serve

  1. Huawei Union Screen Replacement, Battery: passo 1, immagine 1 di 2 Huawei Union Screen Replacement, Battery: passo 1, immagine 2 di 2
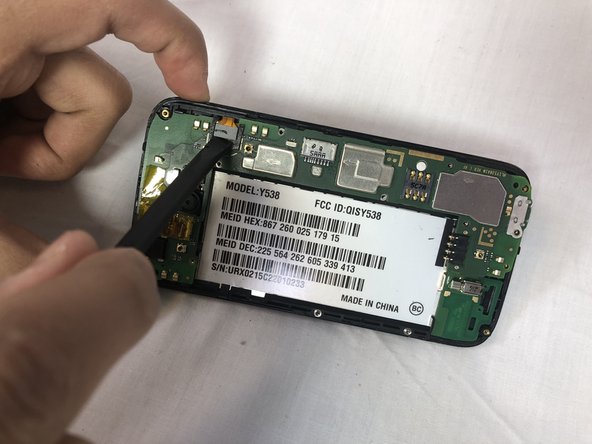
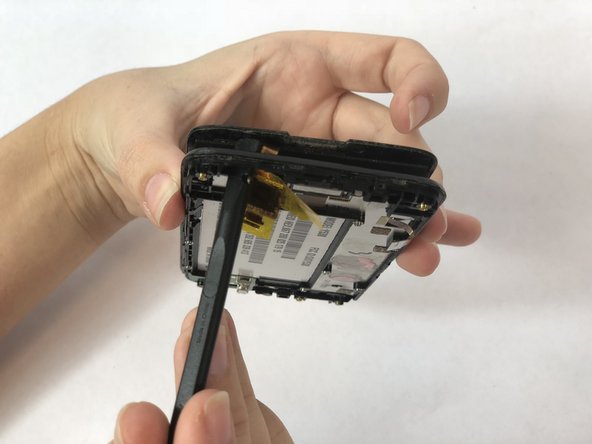
    • Wedge your thumb nail, or the flat end of a spudger, into the bottom left corner and pry off.

  2. Huawei Union Screen Replacement: passo 2, immagine 1 di 2 Huawei Union Screen Replacement: passo 2, immagine 2 di 2
    • Use the flat end of a spudger, or fingernail, to lift up the battery and pull out.

  3. Huawei Union Screen Replacement, Camera Lens Panel: passo 3, immagine 1 di 1
    • Remove the thirteen 3mm Phillips #00 screws from the back panel.

  4. Huawei Union Screen Replacement: passo 4, immagine 1 di 1
    • Use the flat end of a spudger to pry off the back panel.

  5. Huawei Union Screen Replacement, Motherboard: passo 5, immagine 1 di 1
    • Remove a single 3mm Phillips #00 screw from the motherboard.

  6. Huawei Union Screen Replacement: passo 6, immagine 1 di 2 Huawei Union Screen Replacement: passo 6, immagine 2 di 2
    • Using the flat end of a spudger to disconnect the motherboard ribbon cable.

  7. Huawei Union Screen Replacement: passo 7, immagine 1 di 1
    • Firmly hold the second ribbon cable's plastic film cover and pull up to disconnect.

  8. Huawei Union Screen Replacement: passo 8, immagine 1 di 2 Huawei Union Screen Replacement: passo 8, immagine 2 di 2
    • Wedge the flat end of a spudger underneath the motherboard and pry upwards to separate it from the frame.

  9. Huawei Union Screen Replacement, Screen: passo 9, immagine 1 di 1
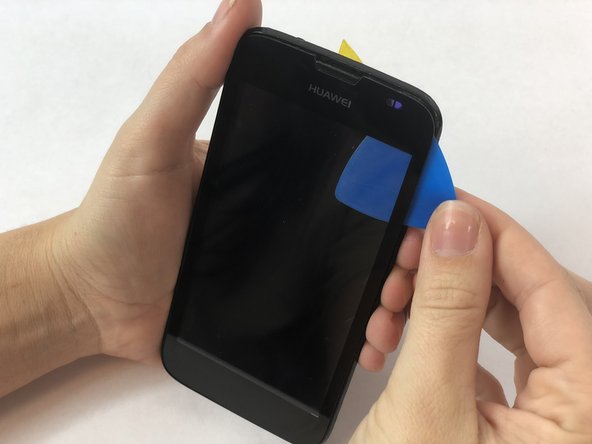
    • Using an iOpener heat source tool, warm the screen of the phone to loosen adhesive of the screen.

  10. Huawei Union Screen Replacement: passo 10, immagine 1 di 2 Huawei Union Screen Replacement: passo 10, immagine 2 di 2
    • Wedge an opening pick underneath the screen and slowly work your way around the screen.

  11. Huawei Union Screen Replacement: passo 11, immagine 1 di 2 Huawei Union Screen Replacement: passo 11, immagine 2 di 2
    • Using multiple Opening Picks, work your way around the edges making sure not to place too much pressure at any one point.

    • With each pass, move the Opening Pick further to complete separation.

  12. Huawei Union Screen Replacement: passo 12, immagine 1 di 3 Huawei Union Screen Replacement: passo 12, immagine 2 di 3 Huawei Union Screen Replacement: passo 12, immagine 3 di 3
    • Once screen is sufficiently separated, holding the sides of the frame firmly, use the Spudger to press through the small access window to the screen at the top let and completely separate the screen from the frame.

    • Do not push too firmly. Screen may break. If screen will not separate, use iOpener heating element again and start over.

    • Do not press too far when separating the screen. There is a small ribbon cable attached to the screen that must be gently drawn through small access window.

  13. Huawei Union Screen Replacement: passo 13, immagine 1 di 1
    • Pull screen away from frame making sure the ribbon cable stays attached.

Conclusione

To reassemble your device, follow these instructions in reverse order.

Team

USF Tampa, Team S1-G1, Nance Spring 2018 Membro di USF Tampa, Team S1-G1, Nance Spring 2018

USFT-NANCE-S18S1G1

4 Membri

12 Guide realizzate

0 Commenti

Aggiungi Commento

Visualizza Statistiche:

Ultime 24 Ore: 0

Ultimi 7 Giorni: 0

Ultimi 30 Giorni: 5

Tutti i Tempi: 465