Salta al contenuto principale

Huawei P9 Plus Display

Solo Prerequisita
Questa guida è destinata a essere usata solo come prerequisito per altre guide. Da sola è incompleta.

Cosa ti serve

  1. Huawei P9 Plus Display, Rear Case: passo 1, immagine 1 di 2 Huawei P9 Plus Display, Rear Case: passo 1, immagine 2 di 2
    • First switch off your phone.

    • Remove the SD and SIM card tray.

  2. Huawei P9 Plus Display: passo 2, immagine 1 di 1
    • Remove the two P2 Pentalobe screws on either side of the USB C port.

  3. Huawei P9 Plus Display: passo 3, immagine 1 di 2 Huawei P9 Plus Display: passo 3, immagine 2 di 2
    • Use an iSclack or a suction handle to separate the display unit from the rear case.

    • Do not fully separate the pieces as they are still connected by the fingerprint sensor cable.

  4. Huawei P9 Plus Display: passo 4, immagine 1 di 3 Huawei P9 Plus Display: passo 4, immagine 2 di 3 Huawei P9 Plus Display: passo 4, immagine 3 di 3
    • After separating the rear case flip the other half open to get to the flex connectors.

    • With a spudger unplug the flex connector of the fingerprint sensor and the one of the side buttons.

    • Remove the rear case.

  5. Huawei P9 Plus Display, Battery: passo 5, immagine 1 di 2 Huawei P9 Plus Display, Battery: passo 5, immagine 2 di 2
    • Remove the sticker that sits on top of the left screw above the battery.

    • Remove the three Phillips #00 screws that hold the metal plates in place.

  6. Huawei P9 Plus Display: passo 6, immagine 1 di 2 Huawei P9 Plus Display: passo 6, immagine 2 di 2
    • Both metal plates have little hooks. Use a tweezer to free them and unhinge the plates by carefully moving them upwards.

  7. Huawei P9 Plus Display: passo 7, immagine 1 di 3 Huawei P9 Plus Display: passo 7, immagine 2 di 3 Huawei P9 Plus Display: passo 7, immagine 3 di 3
    • Use a spudger to unplug the screen flex cable.

    • Unplug the motherboard flex cable and the battery flex cable afterwards.

  8. Huawei P9 Plus Display: passo 8, immagine 1 di 2 Huawei P9 Plus Display: passo 8, immagine 2 di 2
    • The adhesive strips at the top of the battery are less likely to rip if you pull them horizontally in a straight line and not upwards or in any other direction.

    • Use a set of tweezers to unfold the black tab enough to grab with your fingers.

    • Pull the first adhesive strip in a slow and constant movement.

    • Jerking or slackening your grip can cause the adhesive to bunch up and rip.

  9. Huawei P9 Plus Display: passo 9, immagine 1 di 2 Huawei P9 Plus Display: passo 9, immagine 2 di 2
    • Loosen the end of the other adhesive strip with a tweezer and pull it out. If needed use the iOpener again to soften the glue a little.

  10. Huawei P9 Plus Display: passo 10, immagine 1 di 3 Huawei P9 Plus Display: passo 10, immagine 2 di 3 Huawei P9 Plus Display: passo 10, immagine 3 di 3
    Attrezzo utilizzato in questo passaggio:
    Tesa 61395 Tape
    $5.99
    Compra
    • Use a spudger to slide under the battery.

    • If you managed to pull out the adhesive strips you can easily lift out the battery. Otherwise use the iOpener once more to soften any adhesive leftovers. There are no cables under the battery that can be harmed.

    • Remove the battery.

    • When reassembling your phone, replace old adhesive with stretch release adhesive strips, double-sided tape, or pre-cut adhesive strips.

  11. Huawei P9 Plus Display, Display: passo 11, immagine 1 di 3 Huawei P9 Plus Display, Display: passo 11, immagine 2 di 3 Huawei P9 Plus Display, Display: passo 11, immagine 3 di 3
    • Use a tweezer to remove the sticker that sits on top of the screw next to the antenna cable.

    • Unplug the antenna cable and release it from the bracket on the metal plate covering the main flex cable.

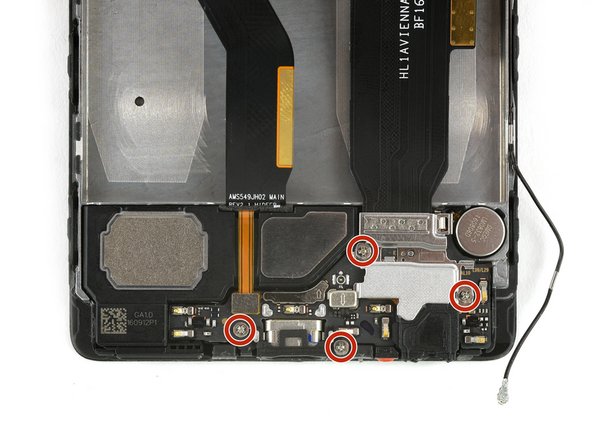
    • Remove the four Phillips #00 screws.
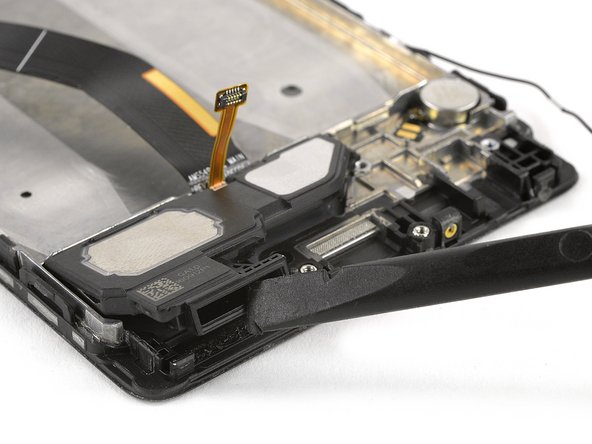
  12. Huawei P9 Plus Display: passo 12, immagine 1 di 3 Huawei P9 Plus Display: passo 12, immagine 2 di 3 Huawei P9 Plus Display: passo 12, immagine 3 di 3
    • The plate, which is covering the motherboard flex cable, has little hooks on each side. Use a tweezer to free them and unhinge the plate by carefully moving it upwards.

    • Use a spudger to unplug the motherboard flex cable and remove it.

    • Unplug the flex connector of the loudspeaker.

  13. Huawei P9 Plus Display: passo 13, immagine 1 di 2 Huawei P9 Plus Display: passo 13, immagine 2 di 2
    • Use a spudger to unplug the flex connector of the headphone jack.

    • Remove the headphone jack.

    • Be careful with the contacts inside and in the bottom area of the headphone jack. They can be damaged easily.

  14. Huawei P9 Plus Display: passo 14, immagine 1 di 2 Huawei P9 Plus Display: passo 14, immagine 2 di 2
    • Use a spudger to lift out the daughter board.

    • Lift the loudspeaker out of the mid frame. There is some adhesive underneath, so it can be a little bit sticky.

Conclusione

To reassemble your device, follow these instructions in reverse order. Reapply adhesive where necessary.

Team

iFixit Membro di iFixit

Staff

135 Membri

16.734 Guide realizzate

0 Commenti

Aggiungi Commento

Visualizza Statistiche:

Ultime 24 Ore: 0

Ultimi 7 Giorni: 0

Ultimi 30 Giorni: 0

Tutti i Tempi: 234