Salta al contenuto principale

Huawei P10 Display Replacement

Cosa ti serve

  1. Huawei P10 Display Replacement, Back Cover: passo 1, immagine 1 di 3 Huawei P10 Display Replacement, Back Cover: passo 1, immagine 2 di 3 Huawei P10 Display Replacement, Back Cover: passo 1, immagine 3 di 3
    • Switch off your phone.

    • Remove the two Pentalobe P2 screws at the bottom.

    • Remove the SIM card tray.

  2. Huawei P10 Display Replacement: passo 2, immagine 1 di 3 Huawei P10 Display Replacement: passo 2, immagine 2 di 3 Huawei P10 Display Replacement: passo 2, immagine 3 di 3
    • Insert a plastic opening tool between the display and the case starting at the bottom area of your phone.

    • Carefully pry the display with its parts out of the case.

    • Getting the prying tool in will require some effort, be careful not to slide the tool too much or you might slightly damage the housing.

    • After you pried out the bottom end, use the opening tool to open the clamps on both sides.

  3. Huawei P10 Display Replacement: passo 3, immagine 1 di 2 Huawei P10 Display Replacement: passo 3, immagine 2 di 2
    • Don't open the phone all the way, yet. The cable for the standby and volume buttons is still connected to the back cover.

    • Swing open the phone backwards.

    • Use a spudger to disconnect the power- and volume button flex cable.

  4. Huawei P10 Display Replacement, Main and display flex disconnect: passo 4, immagine 1 di 3 Huawei P10 Display Replacement, Main and display flex disconnect: passo 4, immagine 2 di 3 Huawei P10 Display Replacement, Main and display flex disconnect: passo 4, immagine 3 di 3
    Attrezzo utilizzato in questo passaggio:
    Tweezers
    $4.99
    Compra
    • Remove the two Phillips #00 screws.

    • Use tweezers to remove both metal plates.

  5. Huawei P10 Display Replacement: passo 5, immagine 1 di 3 Huawei P10 Display Replacement: passo 5, immagine 2 di 3 Huawei P10 Display Replacement: passo 5, immagine 3 di 3
    • Use a spudger to disconnect the interconnect, the battery and the display flex cable.

  6. Huawei P10 Display Replacement, Charging Board: passo 6, immagine 1 di 2 Huawei P10 Display Replacement, Charging Board: passo 6, immagine 2 di 2
    Attrezzo utilizzato in questo passaggio:
    Tweezers
    $4.99
    Compra
    • Remove the four Phillips #00 screws.

    • Use Tweezers to remove the metal plate.

  7. Huawei P10 Display Replacement: passo 7, immagine 1 di 2 Huawei P10 Display Replacement: passo 7, immagine 2 di 2
    • Use a spudger to disconnect the main flex cable.

    • Use tweezers to disconnect the antenna cable and pull it out of the clamp holding it down to the charging board.

  8. Huawei P10 Display Replacement: passo 8, immagine 1 di 2 Huawei P10 Display Replacement: passo 8, immagine 2 di 2
    • Use a spudger to disconnect the headphone jack and the loudspeaker flex cables.

  9. Huawei P10 Display Replacement: passo 9, immagine 1 di 2 Huawei P10 Display Replacement: passo 9, immagine 2 di 2
    • Do not damage any components sitting on the charging board while removing it.

    • Use a spudger to pry out the charging board.

    • Remove the charging board.

  10. Huawei P10 Display Replacement, Loudspeaker: passo 10, immagine 1 di 2 Huawei P10 Display Replacement, Loudspeaker: passo 10, immagine 2 di 2
    • Only insert the spudger as deep as 1/16 of an inch to avoid damage.

    • Use a spudger to carefully pry out the loudspeaker. There is some adhesive underneath so it might be a little bit sticky. You can use an iOpener to loosen it.

    • Remove the loudspeaker.

    • When reassembling your phone, apply new adhesive where it's necessary.

  11. Huawei P10 Display Replacement, Display: passo 11, immagine 1 di 2 Huawei P10 Display Replacement, Display: passo 11, immagine 2 di 2
    Attrezzo utilizzato in questo passaggio:
    Tweezers
    $4.99
    Compra
    • Remove the antenna cable if you haven't already.

    • Use tweezers to remove the interconnect cable.

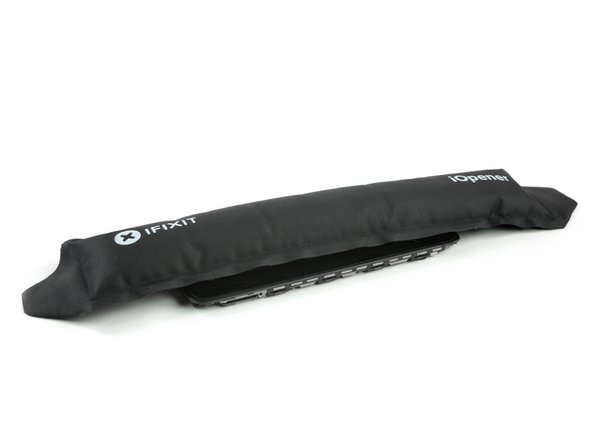
    • Use an iOpener to loosen the adhesive beneath the display. Especially take care of the upper and lower part of the display.

  12. Huawei P10 Display Replacement: passo 12, immagine 1 di 3 Huawei P10 Display Replacement: passo 12, immagine 2 di 3 Huawei P10 Display Replacement: passo 12, immagine 3 di 3
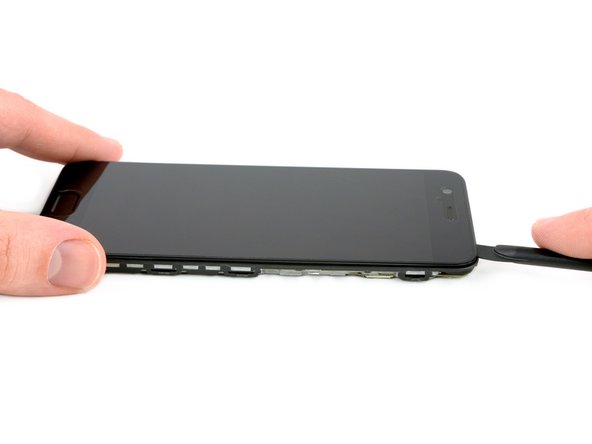
    • Insert the tip of an opening pick between the display and the midframe on the bottom of the phone, near the home button.

    • Slide the opening pick along the bottom edge, to cut the adhesive.

    • Slide the opening pick to the bottom right corner and leave it there.

    • Insert another opening pick under the screen on the bottom left corner.

  13. Huawei P10 Display Replacement: passo 13, immagine 1 di 3 Huawei P10 Display Replacement: passo 13, immagine 2 di 3 Huawei P10 Display Replacement: passo 13, immagine 3 di 3
    • Slide the opening pick under the screen around all edges of the phone.

    • If the adhesive gets tough to pry it is likely too cold. Use your iOpener or heat gun to reheat it.

  14. Huawei P10 Display Replacement: passo 14, immagine 1 di 2 Huawei P10 Display Replacement: passo 14, immagine 2 di 2
    • Carefully pull the display assembly away from the frame.

    • Remove the display assembly.

Conclusione

To reassemble your device, follow these instructions in reverse order.

Altre 23 persone hanno completato questa guida.

Team

iFixit Membro di iFixit

Staff

141 Membri

17.895 Guide realizzate

4 Commenti

Any advice which adhesive to use? I’ve seen a russian replacement video, it looked like the guy was using some kind of silicone.

Tom My - Replica

I used B-7000 glue. It enables you to release the screen when a second replacement is needed.

teunkeusters -

Assuming I purchase a screen off of ebay, and replace it using this method, will the touch id still work?

Simon Fisher - Replica

Aggiungi Commento

Visualizza Statistiche:

Ultime 24 Ore: 0

Ultimi 7 Giorni: 17

Ultimi 30 Giorni: 95

Tutti i Tempi: 26,771