Questa versione può contenere modifiche errate. Passa all'ultima istantanea verificata.
Cosa ti serve
-
Questo passaggio è privo di traduzione. Aiuta a tradurlo
-
Remove screen door from the frame.
-
Disconnect any door closers or safety chains on the door.
-
Remove the screws holding the door to the aluminum frame located on the hinge side of the door.
-
-
Questo passaggio è privo di traduzione. Aiuta a tradurlo
-
Lay the door on a hard surface.
-
Make sure the side with the spine showing is face up.
-
-
Questo passaggio è privo di traduzione. Aiuta a tradurlo
-
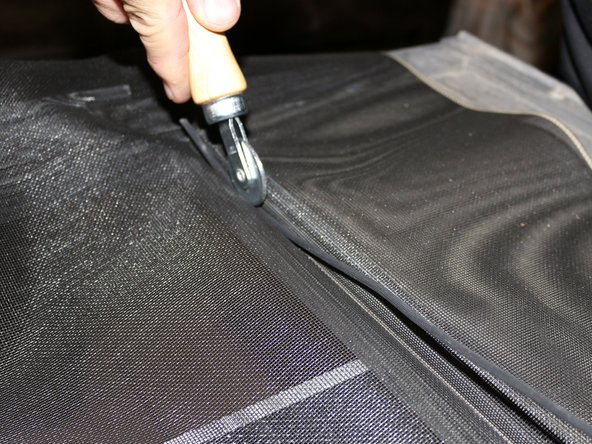
Remove spline by using an awl or pointed object. Pry the end up and pull the spline to remove it from the frame.
-
-
Questo passaggio è privo di traduzione. Aiuta a tradurlo
-
Remove the old screen fabric from the frame.
-
-
-
Questo passaggio è privo di traduzione. Aiuta a tradurlo
-
Cut screen to a manageable size. (2 inches larger than the frame is ideal.)
-
-
Questo passaggio è privo di traduzione. Aiuta a tradurlo
-
Tape or secure screen to prevent movement during spline installation.
-
-
Questo passaggio è privo di traduzione. Aiuta a tradurlo
-
Run concave roller over the screen in the groove designed for the spline.
-
Pre-shape the screen into the channel so that the spline will go in willingly.
-
-
Questo passaggio è privo di traduzione. Aiuta a tradurlo
-
Begin at a top corner and press the spline down over the screen fabric and into the groove on the frame using the convex roller.
-
-
Questo passaggio è privo di traduzione. Aiuta a tradurlo
-
Trim off the excess spline using a razor blade.
-
-
Questo passaggio è privo di traduzione. Aiuta a tradurlo
-
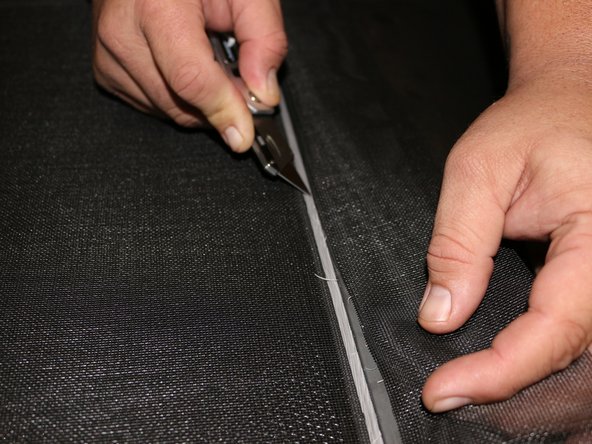
Trim the extra screen material flush at the edge of the retaining spline with a razor blade, creating a neat appearance.
-
-
Questo passaggio è privo di traduzione. Aiuta a tradurlo
-
Reinstall the door reversing the process of Step 1.
-
-
Questo passaggio è privo di traduzione. Aiuta a tradurlo
-
The job is done, and the screen door looks great.
-


Annulla: non ho completato questa guida.
Un'altra persona ha completato questa guida.

Team

USF Sarasota-Manatee, Team S1-G1, Stewart Spring 2020 Membro di USF Sarasota-Manatee, Team S1-G1, Stewart Spring 2020
USFSM-STEWART-S20S1G1
23 Membri
27 Guide realizzate