Introduzione
After repeated use from hiking, running, walking, training, it's totally normal for the inner soles of your shoes to lose their support as the foam becomes compressed or damaged.
Don't let this simple problem stand in the way of wearing your favourite sports shoes! After a quick change of the inner sole, you'll be ready to go again!
Cosa ti serve
-
-
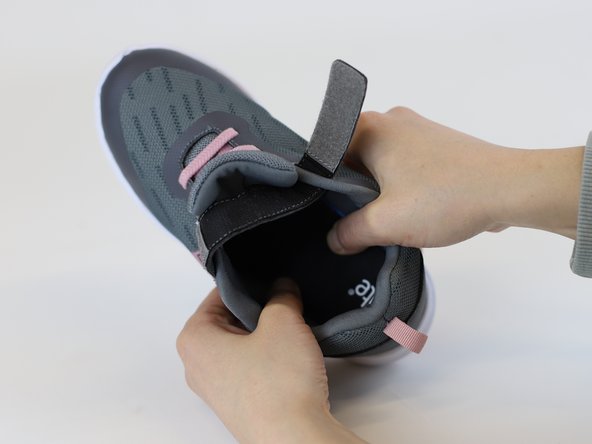
Remove the old inner sole by gently but firmly pulling to detach it from the shoe's bottom.
-
If the inner sole is stuck, use a flat tool, like a spoon or the edge of a credit card, to help lift it. Some inner soles are glued strongly, and others are not glued at all: take care not to damage the shoe when removing the inner sole.
-
Tip: Take note of any specific contours or shapes in the old inner sole that you may want to replicate. When buying a replacement, look for one which matches the old one.
-
-
-
Now you need to purchase a new inner sole.
-
If you found one which is the same size as your old one, you can skip the next step. But many replacement inner soles need to be cut to size.
-
Place the old inner sole on top of the replacement material.
-
Trace its outline with a pen or marker onto the new material
-
Take care: Keep both new and old inner soles facing upside-down, so that you mark on the bottom side, and that after cutting, the correct side faces up
-
-
-
-
Carefully cut along the traced lines of the inner sole.
-
Ensure a precise fit by trimming any excess material.
-
Tip: If the replacement insole is thicker than the original, check for any tightness in the shoe.
-
-
-
Place the cut-out inner sole into the shoe, aligning it with the contours and edges.
-
Push down around the edges with your fingers, and then put your foot into the shoe and push down with your toes.
-
Wiggle your toes and walk around to check for any discomfort or misalignment.
-
-
-
🛠️🏆👏 Congratulations! The repair is complete, and you're ready to go!
-


In need of another repair? Don't worry! Check out our other guides to find quick solutions for your favourite clothing, footwear and equipment!
In need of another repair? Don't worry! Check out our other guides to find quick solutions for your favourite clothing, footwear and equipment!

Team
