Salta al contenuto principale
How to Tie a Tie: Four-in-Hand

How to Tie a Tie: Four-in-Hand

Electric Warthogs

Electric Warthogs e 3 altri collaboratori

Ultimo aggiornamento il March 13, 2018

1 - 5 minuti
Facile
Guida fornita dalla comunità

Introduzione

Vai al passo 1

Active End: The end of the tie that will be used to tie the knot. This can be either the wide end or narrow end of the tie depending on the tie knot.

Shirt Collar: A band of material around the neck of a shirt that can either be folded or unfolded.

Neck Loop: The loop of the tie that goes around the collar.

Keeper Loop: A piece of fabric that is sewn onto the underside of the wide end of the tie that can be used to keep the narrow end of the tie hidden.

Four-in-Hand: A simple and common knot that is incredibly versatile and appropriate for many different occasions.

Cosa ti serve

Ricambi

  1. How to Tie a Tie: Four-in-Hand, Preparation: passo 1, immagine 1 di 1
    • Fold the collar of your shirt up.

  2. How to Tie a Tie: Four-in-Hand: passo 2, immagine 1 di 1
    • Wrap the tie around the back of your neck with the narrow end on the left side of your body and the wide end on the right side.

    • The wide end of the tie will be your active end.

    • Note: The narrow end of the tie should be around the height of your belly button or a little higher. It may need to adjusted for personal height.

  3. How to Tie a Tie: Four-in-Hand, Tying: passo 3, immagine 1 di 1
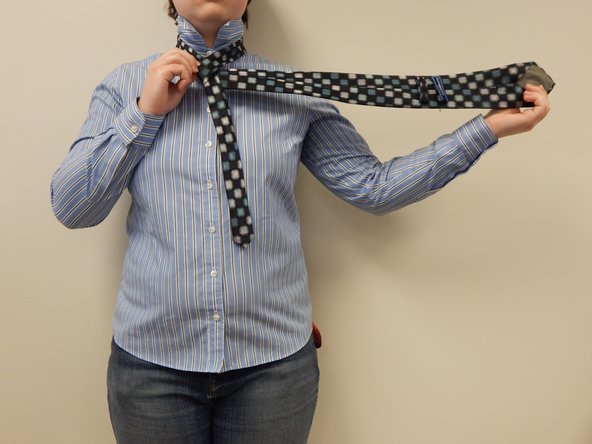
    • Take the active end and cross it over the narrow end, so that it points to the left.

    • Note: be sure that the tie always lays flat so there are no twists in the fabric.

  4. How to Tie a Tie: Four-in-Hand: passo 4, immagine 1 di 1
    • Wrap active end under the narrow end, so that it now points to the right.

  5. How to Tie a Tie: Four-in-Hand: passo 5, immagine 1 di 1
    • Wrap active end over the narrow end, so that it now points to the left.

    • Note: leave this wrap a little loose, as it will be used in step 7.

  6. How to Tie a Tie: Four-in-Hand: passo 6, immagine 1 di 1
    • Pull the active end up through the neck loop, so that it now points up.

  7. How to Tie a Tie: Four-in-Hand: passo 7, immagine 1 di 2 How to Tie a Tie: Four-in-Hand: passo 7, immagine 2 di 2
    • Pull the active end down through the wrap you created in step 5 (see second picture).

  8. How to Tie a Tie: Four-in-Hand, Finishing: passo 8, immagine 1 di 1
    • Tighten the knot by pulling down on the active end and up on the knot, adjusting for size and evenness.

  9. How to Tie a Tie: Four-in-Hand: passo 9, immagine 1 di 1
    • Tighten the neck loop by pulling down on the narrow end of the tie and sliding the knot up toward your neck.

  10. How to Tie a Tie: Four-in-Hand: passo 10, immagine 1 di 1
    • Tuck the narrow end of the tie through the keeper loop.

    • Note: if the narrow end is too long, a simple solution lies in tucking the narrow end between two buttons of your shirt.

    • Fold your collar down when the knot is finished.

Conclusione

Congratulations! You've successful tied the Four-in-Hand knot!

Altre 5 persone hanno completato questa guida.

Team

The Electric Warthogs Membro di The Electric Warthogs

Community

3 Membri

5 Guide realizzate

0Commenti sulla guida

Aggiungi Commento

Visualizza Statistiche:

Ultime 24 Ore: 0

Ultimi 7 Giorni: 4

Ultimi 30 Giorni: 15

Tutti i Tempi: 2,015