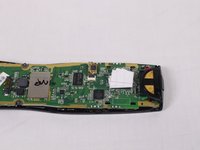
Salta al contenuto principale

How to Stabilize the Logitech Harmony 900 Motherboard

Cosa ti serve

  1. How to Stabilize the Logitech Harmony 900 Motherboard, Battery: passo 1, immagine 1 di 2 How to Stabilize the Logitech Harmony 900 Motherboard, Battery: passo 1, immagine 2 di 2
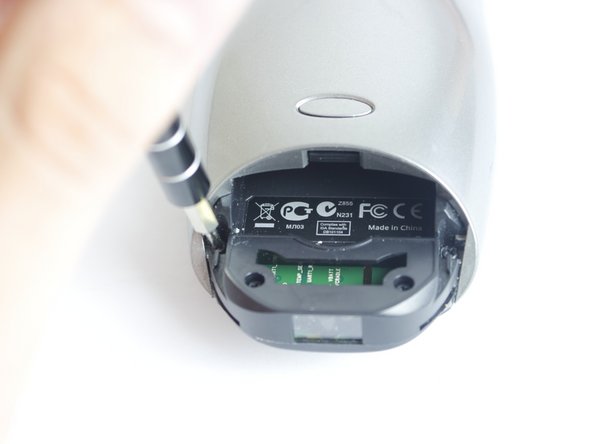
    • Press the oval shaped button on the lower back of the remote to release the battery cover.

    • While pressing the button, remove the cover.

  2. How to Stabilize the Logitech Harmony 900 Motherboard: passo 2, immagine 1 di 2 How to Stabilize the Logitech Harmony 900 Motherboard: passo 2, immagine 2 di 2
    • Push the battery in, pull it up, and slide it out.

  3. How to Stabilize the Logitech Harmony 900 Motherboard, Motherboard: passo 3, immagine 1 di 1
    Attrezzo utilizzato in questo passaggio:
    Tweezers
    $4.99
    Compra
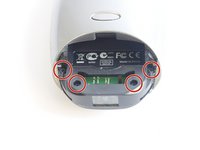
    • Using tweezers, peel off the sticker located under the battery cover to reveal two screws.

  4. How to Stabilize the Logitech Harmony 900 Motherboard: passo 4, immagine 1 di 2 How to Stabilize the Logitech Harmony 900 Motherboard: passo 4, immagine 2 di 2
    • Locate and unscrew the four 50mm screws using the Philips #0 screwdriver.

  5. How to Stabilize the Logitech Harmony 900 Motherboard: passo 5, immagine 1 di 1
    • Use a credit card to pry the black, plastic, back cover off of the device.

    • You may need to get the process started with a metal prying tool before you start using the credit card.

  6. How to Stabilize the Logitech Harmony 900 Motherboard: passo 6, immagine 1 di 2 How to Stabilize the Logitech Harmony 900 Motherboard: passo 6, immagine 2 di 2
    • Locate the three 50mm screws on the back of the remote and remove them using the Phillips #0 screwdriver.

  7. How to Stabilize the Logitech Harmony 900 Motherboard: passo 7, immagine 1 di 2 How to Stabilize the Logitech Harmony 900 Motherboard: passo 7, immagine 2 di 2
    • Pry the black, front face of the remote from the back silver part by inserting a credit card in between and sliding down.

    • Again, you may need to use a metal prying tool to get the separation started.

  8. How to Stabilize the Logitech Harmony 900 Motherboard: passo 8, immagine 1 di 2 How to Stabilize the Logitech Harmony 900 Motherboard: passo 8, immagine 2 di 2
    • When you look at the circuit board, you should see a ribbon attaching the board to the plastic casing.

    • A little lever is holding the ribbon in place. Lift the lever with your nail or a 2.5mm flat-head screwdriver. Move the ribbon away from the circuit board.

  9. How to Stabilize the Logitech Harmony 900 Motherboard: passo 9, immagine 1 di 2 How to Stabilize the Logitech Harmony 900 Motherboard: passo 9, immagine 2 di 2
    • Using the Philips #0 screwdriver, remove the three 50mm screws from the circuit board.

  10. How to Stabilize the Logitech Harmony 900 Motherboard: passo 10, immagine 1 di 1
    • Using your hands, carefully separate the motherboard from the rest of the remote.

  11. How to Stabilize the Logitech Harmony 900 Motherboard, How to Stabilize the Logitech Harmony 900 Motherboard: passo 11, immagine 1 di 1
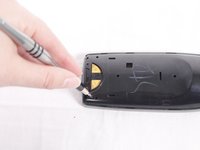
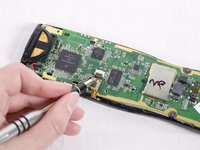
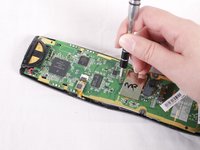
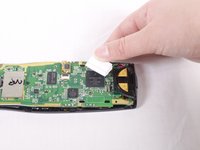
    • Fold a small piece of paper several times until you have a shim about the size of a penny.

  12. How to Stabilize the Logitech Harmony 900 Motherboard: passo 12, immagine 1 di 2 How to Stabilize the Logitech Harmony 900 Motherboard: passo 12, immagine 2 di 2
    • Place the shim on the CPU, which is the top leftmost black box on the motherboard.

Conclusione

To reassemble your device, follow these instructions in reverse order.

Altre 5 persone hanno completato questa guida.

Tyler Hanks

Membro da: 09/25/17

442 Reputazione

3 Guide realizzate

Team

USF Tampa, Team S4-G5, Eyestone Fall 2017 Membro di USF Tampa, Team S4-G5, Eyestone Fall 2017

USFT-EYESTONE-F17S4G5

4 Membri

4 Guide realizzate

3 Commenti

Bought this remote at Goodwill for $15. Repair went flawlessly in 10 minutes. THANKS!!!!!!

Scott Casey - Replica

Hello Tyler,

If you are going to place the shims on the top of cpu, why you have to remove the motherboard completely with screws and ribbon cable from the remote?

Thanks

Daniel Leprince - Replica

Sweet fix thought mine had died

Sean Garbe - Replica

Aggiungi Commento

Visualizza Statistiche:

Ultime 24 Ore: 0

Ultimi 7 Giorni: 2

Ultimi 30 Giorni: 13

Tutti i Tempi: 1,183