Salta al contenuto principale

How to Replace the Adhesive for Your Google Pixel 6

Cosa ti serve

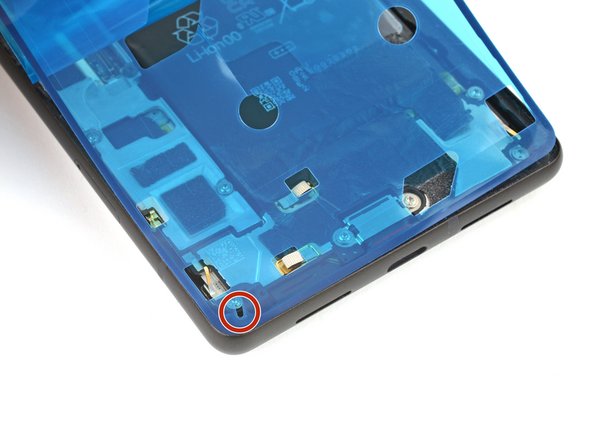
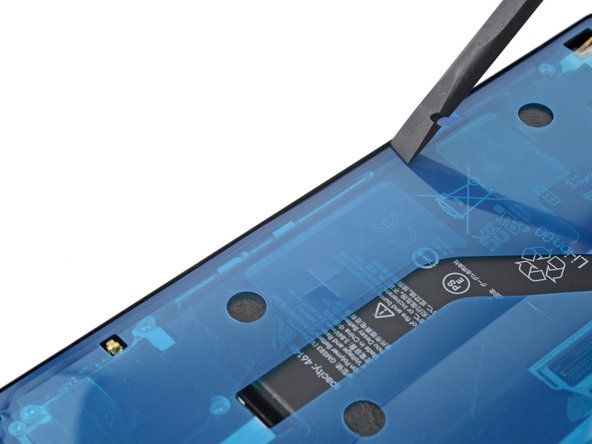
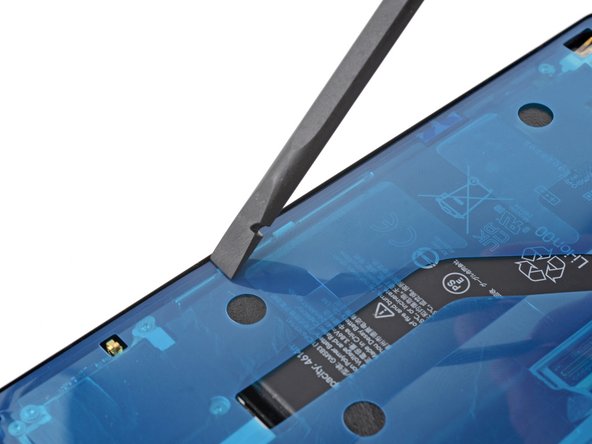
  1. How to Replace the Adhesive for Your Google Pixel 6, Clean the frame: passo 1, immagine 1 di 3 How to Replace the Adhesive for Your Google Pixel 6, Clean the frame: passo 1, immagine 2 di 3 How to Replace the Adhesive for Your Google Pixel 6, Clean the frame: passo 1, immagine 3 di 3
    Attrezzo utilizzato in questo passaggio:
    Microfiber Cleaning Cloths
    $3.99
    Compra
    • Any residual adhesive or debris will prevent your screen from sealing properly.

    • Use the flat end of your spudger to scrape off as much adhesive as you can.

    • Use caution not to damage the spring connectors near the perimeter of the frame.

    • Use tweezers or your fingers to peel and remove any remaining adhesive.

    • Clean the perimeter of the frame with a small amount of highly-concentrated isopropyl alcohol (over 90%) and a lint-free or microfiber cloth.

  2. How to Replace the Adhesive for Your Google Pixel 6, Clean the screen: passo 2, immagine 1 di 3 How to Replace the Adhesive for Your Google Pixel 6, Clean the screen: passo 2, immagine 2 di 3 How to Replace the Adhesive for Your Google Pixel 6, Clean the screen: passo 2, immagine 3 di 3
    • If you're reusing your screen, clean it as you did for the frame.

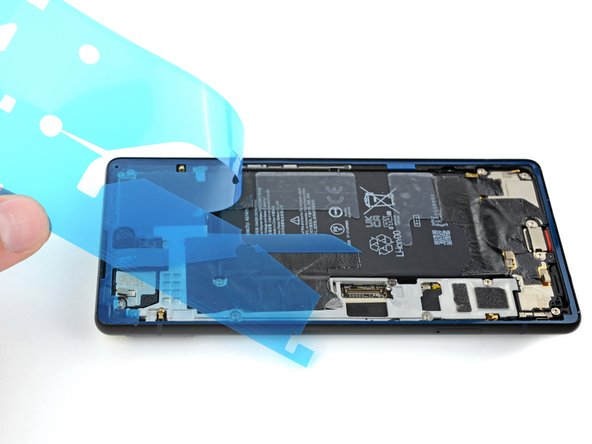
  3. How to Replace the Adhesive for Your Google Pixel 6, Orient the adhesive: passo 3, immagine 1 di 2 How to Replace the Adhesive for Your Google Pixel 6, Orient the adhesive: passo 3, immagine 2 di 2
    • Before applying the new adhesive, lay it over the frame to find its proper orientation.

    • Use features such as the upper loudspeaker cutout, lower left hole, and upper right hole to orient the adhesive.

  4. How to Replace the Adhesive for Your Google Pixel 6, Remove the adhesive backing: passo 4, immagine 1 di 1
    • Use the pull tab on the top of the adhesive to remove the protective backing.

    • This will expose the adhesive that sticks to the frame.

  5. How to Replace the Adhesive for Your Google Pixel 6, Apply the adhesive: passo 5, immagine 1 di 3 How to Replace the Adhesive for Your Google Pixel 6, Apply the adhesive: passo 5, immagine 2 di 3 How to Replace the Adhesive for Your Google Pixel 6, Apply the adhesive: passo 5, immagine 3 di 3
    • Be very careful during this step! The adhesive is very sticky and can't be repositioned once it sticks. Misaligned adhesive can lead to an improper seal.

    • Lay the adhesive onto the frame, starting with the bottom or top edge. Make small corrections as you go.

    • There are holes in the bottom left and top right corners to help align the adhesive.

  6. How to Replace the Adhesive for Your Google Pixel 6: passo 6, immagine 1 di 3 How to Replace the Adhesive for Your Google Pixel 6: passo 6, immagine 2 di 3 How to Replace the Adhesive for Your Google Pixel 6: passo 6, immagine 3 di 3
    • Use a spudger or your fingers to firmly press along the perimeter of the adhesive and adhere it to the frame.

    • Be careful not to damage the spring connectors near the perimeter of the frame.

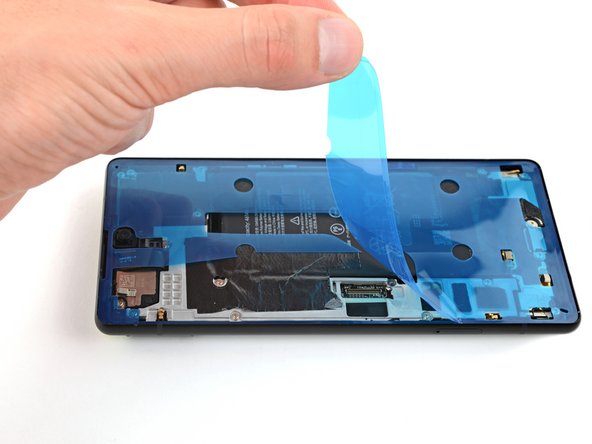
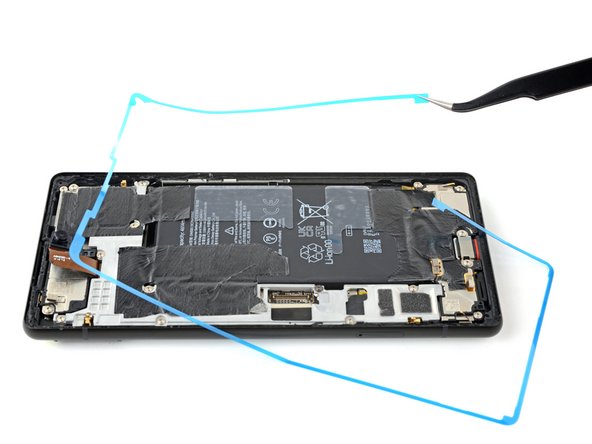
  7. How to Replace the Adhesive for Your Google Pixel 6, Remove the liners: passo 7, immagine 1 di 3 How to Replace the Adhesive for Your Google Pixel 6, Remove the liners: passo 7, immagine 2 di 3 How to Replace the Adhesive for Your Google Pixel 6, Remove the liners: passo 7, immagine 3 di 3
    • Grab the pull tab on the upper left of the frame and peel off the main liner.

  8. How to Replace the Adhesive for Your Google Pixel 6, Check for liners: passo 8, immagine 1 di 1
    • If you replaced the screen, check the front-facing camera hole and sensor cutout on the replacement screen and remove any remaining protective liners in it.

  9. How to Replace the Adhesive for Your Google Pixel 6, Continue reassembly: passo 9, immagine 1 di 1
    • Return to your phone's guide and continue reassembly.

    • Remember to reinstall the screen connector bracket.

    • Finish this guide when your screen is installed and you're ready to seal the phone up.

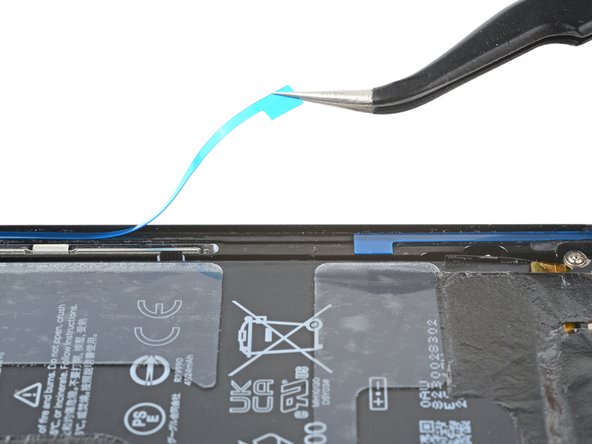
  10. How to Replace the Adhesive for Your Google Pixel 6, Remove the final liner: passo 10, immagine 1 di 3 How to Replace the Adhesive for Your Google Pixel 6, Remove the final liner: passo 10, immagine 2 di 3 How to Replace the Adhesive for Your Google Pixel 6, Remove the final liner: passo 10, immagine 3 di 3
    • Take care not to puncture the battery with your tweezers—a punctured battery may leak dangerous chemicals or cause a fire.

    • Grab the pull tab on the lower right of the frame and peel off the liner covering the perimeter adhesive.

    • Make sure the adhesive doesn't peel up with the liner.

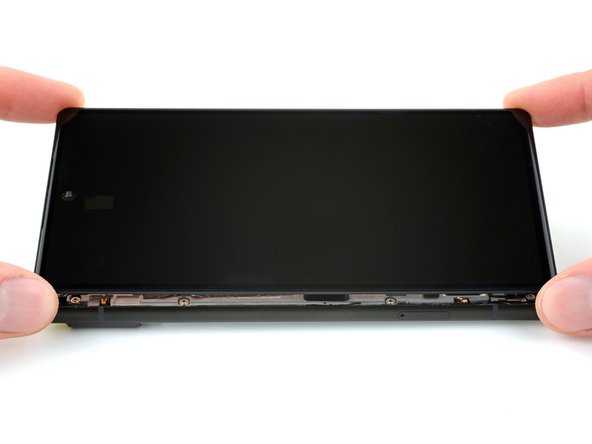
  11. How to Replace the Adhesive for Your Google Pixel 6, Install the screen: passo 11, immagine 1 di 2 How to Replace the Adhesive for Your Google Pixel 6, Install the screen: passo 11, immagine 2 di 2
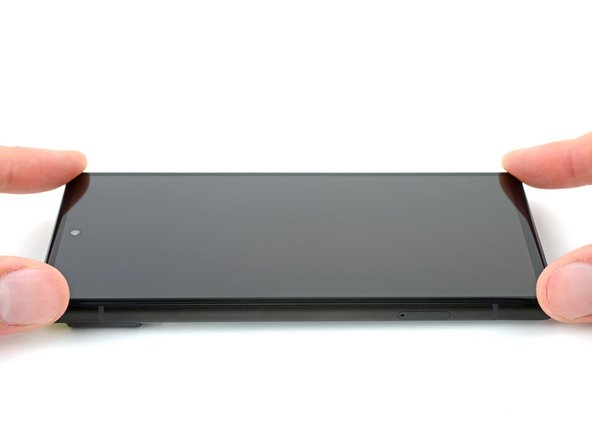
    • Flip the screen over and lay it onto the frame.

    • Press along the perimeter of the screen to secure it.

  12. How to Replace the Adhesive for Your Google Pixel 6, Strengthen the adhesive bond: passo 12, immagine 1 di 3 How to Replace the Adhesive for Your Google Pixel 6, Strengthen the adhesive bond: passo 12, immagine 2 di 3 How to Replace the Adhesive for Your Google Pixel 6, Strengthen the adhesive bond: passo 12, immagine 3 di 3
    Attrezzo utilizzato in questo passaggio:
    Screen Vise Clamps 6-Pack
    $15.99
    Compra
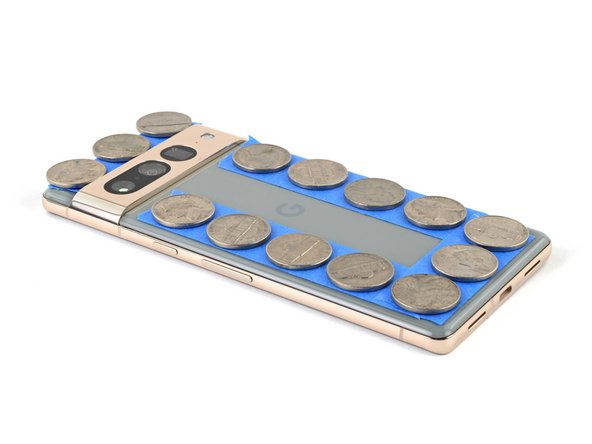
    • To evenly compress your Pixel and strengthen the bond of the screen to the frame, you need to account for the camera bar.

    • If you have screen vise clamps, you can work around the camera bar. Secure the clamps to the perimeter of the device.

    • Apply tape to the perimeter of your rear glass to protect its finish.

    • Place coins or similarly thick objects along the edges of the rear glass. Make sure they're as thick or thicker than the camera bar.

    • Stack multiple books or other heavy objects on your phone. Leave them in place for thirty minutes or longer. Ideally, leave them stacked overnight.

Linea Traguardo

Altre 60 persone hanno completato questa guida.

Clay Eickemeyer

Membro da: 09/19/22

65.977 Reputazione

453 Guide realizzate

Team

iFixit Membro di iFixit

Staff

135 Membri

16.732 Guide realizzate

14 Commenti

Clear and to the point guide, which worked perfectly from the first go, kudos!

Ken Lammrtyn - Replica

Why not align the adhesive with the liner covers on?

-Remove the display side of the adhesive then attach display to phone. Then adhesive should be lined up on the display and you should only need to remove the phone body adhesive cover and press the phone and display together.

Beau Ellerson - Replica

Hi Beau! This is a clever idea. We've taken this approach with some simpler adhesives before. While I can't say exactly why it wouldn't work, I can assume that applying the adhesive the screen-side-first will make it more difficult to visually check that the adhesive lined up properly on the screen. It doesn't seem impossible for any reason, though.

Clay Eickemeyer -

where is the guide for reassembly?

Caspar Redgrave - Replica

The exact guide depends on which phone you have. Click here for the list of Google Pixel 6 guides, pick the guide you were working on, and find where you left off!

Clay Eickemeyer -

Aggiungi Commento

Visualizza Statistiche:

Ultime 24 Ore: 38

Ultimi 7 Giorni: 220

Ultimi 30 Giorni: 937

Tutti i Tempi: 14,593