Salta al contenuto principale
Unisciti alla Community delle riparazioni - Crea un account
How to Replace a Wooden Gate Latch

How to Replace a Wooden Gate Latch

Gracie

Gracie e un altro collaboratore

Ultimo aggiornamento il 29 dic 2020

25 - 45 minuti
Moderato

Introduzione

Vai al passo 1

If your wooden gate is not closing appropriately or latching as it should use this guide to repair your wooden gate. The gate allows you to keep pets from escaping the back yard. If the gate does not function properly it can allow your pets to escape from the back yard and roam. Before using this guide inspect your wooden gate to make sure there is no debris keeping the gate from latching or closing entirely. Step three requires you to use a power saw to remove a portion of the fence. From there you will need to replace the old latch with a new one and sand the sawed edge of the fence to ensure a smooth finish and that the gate closes and latches appropriately. Before beginning make sure everything is out of the way of the gate so that it can be fixed appropriately.

Cosa ti serve

Strumenti

Mostra di più…

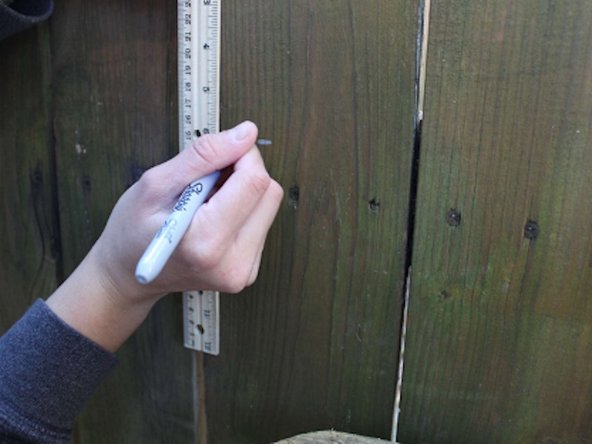
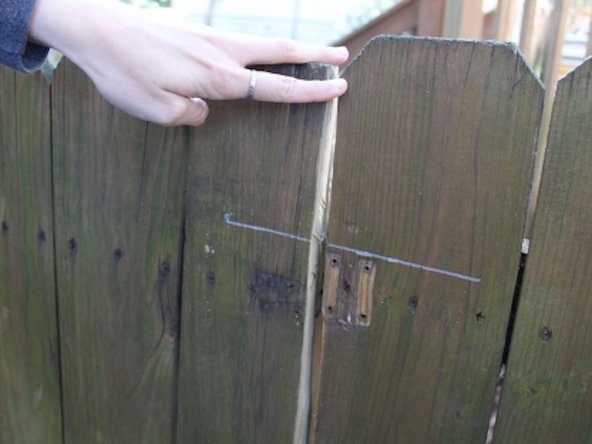
  1. How to Replace a Wooden Gate Latch, Gate Latch: passo 1, immagine 1 di 2 How to Replace a Wooden Gate Latch, Gate Latch: passo 1, immagine 2 di 2
    • Using a ruler and a sharpie, draw a line starting at the bottom corner of the gate to the top corner of the gate, to ensure it is parallel with the rest of the gate.

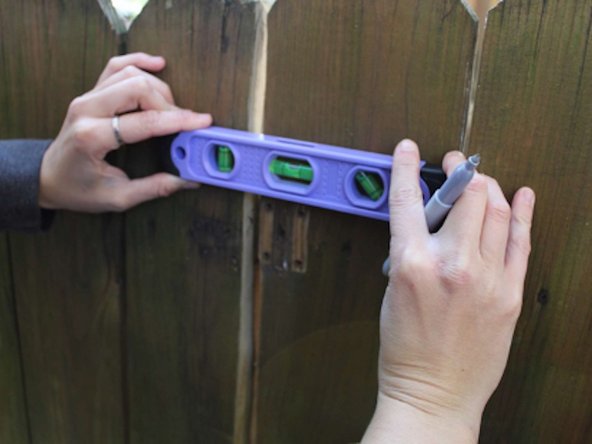
  2. How to Replace a Wooden Gate Latch: passo 2, immagine 1 di 1
    • Place a level on the gate to ensure that the gate is properly level.

  3. How to Replace a Wooden Gate Latch: passo 3, immagine 1 di 3 How to Replace a Wooden Gate Latch: passo 3, immagine 2 di 3 How to Replace a Wooden Gate Latch: passo 3, immagine 3 di 3
    • Starting at the bottom of the gate, place the power saw on the sharpie line and cut along the entirety of the line.

    • Do saw from the opposite side of the fence.

  4. How to Replace a Wooden Gate Latch: passo 4, immagine 1 di 2 How to Replace a Wooden Gate Latch: passo 4, immagine 2 di 2
    • Using a ruler, measure 6 inches down from the top of the gate and mark that spot using a sharpie.

  5. How to Replace a Wooden Gate Latch: passo 5, immagine 1 di 3 How to Replace a Wooden Gate Latch: passo 5, immagine 2 di 3 How to Replace a Wooden Gate Latch: passo 5, immagine 3 di 3
    • Using a ruler, measure 6 inches down from the top of the adjacent fence and mark the spot using a sharpie

  6. How to Replace a Wooden Gate Latch: passo 6, immagine 1 di 3 How to Replace a Wooden Gate Latch: passo 6, immagine 2 di 3 How to Replace a Wooden Gate Latch: passo 6, immagine 3 di 3
    • At the marked location on the gate, attach the latch for the gate using a power drill and screws.

  7. How to Replace a Wooden Gate Latch: passo 7, immagine 1 di 3 How to Replace a Wooden Gate Latch: passo 7, immagine 2 di 3 How to Replace a Wooden Gate Latch: passo 7, immagine 3 di 3
    • On the adjacent fence at the marked spot attach the second half of the latching mechanism using a power drill and screws.

  8. How to Replace a Wooden Gate Latch: passo 8, immagine 1 di 3 How to Replace a Wooden Gate Latch: passo 8, immagine 2 di 3 How to Replace a Wooden Gate Latch: passo 8, immagine 3 di 3
    • Sand the edge of the gate that was cut using a power sander until the edge is smooth and fits properly when closing the gate.

Conclusione

To reassemble your device, follow these instructions in reverse order.

Gracie

Membro da: 10/07/20

157 Reputazione

1 Guida realizzata

0Commenti sulla guida

Aggiungi Commento

Visualizza Statistiche:

Ultime 24 Ore: 0

Ultimi 7 Giorni: 0

Ultimi 30 Giorni: 6

Tutti i Tempi: 1,270