Salta al contenuto principale
Unisciti alla Community delle riparazioni - Crea un account
How to Replace a Damaged Gutter Segment

How to Replace a Damaged Gutter Segment

Gavin Luc

Gavin Luc e 3 altri collaboratori

Ultimo aggiornamento il 21 ago 2023

15 minuti
Facile

Introduzione

Vai al passo 1

In this guide, we will provide step-by-step instructions for replacing a gutter. Whether you are dealing with a damaged gutter or simply upgrading to a new one, this guide will help you through the process.

Gutter replacements performed by professionals can often come with a hefty price tag. By following this guide, you can save money and gain the satisfaction of completing the task on your own.

Most importantly, damage to the gutter could potentially cause various issues in the drainage system. By following this guide, you can successfully replace your gutter and ensure its proper installation for effective water drainage and maintenance of your property.

Cosa ti serve

iFixit guadagna commissioni quando acquisti tramite questi link.
  1. How to Replace a Damaged Gutter Segment, Eavestrough Gutter Segment: passo 1, immagine 1 di 1
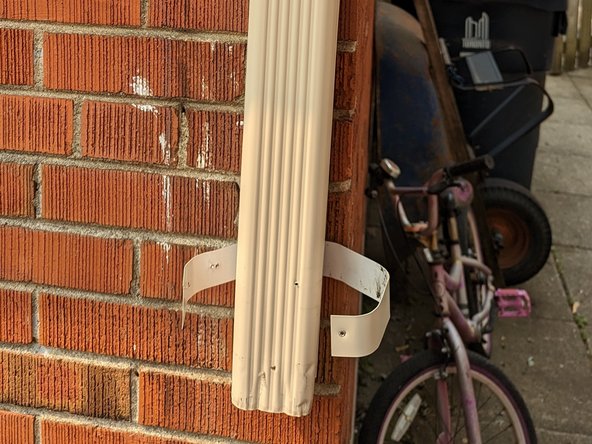
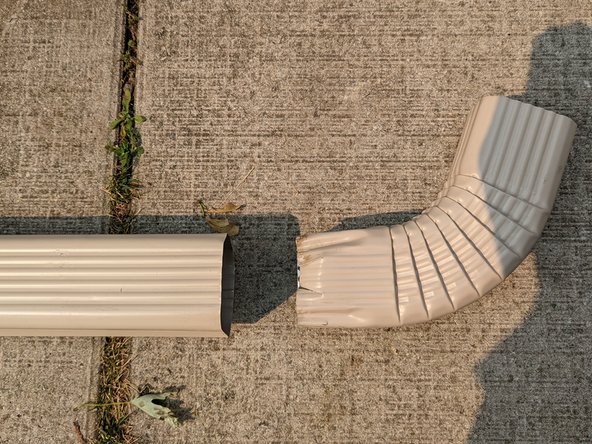
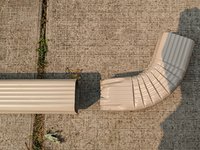
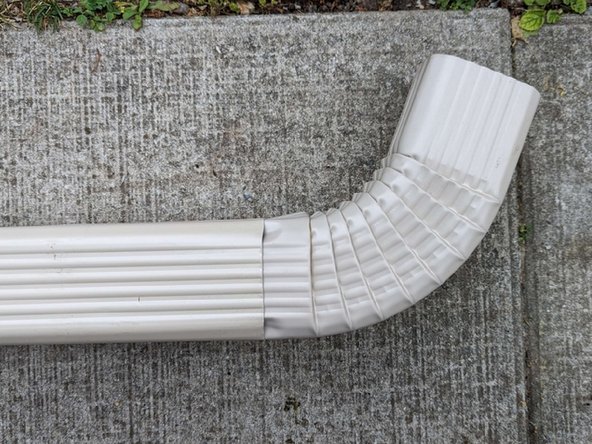
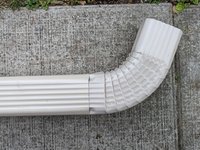
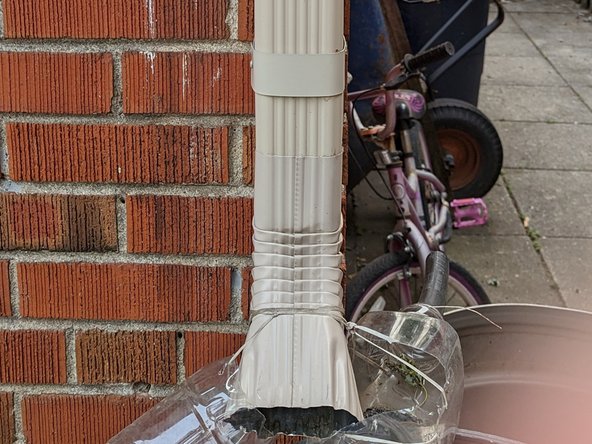
    • Identify the section of the gutter system that needs to be replaced, specifically the middle gutter.

  2. How to Replace a Damaged Gutter Segment: passo 2, immagine 1 di 2 How to Replace a Damaged Gutter Segment: passo 2, immagine 2 di 2
    • Using a screwdriver, remove the screws from the strip that holds the gutter to the wall.

    • Repeat this process for each strip along the length of the gutter.

    • Spread apart the strips to release the gutter.

    • When spreading apart the strips, they may have sharp edges. To ensure your safety, please use caution and wear protective gloves.

  3. How to Replace a Damaged Gutter Segment: passo 3, immagine 1 di 3 How to Replace a Damaged Gutter Segment: passo 3, immagine 2 di 3 How to Replace a Damaged Gutter Segment: passo 3, immagine 3 di 3
    • Locate the connecting points between the bottom gutter and the middle gutter.

    • Using a screwdriver, remove the screws.

    • Separate the bottom gutter from the middle gutter by sliding them apart.

  4. How to Replace a Damaged Gutter Segment: passo 4, immagine 1 di 3 How to Replace a Damaged Gutter Segment: passo 4, immagine 2 di 3 How to Replace a Damaged Gutter Segment: passo 4, immagine 3 di 3
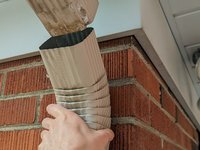
    • Detach the top gutter from the connected fittings.

    • Position yourself securely on a ladder or elevated platform at the appropriate height to access the top gutter.

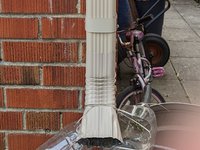
    • Place the removed top gutter and the middle gutter on the ground.

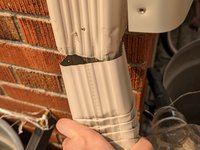
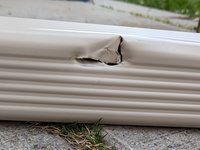
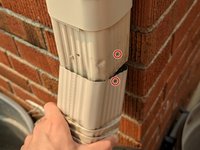
    • Inspect both the top gutter and the middle gutter for any damage. Assess whether they need to be entirely replaced or if repairs can be made.

    • If the damaged area is serious, you can only replace with a new segment (looking for environmentally friendly materials to protect the earth).

  5. How to Replace a Damaged Gutter Segment: passo 5, immagine 1 di 3 How to Replace a Damaged Gutter Segment: passo 5, immagine 2 di 3 How to Replace a Damaged Gutter Segment: passo 5, immagine 3 di 3
    • Slide the new middle gutter into the top gutter, inserting it gently until they are firmly connected.

    • Double-check that the alignment is correct and there are no gaps between the sections to avoid any drainage.

    • With the middle and top gutters connected, reattach the assembled gutters to the connected fittings.

  6. How to Replace a Damaged Gutter Segment: passo 6, immagine 1 di 3 How to Replace a Damaged Gutter Segment: passo 6, immagine 2 di 3 How to Replace a Damaged Gutter Segment: passo 6, immagine 3 di 3
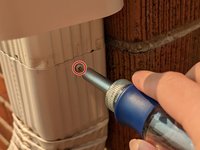
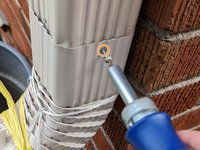
    • Load a screw into the strip, positioning it so that it can be screwed into the holes of both the strip and the gutter.

    • Fold the strip around the gutter, aligning the holes of the strip with the corresponding holes on the gutter.

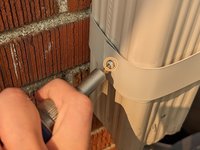
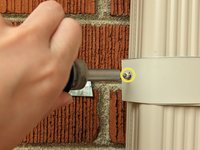
    • Screw the screws into the holes of the strip and the gutter, using a screwdriver.

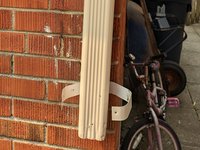
    • Repeat this process for each strip along the length of the new middle gutter.

    • Take care not to overtighten the screw, as it may damage the gutter or strip the threads.

  7. How to Replace a Damaged Gutter Segment: passo 7, immagine 1 di 3 How to Replace a Damaged Gutter Segment: passo 7, immagine 2 di 3 How to Replace a Damaged Gutter Segment: passo 7, immagine 3 di 3
    • Position the bottom gutter in its intended location, ensuring that the holes on both pieces line up properly.

    • Using a screwdriver, tighten the screws to fasten the middle and bottom gutters together.

    • Replacement Complete!

Linea Traguardo

Un'altra persona ha completato questa guida.

Gavin Luc

Membro da: 10/19/22

154 Reputazione

1 Guida realizzata

0Commenti sulla guida

Aggiungi Commento

Visualizza Statistiche:

Ultime 24 Ore: 2

Ultimi 7 Giorni: 11

Ultimi 30 Giorni: 63

Tutti i Tempi: 1,441