Questa versione può contenere modifiche errate. Passa all'ultima istantanea verificata.
Cosa ti serve
-
Questo passaggio è privo di traduzione. Aiuta a tradurlo
-
Spray WD-40 on each hinge bolt. This will make it easier to remove them.
-
-
Questo passaggio è privo di traduzione. Aiuta a tradurlo
-
Remove the bolt from the hinge strap on the fence post.
-
Wipe the excess lubricant from the bolt to avoid slipping.
-
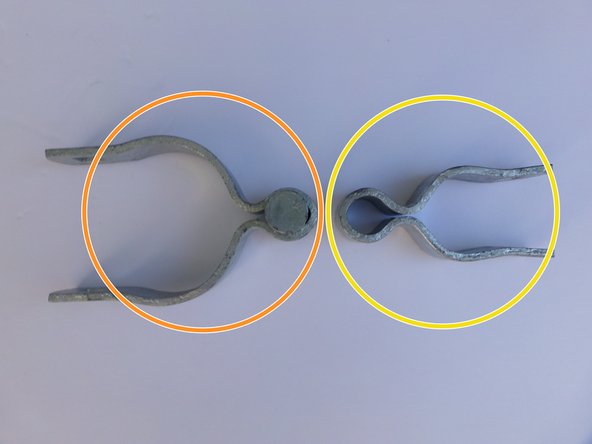
Slide the loosened hinge strap up to remove the pin from the loop on the gate hinge.
-
Repeat this process for the bottom hinge.
-
-
Questo passaggio è privo di traduzione. Aiuta a tradurlo
-
Slide the gate away from the fence post set it aside.
-
-
Questo passaggio è privo di traduzione. Aiuta a tradurlo
-
Repeat the previous steps to remove the second gate pane.
-
-
Questo passaggio è privo di traduzione. Aiuta a tradurlo
-
Remove the unbolted post hinges from the fence posts.
-
-
-
Questo passaggio è privo di traduzione. Aiuta a tradurlo
-
Open the Galvanized Drive Gate Set and verify that you have four hinge pairs.
-
Separate one of the hinge pairs.
-
-
Questo passaggio è privo di traduzione. Aiuta a tradurlo
-
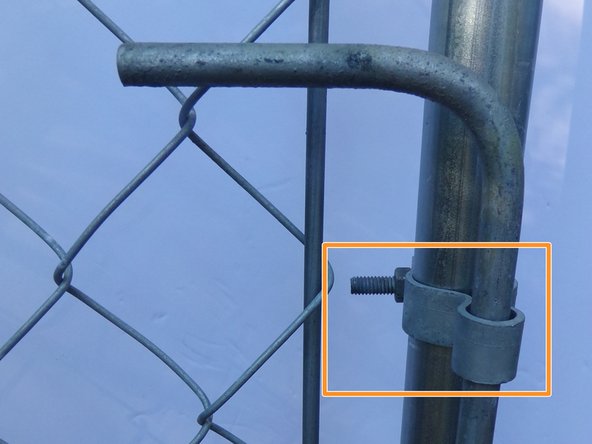
Slide the hinge strap onto the post so that the pin is facing down.
-
Slide the hinge strap onto the post so that the pin is facing down.
-
Slide a nut onto the end of the bolt.
-
Tighten the nut using the socket wrench.
-
-
Questo passaggio è privo di traduzione. Aiuta a tradurlo
-
Slide the hinge strap onto the post so that the pin is facing up.
-
Slide a bolt through the holes in the strap.
-
Slide a nut onto the end of the bolt.
-
Tighten the nut using the socket wrench.
-
-
Questo passaggio è privo di traduzione. Aiuta a tradurlo
-
Attach the two gate hinges to the side of the gate frame with the loops facing out.
-
-
Questo passaggio è privo di traduzione. Aiuta a tradurlo
-
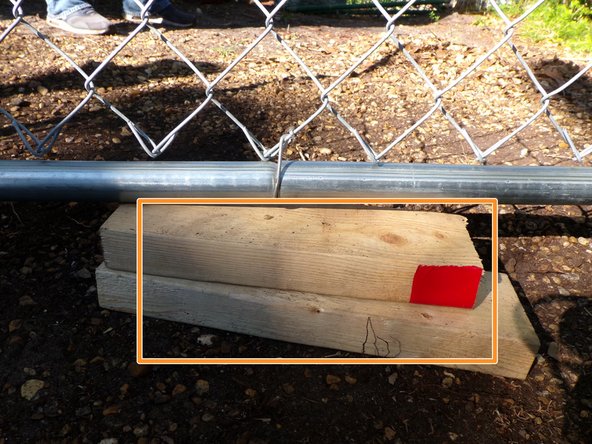
Place blocks on the ground at the where you will install the gate. These will support the gate while you are connecting the hinges.
-
Lift the gate panel into position so that the gate lines up with the fence and at the desired height. Adjust the blocks as necessary to achieve the desired height.
-
-
Questo passaggio è privo di traduzione. Aiuta a tradurlo
-
Slide the top gate hinge up as you slide the loop over the pin on the top post hinge.
-
Tighten the nut on the gate hinge straps.
-
Repeat for the bottom gate hinge.
-
-
Questo passaggio è privo di traduzione. Aiuta a tradurlo
-
Adjust the hinges so that the gate can swing freely.
-
-
Questo passaggio è privo di traduzione. Aiuta a tradurlo
-
Using a a 1/2" socket wrench or adjustable wrench, bolt the two latch plates on the inside of the gate frame together on one end.
-
Insert the latch between the two plates on the outside of the gate frame.
-
Insert a bolt and nut. Tighten to secure the latch.
-
-
Questo passaggio è privo di traduzione. Aiuta a tradurlo
-
Bolt the two post holders onto the gate frame.
-
Slide the post down through the post holders and secure in the ground.
-


Annulla: non ho completato questa guida.
Altre 6 persone hanno completato questa guida.

Team

USF Sarasota-Manatee, Team 1-1, Stewart Spring 2017 Membro di USF Sarasota-Manatee, Team 1-1, Stewart Spring 2017
USFSM-STEWART-S17S1G1
19 Membri
19 Guide realizzate