Salta al contenuto principale
Unisciti alla Community delle riparazioni - Crea un account
How to Repair a Stuck GameCube Eject Button

How to Repair a Stuck GameCube Eject Button

Tanner Hall

Tanner Hall e 3 altri collaboratori

Ultimo aggiornamento il October 15, 2024

15 - 25 minuti
Moderato

Introduzione

Vai al passo 1

Over time, dust and grime can build up on components inside the GameCube console. This can cause a sticky eject button, which will not allow the game tray to close in order to play games. This tutorial shows how to open up the GameCube console to clean out normally inaccessible debris buildup around the eject button.

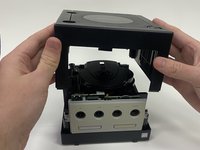
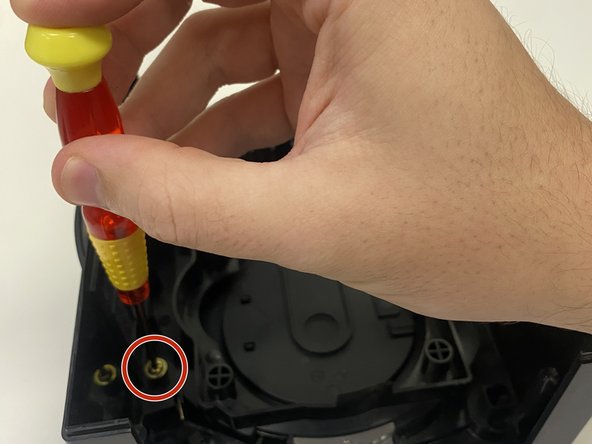
This process involves opening up the GameCube console and utilizes a specialty 4.5mm game-bit screwdriver. This is required to disassemble the GameCube's housing without causing damage to the screws or the plastic housing.

Before beginning make sure all power is disconnected from the GameCube to prevent damage to the device or people.

Cosa ti serve

iFixit guadagna commissioni quando acquisti tramite questi link.
  1. How to Repair a Stuck GameCube Eject Button, How to Repair a Stuck GameCube Eject Button: passo 1, immagine 1 di 3 How to Repair a Stuck GameCube Eject Button, How to Repair a Stuck GameCube Eject Button: passo 1, immagine 2 di 3 How to Repair a Stuck GameCube Eject Button, How to Repair a Stuck GameCube Eject Button: passo 1, immagine 3 di 3
    • Turn off the GameCube and unplug the power cable from the back of the device.

    • Ensure that all power is disconnected to ensure no damage is caused to the device or yourself.

    • Remove any discs from the disc tray. Unplug any controllers or memory cards from the front ports.

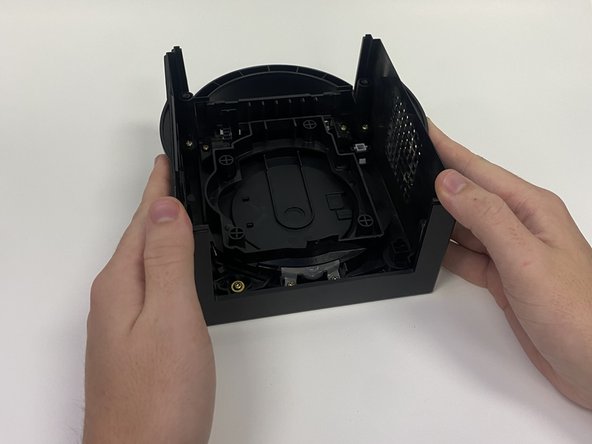
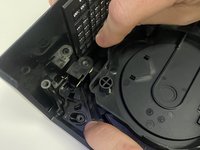
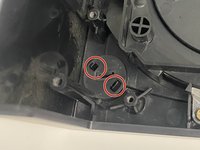
    • Place the GameCube upside down.

  2. How to Repair a Stuck GameCube Eject Button: passo 2, immagine 1 di 3 How to Repair a Stuck GameCube Eject Button: passo 2, immagine 2 di 3 How to Repair a Stuck GameCube Eject Button: passo 2, immagine 3 di 3
    • Remove all four 4.5 mm screws using a Gamebit 4.5 mm screwdriver.

    • Be cautious not to apply too much pressure to prevent damaging the screws or the GameCube's housing.

  3. How to Repair a Stuck GameCube Eject Button: passo 3, immagine 1 di 2 How to Repair a Stuck GameCube Eject Button: passo 3, immagine 2 di 2
    • Carefully lift off the top shell of the GameCube housing.

    • Flip over the top housing of the GameCube, making sure the handle is facing away from you.

  4. How to Repair a Stuck GameCube Eject Button: passo 4, immagine 1 di 2 How to Repair a Stuck GameCube Eject Button: passo 4, immagine 2 di 2
    • Remove the two screws in the bottom left and right corners using a Phillips #00 screwdriver.

    • Have caution while removing the screws from the housing to prevent damage to any components.

  5. How to Repair a Stuck GameCube Eject Button: passo 5, immagine 1 di 2 How to Repair a Stuck GameCube Eject Button: passo 5, immagine 2 di 2
    • Pull back on the lower section of the spring mechanism until the spring is fully compressed.

    • Lift the spring mechanism out of the GameCube's top housing and place it to the side.

  6. How to Repair a Stuck GameCube Eject Button: passo 6, immagine 1 di 3 How to Repair a Stuck GameCube Eject Button: passo 6, immagine 2 di 3 How to Repair a Stuck GameCube Eject Button: passo 6, immagine 3 di 3
    • Pinch in the two small tabs from the eject button inside the GameCube's top housing.

    • Push the button out on the top-side of the GameCube's top housing.

  7. How to Repair a Stuck GameCube Eject Button: passo 7, immagine 1 di 2 How to Repair a Stuck GameCube Eject Button: passo 7, immagine 2 di 2
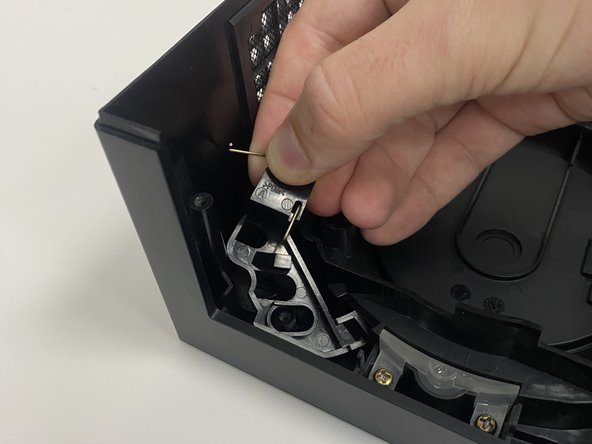
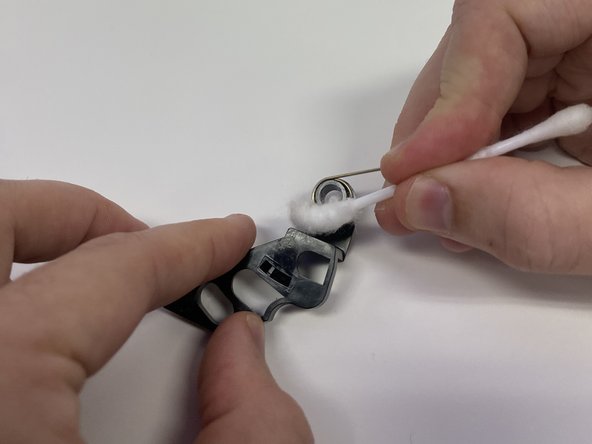
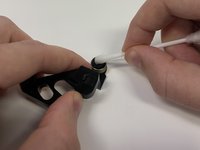
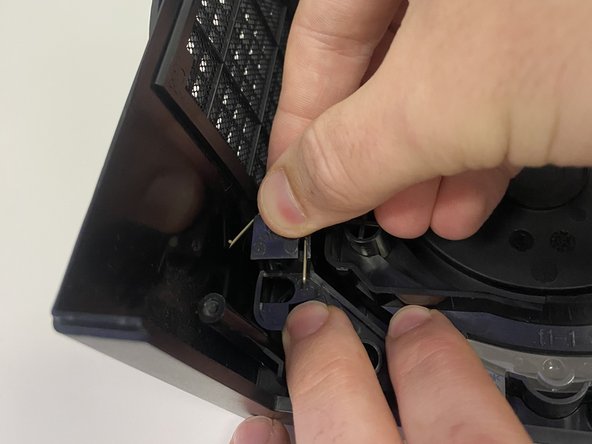
    • Dip one end of a cotton swab in 91% isopropyl alcohol.

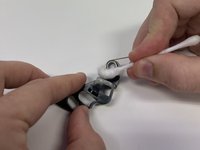
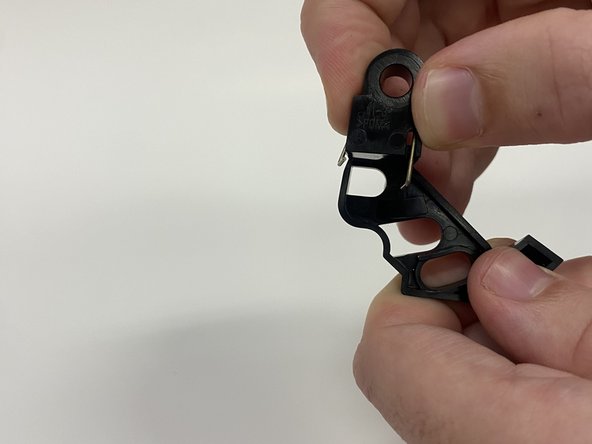
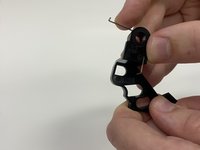
    • Wipe away any dust or grime from the spring mechanism with the wet cotton swab.

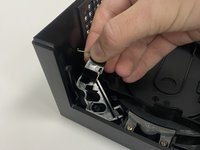
    • Let the spring mechanism dry for one minute.

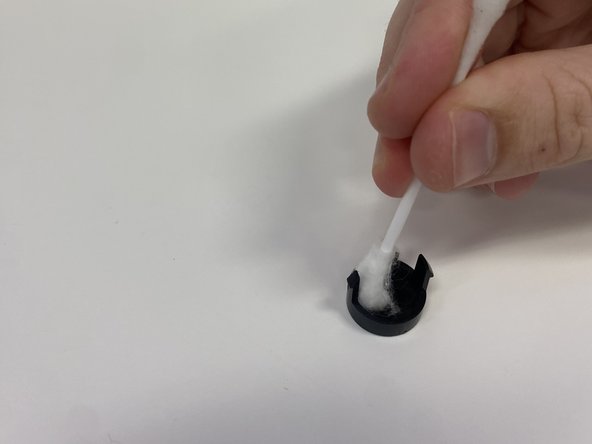
    • Use the dry end of a cotton swab to clean up any leftover dust or isopropyl alcohol after the spring mechanism dries.

  8. How to Repair a Stuck GameCube Eject Button: passo 8, immagine 1 di 2 How to Repair a Stuck GameCube Eject Button: passo 8, immagine 2 di 2
    • Dip one end of a new cotton swab into 91% isopropyl alcohol.

    • Use the new wet cotton swab to clean away any dust or grime on the eject button.

    • Let the eject button dry for one minute.

    • Wipe away any missed dust or any remaining isopropyl alcohol with the dry end of the cotton swab.

  9. How to Repair a Stuck GameCube Eject Button: passo 9, immagine 1 di 3 How to Repair a Stuck GameCube Eject Button: passo 9, immagine 2 di 3 How to Repair a Stuck GameCube Eject Button: passo 9, immagine 3 di 3
    • Push the spring section of the spring mechanism in so that it lays flat along the plastic piece.

    • Place the spring mechanism into the housing with the spring bent down and pressed against the side of the housing.

Conclusione

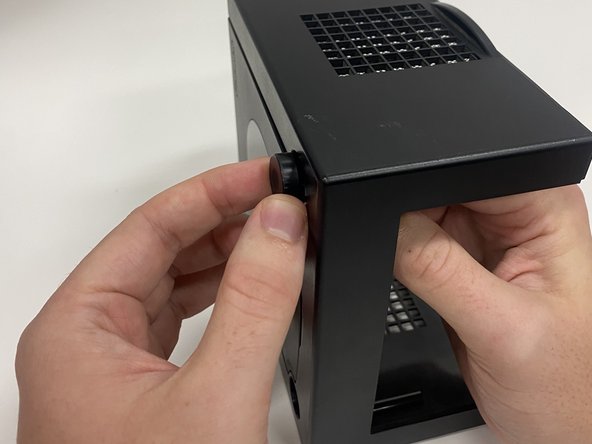
To reassemble your device, perform steps 6 through 1 in reverse.

0Commenti sulla guida

Aggiungi Commento

Visualizza Statistiche:

Ultime 24 Ore: 6

Ultimi 7 Giorni: 31

Ultimi 30 Giorni: 131

Tutti i Tempi: 2,899