Salta al contenuto principale

How to Mend a Tear Using Sashiko Stitching

Cosa ti serve

  1. How to Mend a Tear Using Sashiko Stitching, How to Mend a Tear Using Sashiko Stitching: passo 1, immagine 1 di 3 How to Mend a Tear Using Sashiko Stitching, How to Mend a Tear Using Sashiko Stitching: passo 1, immagine 2 di 3 How to Mend a Tear Using Sashiko Stitching, How to Mend a Tear Using Sashiko Stitching: passo 1, immagine 3 di 3
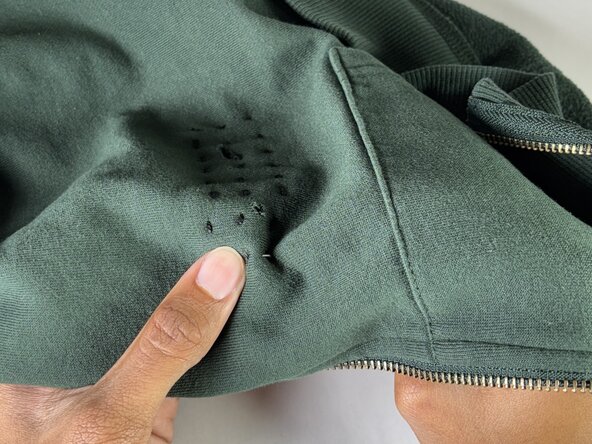
    • Cut away any loose threads around the tear.

  2. How to Mend a Tear Using Sashiko Stitching: passo 2, immagine 1 di 2 How to Mend a Tear Using Sashiko Stitching: passo 2, immagine 2 di 2
    • Measure how big your patch should be.

    • Your patch should extend at least half an inch past the tear.

  3. How to Mend a Tear Using Sashiko Stitching: passo 3, immagine 1 di 3 How to Mend a Tear Using Sashiko Stitching: passo 3, immagine 2 di 3 How to Mend a Tear Using Sashiko Stitching: passo 3, immagine 3 di 3
    • Cut your patch using measurements from Step 2.

    • You can use any sturdy fabric for your patch.

  4. How to Mend a Tear Using Sashiko Stitching: passo 4, immagine 1 di 3 How to Mend a Tear Using Sashiko Stitching: passo 4, immagine 2 di 3 How to Mend a Tear Using Sashiko Stitching: passo 4, immagine 3 di 3
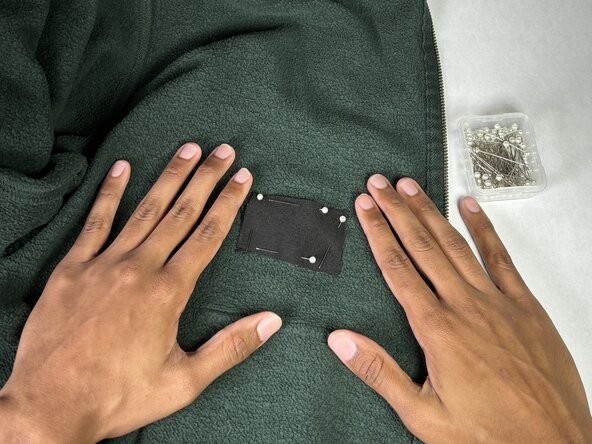
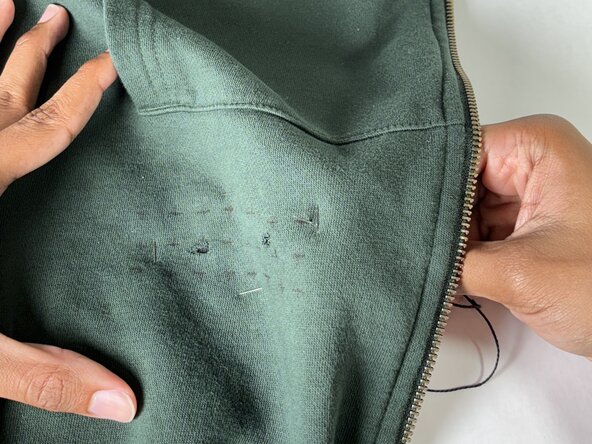
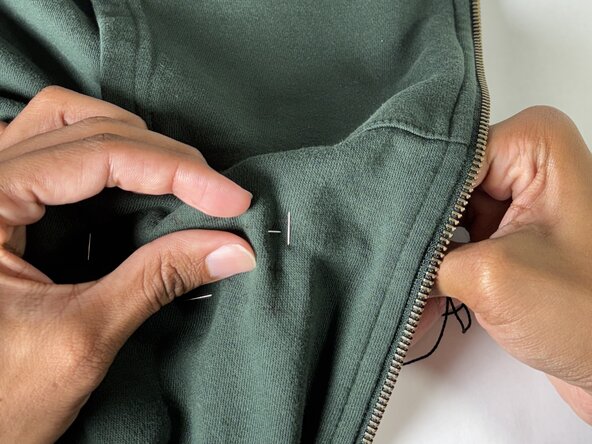
    • Pin your patch to the inside of the garment.

    • Make sure the patch is centered on the tear.

    • Be careful pushing pins through to not poke yourself.

  5. How to Mend a Tear Using Sashiko Stitching: passo 5, immagine 1 di 3 How to Mend a Tear Using Sashiko Stitching: passo 5, immagine 2 di 3 How to Mend a Tear Using Sashiko Stitching: passo 5, immagine 3 di 3
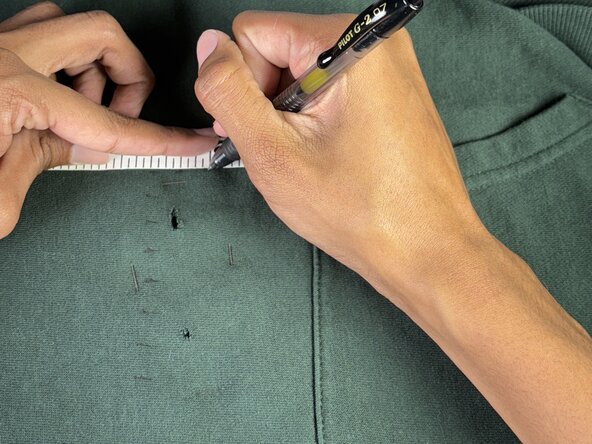
    • Flip the garment right side out.

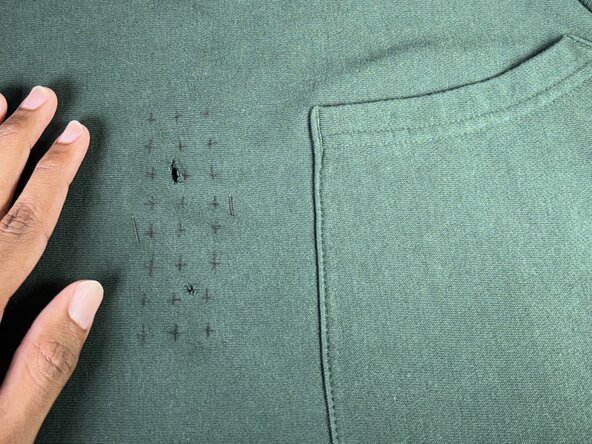
    • Over the patch, mark small dashes every half inch, horizontally and vertically.

    • These marks should create small crosses to guide your stitches later on.

    • We used a pen in this step, but for a less permanent mark we recommend using tailor’s chalk.

  6. How to Mend a Tear Using Sashiko Stitching: passo 6, immagine 1 di 2 How to Mend a Tear Using Sashiko Stitching: passo 6, immagine 2 di 2
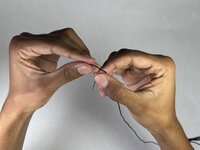
    • Thread your needle and pull the thread through at least 5 inches.

    • Wetting and pinching the end of the thread can help fit the thread through the eye of the needle.

  7. How to Mend a Tear Using Sashiko Stitching: passo 7, immagine 1 di 1
    • Cut the thread to a single arm’s length.

    • The length should be manageable to you; shorter is better than longer.

  8. How to Mend a Tear Using Sashiko Stitching: passo 8, immagine 1 di 3 How to Mend a Tear Using Sashiko Stitching: passo 8, immagine 2 di 3 How to Mend a Tear Using Sashiko Stitching: passo 8, immagine 3 di 3
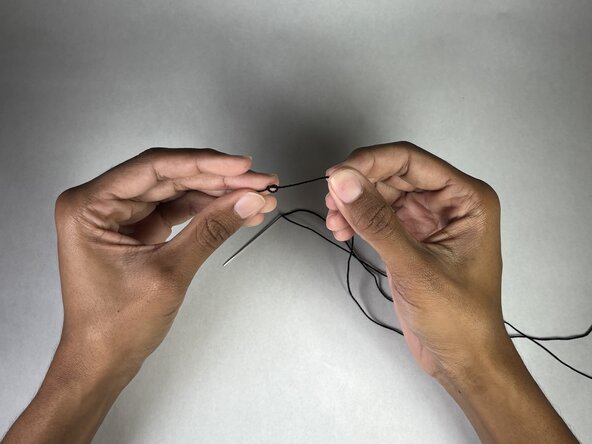
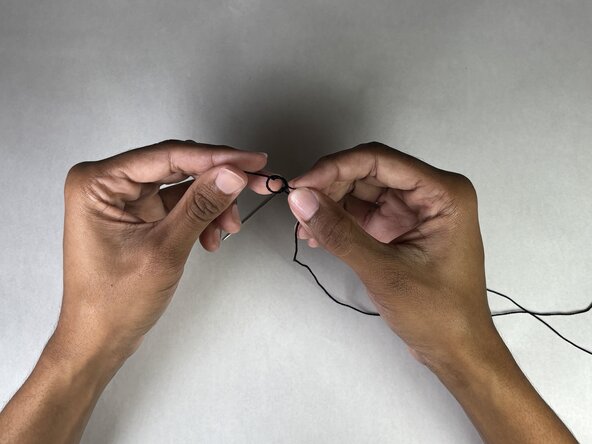
    • Tie a double knot at the end of your thread.

    • Trim off any excess.

  9. How to Mend a Tear Using Sashiko Stitching: passo 9, immagine 1 di 3 How to Mend a Tear Using Sashiko Stitching: passo 9, immagine 2 di 3 How to Mend a Tear Using Sashiko Stitching: passo 9, immagine 3 di 3
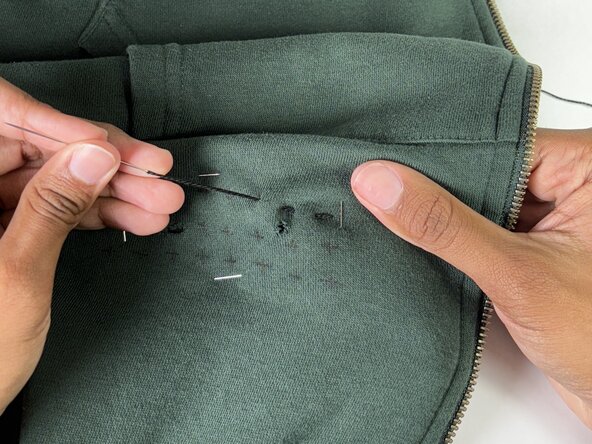
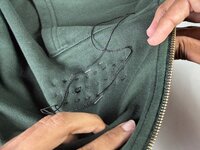
    • Start your stitch from the inside of the garment, beginning at the top right horizontal stitch.

  10. How to Mend a Tear Using Sashiko Stitching: passo 10, immagine 1 di 3 How to Mend a Tear Using Sashiko Stitching: passo 10, immagine 2 di 3 How to Mend a Tear Using Sashiko Stitching: passo 10, immagine 3 di 3
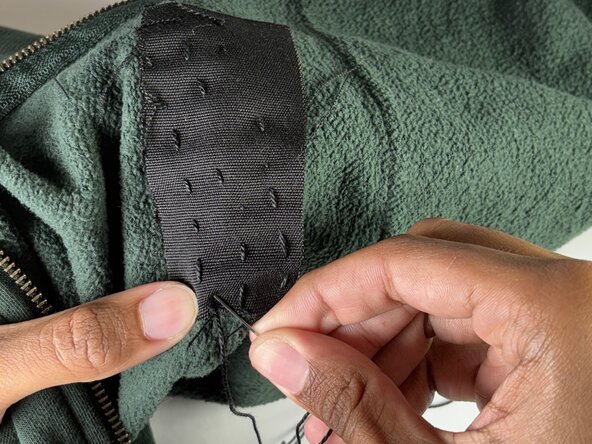
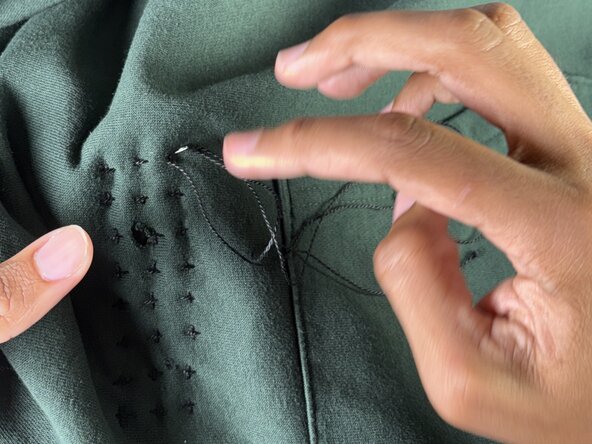
    • Start your horizontal stitch, going over the marks, and under the gaps.

  11. How to Mend a Tear Using Sashiko Stitching: passo 11, immagine 1 di 3 How to Mend a Tear Using Sashiko Stitching: passo 11, immagine 2 di 3 How to Mend a Tear Using Sashiko Stitching: passo 11, immagine 3 di 3
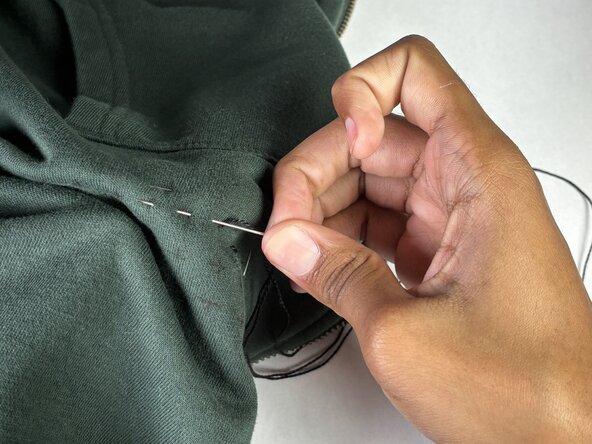
    • After a couple stitches, pull your needle and thread all the way through.

    • Smooth out your stitches to avoid bunching.

  12. How to Mend a Tear Using Sashiko Stitching: passo 12, immagine 1 di 3 How to Mend a Tear Using Sashiko Stitching: passo 12, immagine 2 di 3 How to Mend a Tear Using Sashiko Stitching: passo 12, immagine 3 di 3
    • Repeat steps 10 and 11 until you reach the end of the first row.

  13. How to Mend a Tear Using Sashiko Stitching: passo 13, immagine 1 di 3 How to Mend a Tear Using Sashiko Stitching: passo 13, immagine 2 di 3 How to Mend a Tear Using Sashiko Stitching: passo 13, immagine 3 di 3
    • On the last stitch of a row, stitch down to start the next row.

    • You may need to rotate the garment between rows to make stitching easier.

  14. How to Mend a Tear Using Sashiko Stitching: passo 14, immagine 1 di 3 How to Mend a Tear Using Sashiko Stitching: passo 14, immagine 2 di 3 How to Mend a Tear Using Sashiko Stitching: passo 14, immagine 3 di 3
    • Repeat steps 10 through 13 until all horizontal stitches are done.

    • On the last stitch, push the needle through to the inside of the garment.

  15. How to Mend a Tear Using Sashiko Stitching: passo 15, immagine 1 di 2 How to Mend a Tear Using Sashiko Stitching: passo 15, immagine 2 di 2
    • Remove the pins from the patch.

  16. How to Mend a Tear Using Sashiko Stitching: passo 16, immagine 1 di 3 How to Mend a Tear Using Sashiko Stitching: passo 16, immagine 2 di 3 How to Mend a Tear Using Sashiko Stitching: passo 16, immagine 3 di 3
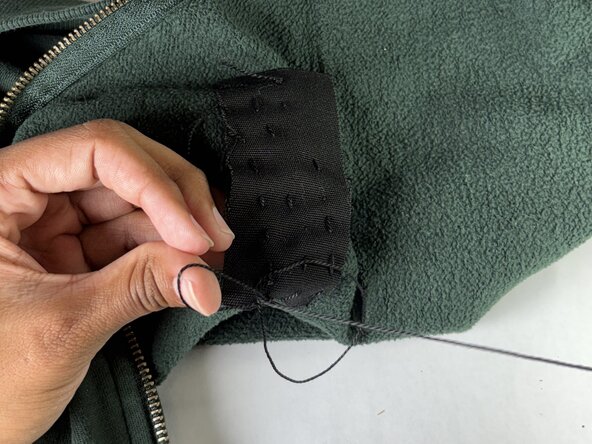
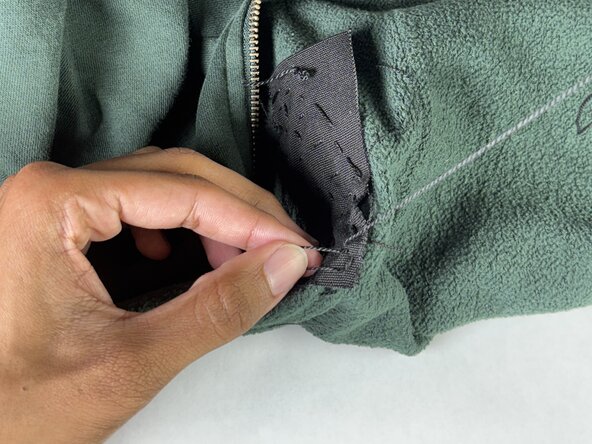
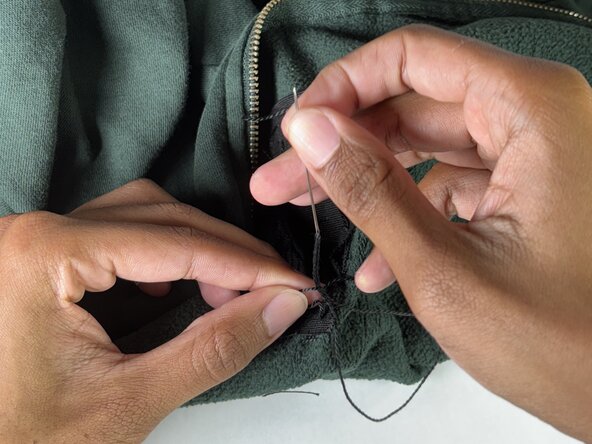
    • Make a small stitch through just the patch, right next to where the needle came through.

    • Pull the thread almost all the way through, leaving a small loop.

  17. How to Mend a Tear Using Sashiko Stitching: passo 17, immagine 1 di 2 How to Mend a Tear Using Sashiko Stitching: passo 17, immagine 2 di 2
    • Pull the needle through the loop twice.

  18. How to Mend a Tear Using Sashiko Stitching: passo 18, immagine 1 di 3 How to Mend a Tear Using Sashiko Stitching: passo 18, immagine 2 di 3 How to Mend a Tear Using Sashiko Stitching: passo 18, immagine 3 di 3
    • Pull the thread tight to knot off.

    • Trim any excess thread.

  19. How to Mend a Tear Using Sashiko Stitching: passo 19, immagine 1 di 3 How to Mend a Tear Using Sashiko Stitching: passo 19, immagine 2 di 3 How to Mend a Tear Using Sashiko Stitching: passo 19, immagine 3 di 3
    • Begin your vertical stitches, starting at the top right corner.

    • You may need to start a new thread; see Steps 6-8.

  20. How to Mend a Tear Using Sashiko Stitching: passo 20, immagine 1 di 3 How to Mend a Tear Using Sashiko Stitching: passo 20, immagine 2 di 3 How to Mend a Tear Using Sashiko Stitching: passo 20, immagine 3 di 3
    • Repeat Steps 10-13 along your vertical stitch marks.

  21. How to Mend a Tear Using Sashiko Stitching: passo 21, immagine 1 di 3 How to Mend a Tear Using Sashiko Stitching: passo 21, immagine 2 di 3 How to Mend a Tear Using Sashiko Stitching: passo 21, immagine 3 di 3
    • On your last stitch, push your needle through to the inside.

  22. How to Mend a Tear Using Sashiko Stitching: passo 22, immagine 1 di 2 How to Mend a Tear Using Sashiko Stitching: passo 22, immagine 2 di 2
    • Make a small stitch through just the patch, right next to where the needle came through.

    • Pull the thread almost all the way through, leaving a small loop.

  23. How to Mend a Tear Using Sashiko Stitching: passo 23, immagine 1 di 2 How to Mend a Tear Using Sashiko Stitching: passo 23, immagine 2 di 2
    • Pull the needle through the loop twice.

  24. How to Mend a Tear Using Sashiko Stitching: passo 24, immagine 1 di 2 How to Mend a Tear Using Sashiko Stitching: passo 24, immagine 2 di 2
    • Trim any excess thread.

Conclusione

You have now successfully mended your garment! Revisit this guide to mend other garments with any holes or tears.

TaShun Blanchard

Membro da: 02/19/25

349 Reputazione

1 Guida realizzata

Team

UC Davis, Team 3-5, Andersen Winter 2025 Membro di UC Davis, Team 3-5, Andersen Winter 2025

UCD-ANDERSEN-W25S3G5

3 Membri

1 Guida realizzata

0Commenti sulla guida

Aggiungi Commento

Visualizza Statistiche:

Ultime 24 Ore: 0

Ultimi 7 Giorni: 11

Ultimi 30 Giorni: 33

Tutti i Tempi: 84