Questa versione può contenere modifiche errate. Passa all'ultima istantanea verificata.
Cosa ti serve
-
Questo passaggio è privo di traduzione. Aiuta a tradurlo
-
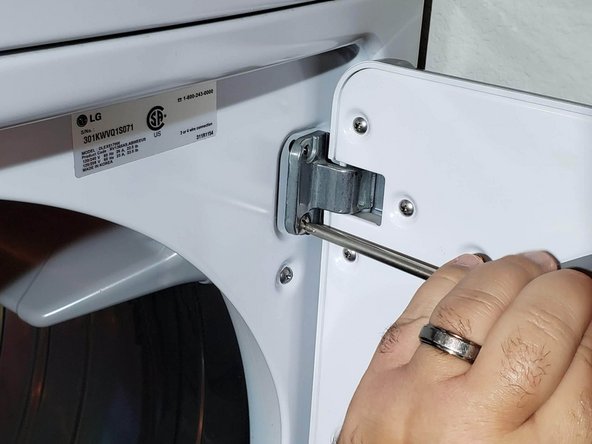
Remove the two 150 mm Phillips #2 screws from each of the two hinges on the inside of the door.
-
Remove the door.
-
-
Questo passaggio è privo di traduzione. Aiuta a tradurlo
-
Remove the sixteen 150 mm Phillips #2 screws from the door.
-
-
Questo passaggio è privo di traduzione. Aiuta a tradurlo
-
Gently pry open the inside panel of the door using a spudger or medium flathead screwdriver.
-
Remove the inside panel from the door.
-
-
-
Questo passaggio è privo di traduzione. Aiuta a tradurlo
-
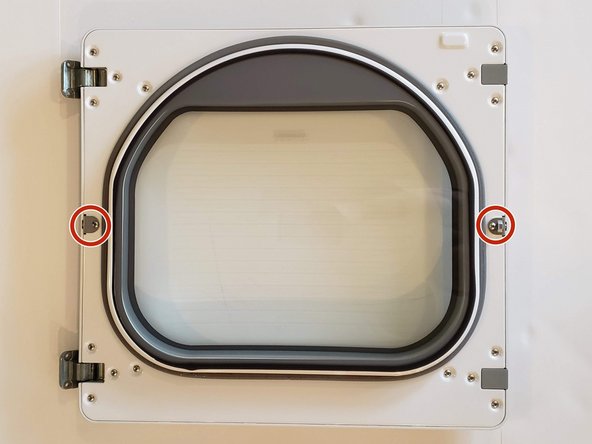
Remove the two 140 mm Phillips #2 screws from both the hook and the latch on the inside panel.
-
Swap the positions of the hook and the latch on the door.
-
Reattach the two screws to both the hook and the latch on the inside panel.
-
-
Questo passaggio è privo di traduzione. Aiuta a tradurlo
-
Remove the two Phillips #2 140mm screws from each of the two hinges.
-
Swap the positions of the two hinges and the two gray cover caps.
-
Reattach the two screws on each of the two hinges.
-
-
Questo passaggio è privo di traduzione. Aiuta a tradurlo
-
Remount the inside door panel to the door.
-
Reattach the sixteen 150 mm Phillips #2 screws to the door.
-
-
Questo passaggio è privo di traduzione. Aiuta a tradurlo
-
Remove the two plastic cover caps on the dryer front gently, using a spudger or medium flat-head screwdriver.
-
Reattach the two plastic cover caps on the opposite side of the dryer front.
-
-
Questo passaggio è privo di traduzione. Aiuta a tradurlo
-
Reattach the door to the dryer using two 150 mm Phillips #2 screws on each of the two hinges.
-
-
Questo passaggio è privo di traduzione. Aiuta a tradurlo
-
Test the alignment and door latch by opening and closing the door.
-


Annulla: non ho completato questa guida.
Altre 2 persone hanno completato questa guida.

Team

University of North Texas, Team 1-6, Martin Fall 2023 Membro di University of North Texas, Team 1-6, Martin Fall 2023
UNT-MARTIN-F23S1G6
1 Membro
3 Guide realizzate