Introduzione
Use this guide to fix the broken clicker in your Razer Naga Trinity gaming mouse.
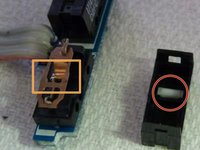
Each mouse has a fixed maximum number of clicks. When the mouse is used for a long time, the clicker of the mouse will have problems. At this time, you will need to manually disassemble the mouse for maintenance.
Make sure you do not use too much force; the parts inside the mouse are sometimes very easy to damage.
This guide is not only applicable to this model,—other mice can also be repaired with this guide, but the internal structure may be different.
Cosa ti serve
-
-
Remove the three pads from the bottom of the mouse.
-
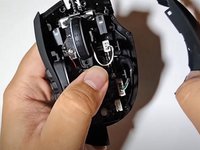
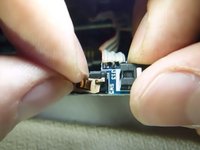
Remove the four screws beneath the pads using a JIS #1 screwdriver.
-
-


To reassemble your device, follow these instructions in reverse order.
Annulla: non ho completato questa guida.
Altre 4 persone hanno completato questa guida.
Team

York University, Team S-12, Woodhouse Winter 2022 Membro di York University, Team S-12, Woodhouse Winter 2022
YORK-WOODHOUSE-W22SSG12
1 Membro
4 Guide realizzate
1Commento della guida
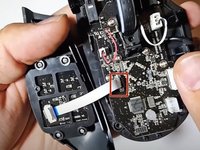
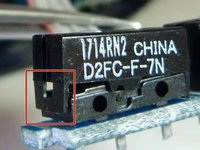
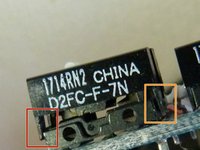
On the latest version of the mouse, the clicker button can no longer be opened...