Salta al contenuto principale
Unisciti alla Community delle riparazioni - Crea un account

How to Fix a Damaged VHS Tape

Cosa ti serve

  1. How to Fix a Damaged VHS Tape, How to Fix a Damaged VHS Tape: passo 1, immagine 1 di 3 How to Fix a Damaged VHS Tape, How to Fix a Damaged VHS Tape: passo 1, immagine 2 di 3 How to Fix a Damaged VHS Tape, How to Fix a Damaged VHS Tape: passo 1, immagine 3 di 3
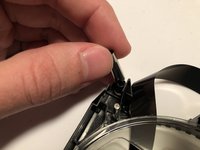
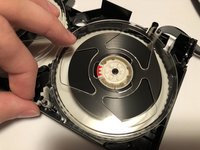
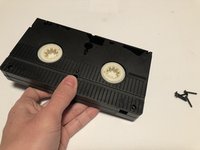
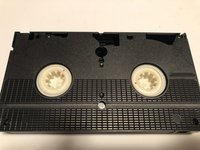
    • Remove the screws at the bottom of the VHS case using a Phillips #0 screwdriver.

    Chiedi a FixBot

    Aggiungi Commento

  2. How to Fix a Damaged VHS Tape: passo 2, immagine 1 di 2 How to Fix a Damaged VHS Tape: passo 2, immagine 2 di 2
    • Lift open the cover of the VHS.

    Chiedi a FixBot

    Aggiungi Commento

  3. How to Fix a Damaged VHS Tape: passo 3, immagine 1 di 2 How to Fix a Damaged VHS Tape: passo 3, immagine 2 di 2
    • Remove the top cover of the VHS case.

    Chiedi a FixBot

    Aggiungi Commento

  4. How to Fix a Damaged VHS Tape: passo 4, immagine 1 di 3 How to Fix a Damaged VHS Tape: passo 4, immagine 2 di 3 How to Fix a Damaged VHS Tape: passo 4, immagine 3 di 3
    • Replace any rollers that accidently fall out of the VHS case.

    Chiedi a FixBot

    Aggiungi Commento

  5. How to Fix a Damaged VHS Tape: passo 5, immagine 1 di 3 How to Fix a Damaged VHS Tape: passo 5, immagine 2 di 3 How to Fix a Damaged VHS Tape: passo 5, immagine 3 di 3
    • Unroll the video tape from each side of the VHS, running it through the rollers the correct way. Do this until you reach the damaged parts of the tape.

    Chiedi a FixBot

    Aggiungi Commento

  6. How to Fix a Damaged VHS Tape: passo 6, immagine 1 di 3 How to Fix a Damaged VHS Tape: passo 6, immagine 2 di 3 How to Fix a Damaged VHS Tape: passo 6, immagine 3 di 3
    • Cut out the wrinkled and damaged parts of the VHS tape using scissors.

    Chiedi a FixBot

    Aggiungi Commento

  7. How to Fix a Damaged VHS Tape: passo 7, immagine 1 di 1
    • Hold the undamaged parts of the tape over each other as evenly as possible.

    Chiedi a FixBot

    Aggiungi Commento

  8. How to Fix a Damaged VHS Tape: passo 8, immagine 1 di 2 How to Fix a Damaged VHS Tape: passo 8, immagine 2 di 2
    • Cut the overlapping portion of the tape at an angle.

    Chiedi a FixBot

    Aggiungi Commento

  9. How to Fix a Damaged VHS Tape: passo 9, immagine 1 di 2 How to Fix a Damaged VHS Tape: passo 9, immagine 2 di 2
    • Apply scotch tape to the dull side of the two matching halves of the VHS tape.

    • Potential for device damage: Do not wrap the scotch tape around the other side of the VHS tape.

    Chiedi a FixBot

    Aggiungi Commento

  10. How to Fix a Damaged VHS Tape: passo 10, immagine 1 di 3 How to Fix a Damaged VHS Tape: passo 10, immagine 2 di 3 How to Fix a Damaged VHS Tape: passo 10, immagine 3 di 3
    • Cut excess scotch tape to match the size of the VHS tape as precisely as possible.

    Chiedi a FixBot

    Aggiungi Commento

  11. How to Fix a Damaged VHS Tape: passo 11, immagine 1 di 3 How to Fix a Damaged VHS Tape: passo 11, immagine 2 di 3 How to Fix a Damaged VHS Tape: passo 11, immagine 3 di 3
    • Wind the loose VHS tape back into the case.

    Chiedi a FixBot

    Aggiungi Commento

  12. How to Fix a Damaged VHS Tape: passo 12, immagine 1 di 3 How to Fix a Damaged VHS Tape: passo 12, immagine 2 di 3 How to Fix a Damaged VHS Tape: passo 12, immagine 3 di 3
    • Replace the cover back on top of the VHS case.

    Chiedi a FixBot

    Aggiungi Commento

  13. How to Fix a Damaged VHS Tape: passo 13, immagine 1 di 3 How to Fix a Damaged VHS Tape: passo 13, immagine 2 di 3 How to Fix a Damaged VHS Tape: passo 13, immagine 3 di 3
    • Reinsert the screws through the bottom of the VHS tape.

    Chiedi a FixBot

    Aggiungi Commento

Linea Traguardo

Annulla: non ho completato questa guida.

Altre 2 persone hanno completato questa guida.

Team

4Commenti sulla guida

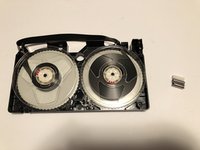
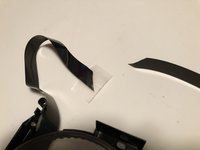
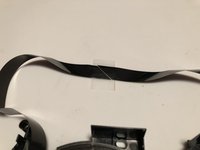
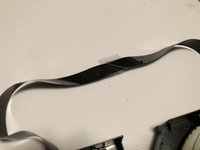
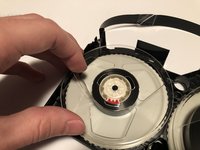
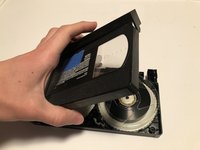
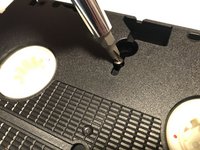
Na het monteren van de tape, en voor het sluiten van de cassette hield ik nog een klein zwart onderdeeltje over en kan het niet meer herplaatsen, deel omdat de behuizing nagenoeg zwart is, en ook omdat ik niets wil forceren. Zou een tip om de plaats van dit onderdeel te vinden enorm op prijs stellen.

Jan - Rispondi Condividi

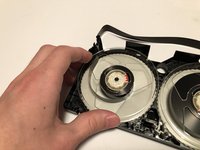
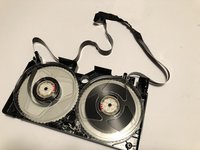
Inmiddels van iemand een VHS band geleend, opengemaakt en vastgesteld waar het blokje past, bij de afbeelding 4 en 5 is dat helaas slecht te zien, maar het blokje past in een kleine ruimte tussen de twee spoelen. Het zou mooi zijn, als je plaatjes kon toevoegen, maar goed probleem opgelost, en nu opnieuw met de videograbber aan de slag, wat leveren de Kabelshop en NEDIS een slecht service, door steeds verwijzen dat het aan de kabel ligt, de videospeler, of de aansluiting met de Windows PC, feitelijk stijllloos.

Jan - Rispondi Condividi

Zou een tip om de plaats van dit onderdeel te vinden enorm op prijs stellen.

domz - Rispondi Condividi

I'm unsure which side is the dull or shiny side in step 9, they both look shiny to me. Maybe clarify whether the tape is on the inside or outside of the loop?

journaljemmy - Rispondi Condividi

Aggiungi Commento

Visualizza statistiche:

Ultime 24 ore: 2

Ultimi 7 giorni: 36

Ultimi 30 giorni: 243

Tutti i Tempi: 13,454