Salta al contenuto principale

How to Change Mortise Lock and its Cylinder

Cosa ti serve

  1. How to Change Mortise Lock and its Cylinder, Mortise Lock and Cylinder: passo 1, immagine 1 di 3 How to Change Mortise Lock and its Cylinder, Mortise Lock and Cylinder: passo 1, immagine 2 di 3 How to Change Mortise Lock and its Cylinder, Mortise Lock and Cylinder: passo 1, immagine 3 di 3
    • Determine the position of the screws on both door handles and the front plate.

  2. How to Change Mortise Lock and its Cylinder: passo 2, immagine 1 di 2 How to Change Mortise Lock and its Cylinder: passo 2, immagine 2 di 2
    • Use a flathead screwdriver to remove the eight 6 mm screws on both handles.

  3. How to Change Mortise Lock and its Cylinder: passo 3, immagine 1 di 3 How to Change Mortise Lock and its Cylinder: passo 3, immagine 2 di 3 How to Change Mortise Lock and its Cylinder: passo 3, immagine 3 di 3
    • Pull out the door handles on both sides of the door.

  4. How to Change Mortise Lock and its Cylinder: passo 4, immagine 1 di 3 How to Change Mortise Lock and its Cylinder: passo 4, immagine 2 di 3 How to Change Mortise Lock and its Cylinder: passo 4, immagine 3 di 3
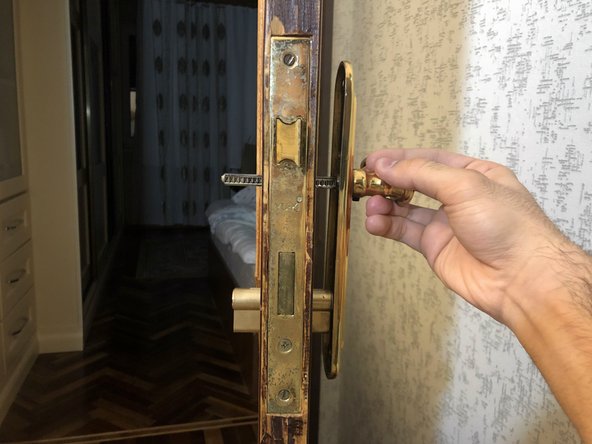
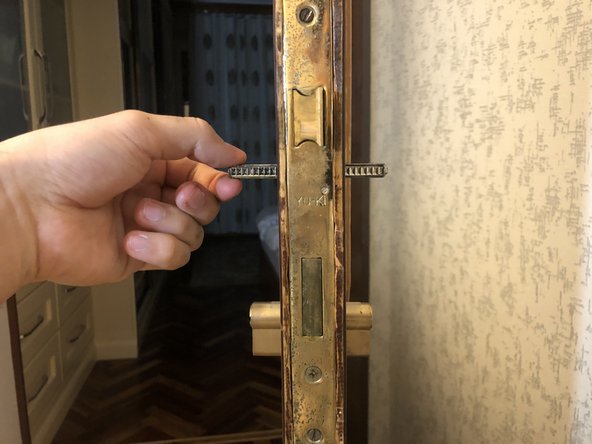
    • Pull out the spindle (the rectangular piece of metal) from the door.

  5. How to Change Mortise Lock and its Cylinder: passo 5, immagine 1 di 3 How to Change Mortise Lock and its Cylinder: passo 5, immagine 2 di 3 How to Change Mortise Lock and its Cylinder: passo 5, immagine 3 di 3
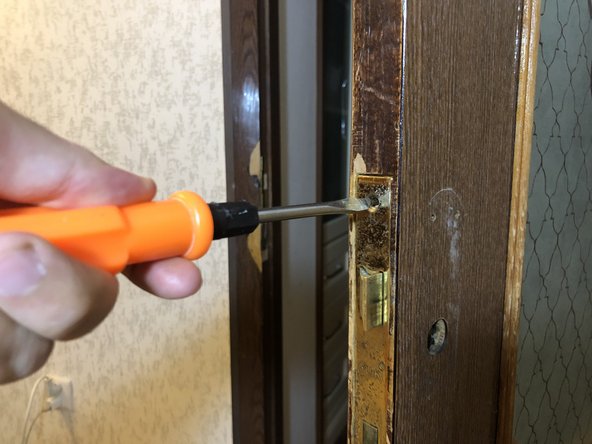
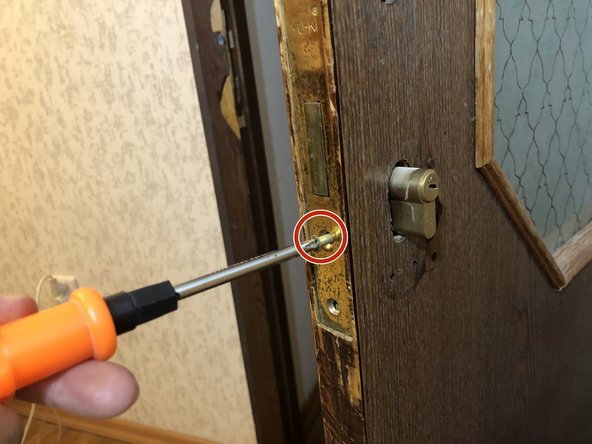
    • Loosen the two 6 mm flathead screws at the top and bottom of the lock using a flathead screwdriver.

    • Remove the third 6 mm Phillips screw in the middle using a Phillips #1 screwdriver.

  6. How to Change Mortise Lock and its Cylinder: passo 6, immagine 1 di 2 How to Change Mortise Lock and its Cylinder: passo 6, immagine 2 di 2
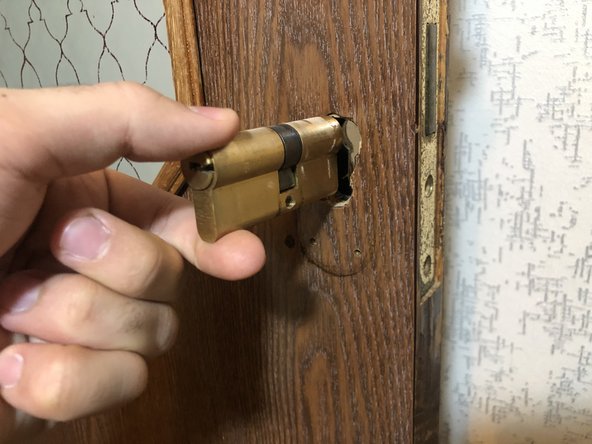
    • Pull the lock cylinder out to either side of the door.

  7. How to Change Mortise Lock and its Cylinder: passo 7, immagine 1 di 3 How to Change Mortise Lock and its Cylinder: passo 7, immagine 2 di 3 How to Change Mortise Lock and its Cylinder: passo 7, immagine 3 di 3
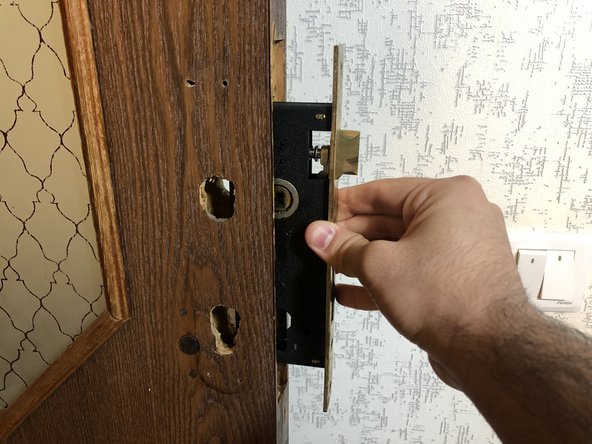
    • Grasp the mortise lock on either side and pull it out from the edge of the door.

Conclusione

To reassemble your device, follow these instructions in reverse order.

Un'altra persona ha completato questa guida.

0 Commenti

Aggiungi Commento

Visualizza Statistiche:

Ultime 24 Ore: 2

Ultimi 7 Giorni: 24

Ultimi 30 Giorni: 75

Tutti i Tempi: 1,806