Questa guida ha delle modifiche più recenti. Passa all'ultima versione non verificata.
Introduzione
This fix will help individuals fix the dents on their cars easily from home. The hardest part of this Fix is in fact our first step. When cutting a hole at the bottom of the pot and/or bucket you decide to use one must be both careful and patient, since we're cutting a hole in something. Having a helping hand in the process of taping the bucket to your car can also be very helpful, but not needed. Aside from that it isn't a fix that is too complicated for anyone to try!
Cosa ti serve
-
-
Be sure that the bucket or pot is big enough to fit the vacuum that will be used for this procedure
-
-
-
Insert the vacuum into the hole at the bottom of the bucket to be sure it fits
-
If the hole is too small and the vacuum cannot fit within the hole, go back to step one and attempt to enlarge the hole
-
If the hole appears to be too large, one may want to consider going back to step one with a new bucket
-
-
-
-
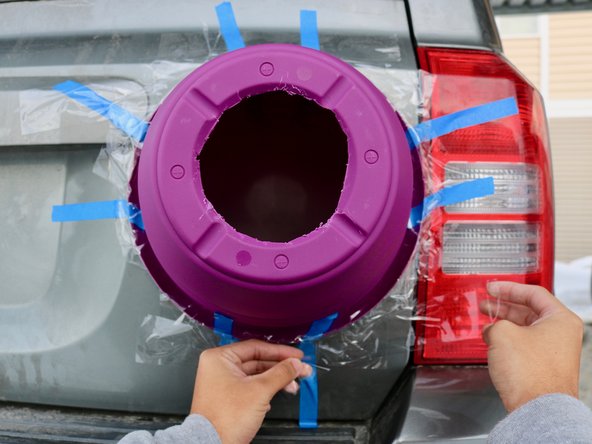
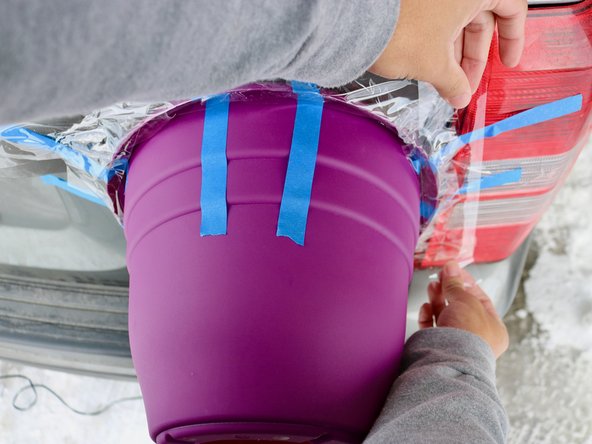
Place the bucket over the dent that needs to be fixed
-
Start by lightly taping down the bucket with painters tape - this allows the bucket to be held up and allow the rest of the tapping easier to do
-
Go over the edges of the bucket with duct tape until you are sure that it is airtight onto the car
-


Annulla: non ho completato questa guida.
Altre 3 persone hanno completato questa guida.

Team

Eastern Washington University, Team S27-G13, Munoz Winter 2019 Membro di Eastern Washington University, Team S27-G13, Munoz Winter 2019
EWU-MUNOZ-W19S27G13
1 Membro
1 Guida realizzata