Salta al contenuto principale
How To Fix A Frayed Buttonhole

How To Fix A Frayed Buttonhole

Adina Asif

Adina Asif e un altro collaboratore

Ultimo aggiornamento il May 24, 2021

10 - 20 minuti
Facile

Introduzione

Vai al passo 1

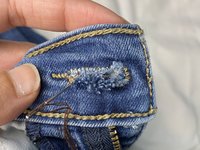
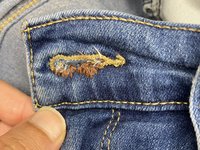
A buttonhole is basically an opening in the fabric which the button can slip through. With excessive use the fabric will wear and fray, destroying the buttonhole. Even non-fraying fabrics like felt will stretch and show wear with a lot of use. Binding the fabric edge protects the fabric and creates a strong opening for the button to pass through again and again.

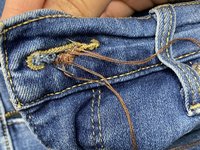
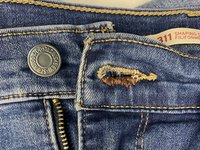
Frayed buttonholes are caused by excessive use of washing or resulting in the fabric wearing out or getting tattered. This also leads to the buttons popping out at the slightest provocation. Follow this guide to repair the buttonhole of your denim or other clothing item.

  1. How To Fix A Frayed Buttonhole, How To Fix A Frayed Buttonhole: passo 1, immagine 1 di 3 How To Fix A Frayed Buttonhole, How To Fix A Frayed Buttonhole: passo 1, immagine 2 di 3 How To Fix A Frayed Buttonhole, How To Fix A Frayed Buttonhole: passo 1, immagine 3 di 3
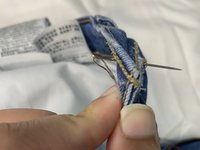
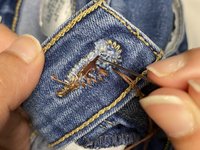
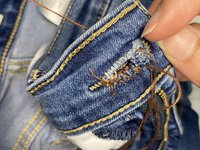
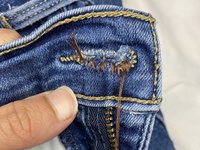
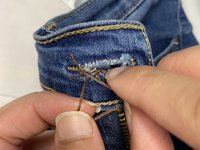
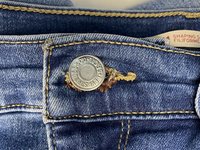
    • With a seam ripper, carefully remove all the threads from the frayed buttonhole.

  2. How To Fix A Frayed Buttonhole: passo 2, immagine 1 di 1
    • Find a thread that closely matches the thread on the pants.

  3. How To Fix A Frayed Buttonhole: passo 3, immagine 1 di 3 How To Fix A Frayed Buttonhole: passo 3, immagine 2 di 3 How To Fix A Frayed Buttonhole: passo 3, immagine 3 di 3
    • Holding the fabric right-side up with the buttonhole horizontal, begin stitching at the edge.

    • Start from the inner side.

    • Be cautious of your hand placement when pushing the needle through the fabric.

  4. How To Fix A Frayed Buttonhole: passo 4, immagine 1 di 3 How To Fix A Frayed Buttonhole: passo 4, immagine 2 di 3 How To Fix A Frayed Buttonhole: passo 4, immagine 3 di 3
    • The needle should be on the front side.

    • Put the needle in between the layers of fabric and pull it through towards the inner side, securing the fabrics together.

  5. How To Fix A Frayed Buttonhole: passo 5, immagine 1 di 3 How To Fix A Frayed Buttonhole: passo 5, immagine 2 di 3 How To Fix A Frayed Buttonhole: passo 5, immagine 3 di 3
    • The needle is on the inner side.

    • Pull the needle through the buttonhole towards the other side.

    • Do not put the needle through the fabric.

  6. How To Fix A Frayed Buttonhole: passo 6, immagine 1 di 2 How To Fix A Frayed Buttonhole: passo 6, immagine 2 di 2
    • Continue making buttonhole stitches along the side of the buttonhole.

    • Keep the stitches close together.

  7. How To Fix A Frayed Buttonhole: passo 7, immagine 1 di 3 How To Fix A Frayed Buttonhole: passo 7, immagine 2 di 3 How To Fix A Frayed Buttonhole: passo 7, immagine 3 di 3
    • On the back side, tie a knot to seal the thread.

  8. How To Fix A Frayed Buttonhole: passo 8, immagine 1 di 2 How To Fix A Frayed Buttonhole: passo 8, immagine 2 di 2
    • After sealing the knot, the button should fit into the buttonhole.

Conclusione

This guide should be easy to anybody with sewing experience, and if you don’t have sewing experience, then this guide should be a good beginners guide on how to get familiar with sewing.


Altre 4 persone hanno completato questa guida.

0Commenti sulla guida

Aggiungi Commento

Visualizza Statistiche:

Ultime 24 Ore: 6

Ultimi 7 Giorni: 25

Ultimi 30 Giorni: 138

Tutti i Tempi: 9,029