Salta al contenuto principale

Hover-1 Ultra Power Button Replacement

Cosa ti serve

  1. Hover-1 Ultra Power Button Replacement, Power Button: passo 1, immagine 1 di 3 Hover-1 Ultra Power Button Replacement, Power Button: passo 1, immagine 2 di 3 Hover-1 Ultra Power Button Replacement, Power Button: passo 1, immagine 3 di 3
    • Orient the hoverboard so that the pads are facing down.

    • With the Phillips #1 screwdriver, remove all 18 of the screws on the underside of the hoverboard.

    • Carefully remove the shell, lifting directly up.

  2. Hover-1 Ultra Power Button Replacement: passo 2, immagine 1 di 1
    • Unscrew the power button using your hands or an adjustable crescent wrench.

    • Turn the power button counter-clockwise to release from the shell.

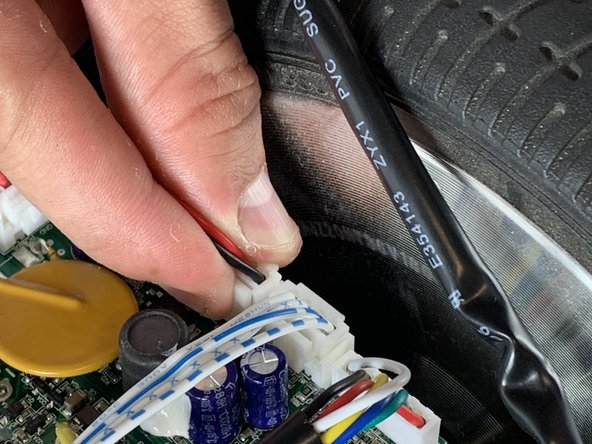
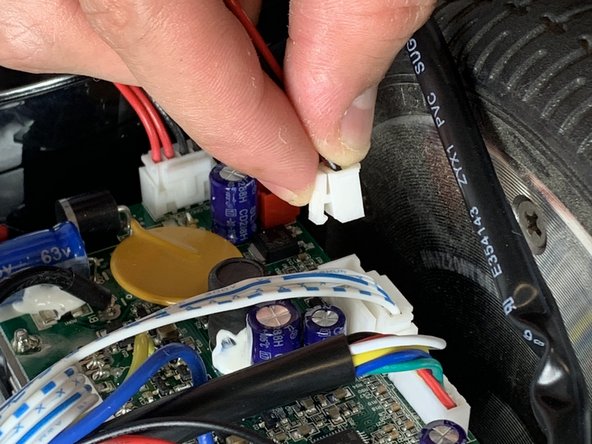
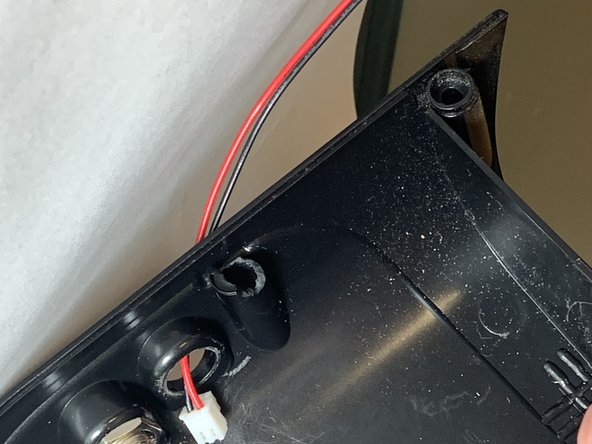
  3. Hover-1 Ultra Power Button Replacement: passo 3, immagine 1 di 3 Hover-1 Ultra Power Button Replacement: passo 3, immagine 2 di 3 Hover-1 Ultra Power Button Replacement: passo 3, immagine 3 di 3
    • Unclip the red and black power cables that are attached to the port from the motherboard.

  4. Hover-1 Ultra Power Button Replacement: passo 4, immagine 1 di 2 Hover-1 Ultra Power Button Replacement: passo 4, immagine 2 di 2
    • Remove the power button from the hoverboard assembly.

Conclusione

To reassemble your device, follow the instructions for step 1 in reverse order.

Un'altra persona ha completato questa guida.

Team

UC Davis, Team S7-G5, Lore Fall 2018 Membro di UC Davis, Team S7-G5, Lore Fall 2018

UCD-LORE-F18S7G5

3 Membri

3 Guide realizzate

0 Commenti

Aggiungi Commento

Visualizza Statistiche:

Ultime 24 Ore: 2

Ultimi 7 Giorni: 2

Ultimi 30 Giorni: 6

Tutti i Tempi: 519